17 Garden Layout Ideas That Improve Drainage Naturally
Garden layout ideas that improve drainage naturally can completely change how your garden performs.
Have you ever noticed water pooling in certain areas while other parts dry out too quickly?
This guide explains how to design a layout that manages water properly and helps plants grow more consistently.
Why Drainage Matters More Than Most Gardeners Realize
Many gardening problems that appear unrelated are often connected to poor drainage. Slow growth, root issues, and uneven plant performance frequently come from how water moves through the soil rather than how often plants are watered.
When water remains in one place for too long, roots struggle to access oxygen. At the same time, areas that drain too quickly may leave plants without enough moisture to sustain steady growth.
A well-designed layout balances water retention and drainage so that moisture remains available without becoming stagnant. This balance supports both root health and long-term plant stability.
How Water Actually Moves Through a Garden
Water does not spread evenly across a garden.
Gravity pulls water downward, while soil structure determines how quickly it moves. Compact soil slows drainage, while loose soil allows water to pass through more easily.
The shape of the ground also affects water flow. Slight slopes, dips, and raised areas influence where water collects and where it drains away.
Understanding this movement is essential because layout decisions should guide water rather than fight against it.
Signs Your Garden Layout Has Drainage Problems
Before improving drainage, it is important to recognize the signs of imbalance.
Water pooling after rain or watering indicates that the soil cannot absorb or redirect moisture effectively. Plants in these areas may show slow growth or root-related issues.
On the other hand, areas that dry out too quickly may indicate that water is moving away too fast, leaving roots without consistent moisture.
Uneven plant growth across the garden is often a clear sign that water distribution is not balanced.
Garden Layout Ideas That Improve Drainage Naturally
1. Raised Bed Layout for Controlled Drainage
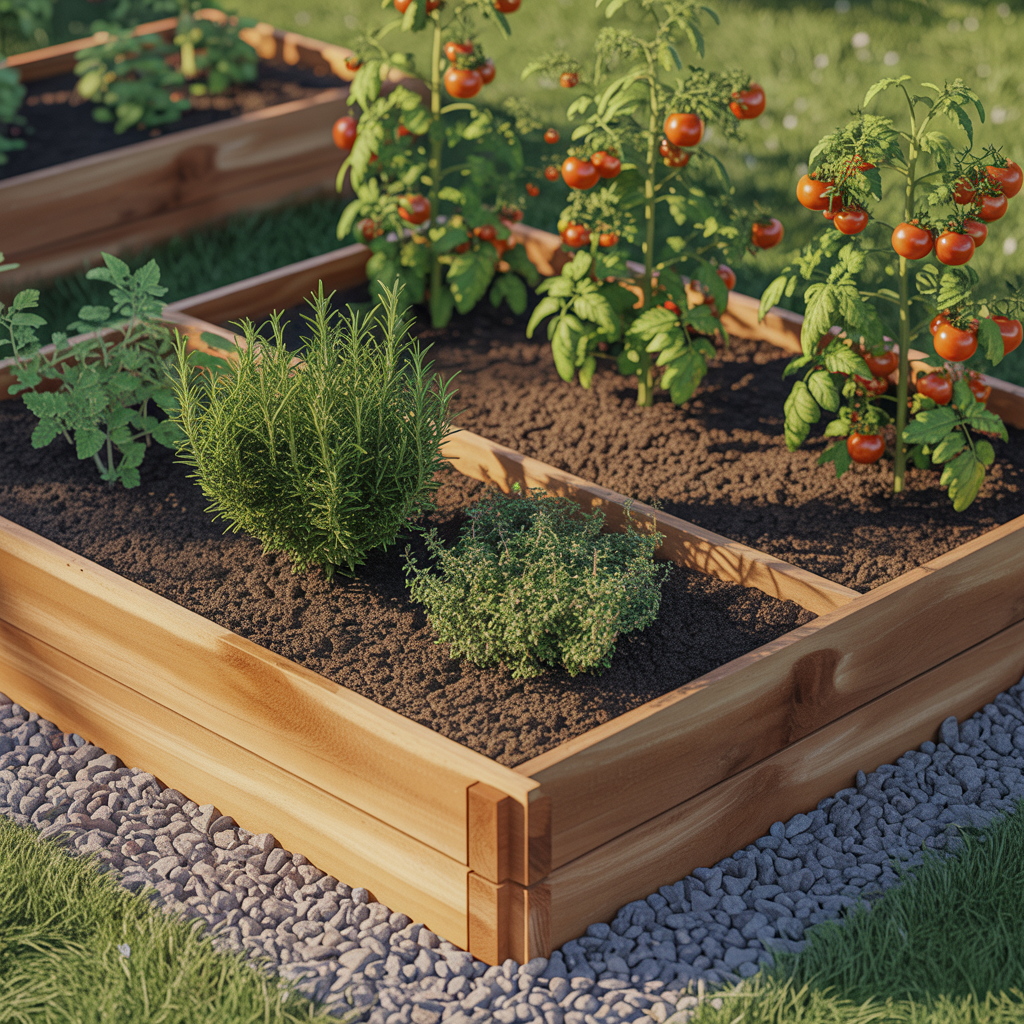
A raised bed layout lifts the planting area above ground level, which allows excess water to move downward instead of collecting around roots. This creates a controlled environment where soil structure and drainage can be adjusted easily.
To set this up, start by building a raised frame using wood, bricks, or stone. Fill the base with coarse material such as gravel or small rocks, then layer a well-draining soil mix on top. The height does not need to be extreme, even 20–30 cm can significantly improve drainage.
This layout works best in gardens with heavy clay soil or areas that remain wet after rain. It also helps prevent root diseases caused by waterlogging.
Plants that thrive in raised beds include herbs like rosemary and thyme, vegetables such as tomatoes and peppers, and most flowering plants that prefer well-drained soil.
2. Gentle Slope Layout to Guide Water Flow
A sloped layout uses the natural movement of water to prevent pooling.
Instead of keeping the garden flat, the surface is slightly angled so that water flows away from planting zones and into designated drainage areas. Even a subtle slope can redirect water effectively.
To create this, gradually raise one side of the garden and allow the other side to sit slightly lower. The slope should be gentle enough to avoid erosion but noticeable enough to guide water.
This layout is ideal for areas where water collects in one spot after rainfall. It works especially well in larger gardens where natural grading is possible.
Plants that prefer drier conditions, such as lavender, sage, and ornamental grasses, perform well in the higher sections, while moisture-tolerant plants can be placed lower.
3. Gravel Pathway Layout for Water Distribution
Gravel pathways do more than create walking space. They act as natural drainage channels that help water move through the garden.
Instead of using solid surfaces, gravel allows water to pass through and spread into surrounding soil. This reduces runoff and prevents water from concentrating in one area.
To build this layout, create pathways between planting zones using gravel or crushed stone. You can place a permeable layer underneath to keep the structure stable while allowing water to flow.
This approach works well in gardens where foot traffic compacts the soil, as it protects planting areas and improves overall drainage.
It pairs well with most plant types, especially when combined with raised or slightly elevated planting areas.
4. Layered Soil Zones for Balanced Moisture Control
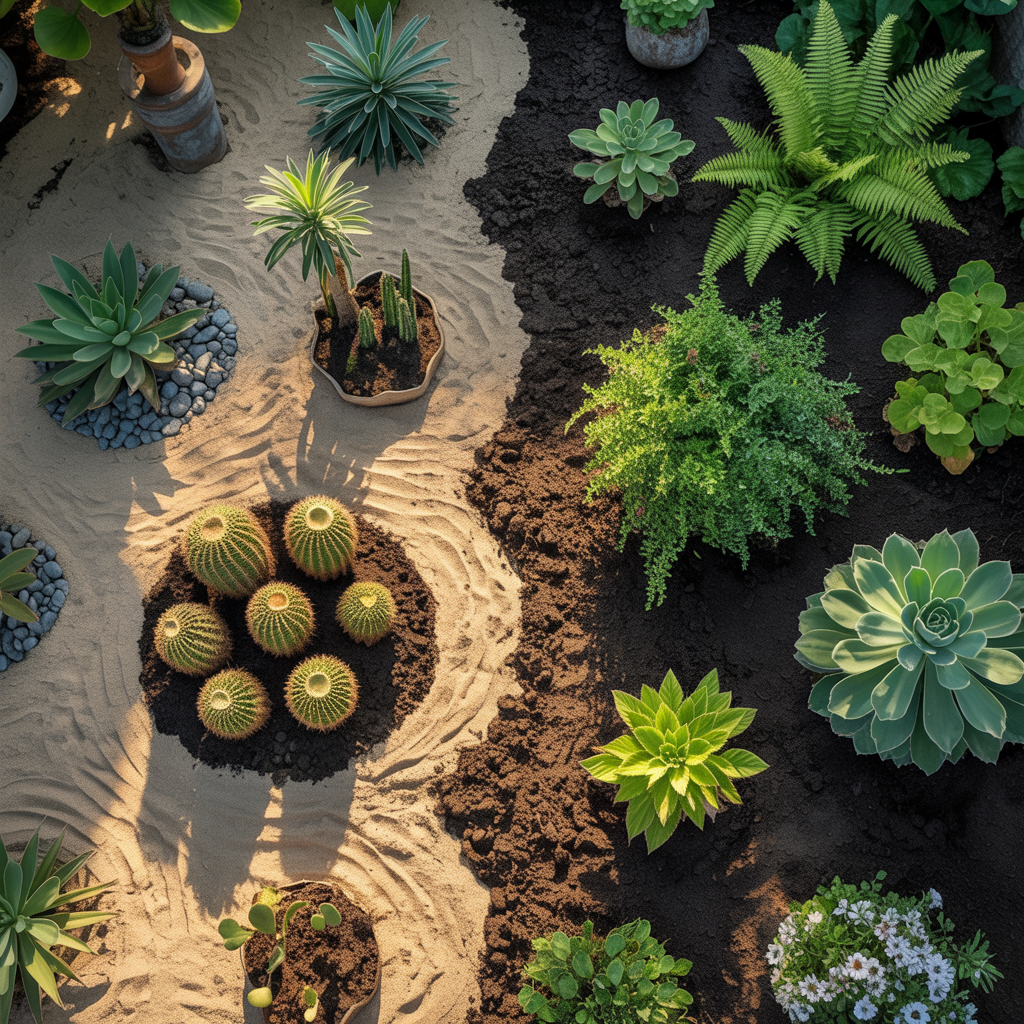
A layered layout uses different soil compositions across the garden to control how water behaves in each area.
Instead of treating the entire garden the same, some zones are designed to retain more moisture, while others are optimized for fast drainage. This creates a more balanced system.
You should mix sand or perlite into soil in areas prone to water buildup. In drier areas, add organic matter such as compost to improve moisture retention.
This layout is particularly useful in mixed gardens where different plants have different water needs.
For example, leafy greens and moisture-loving plants can be placed in richer, water-retentive zones, while succulents and drought-tolerant plants are placed in faster-draining sections.
5. Sunken Bed Layout for Controlled Water Retention
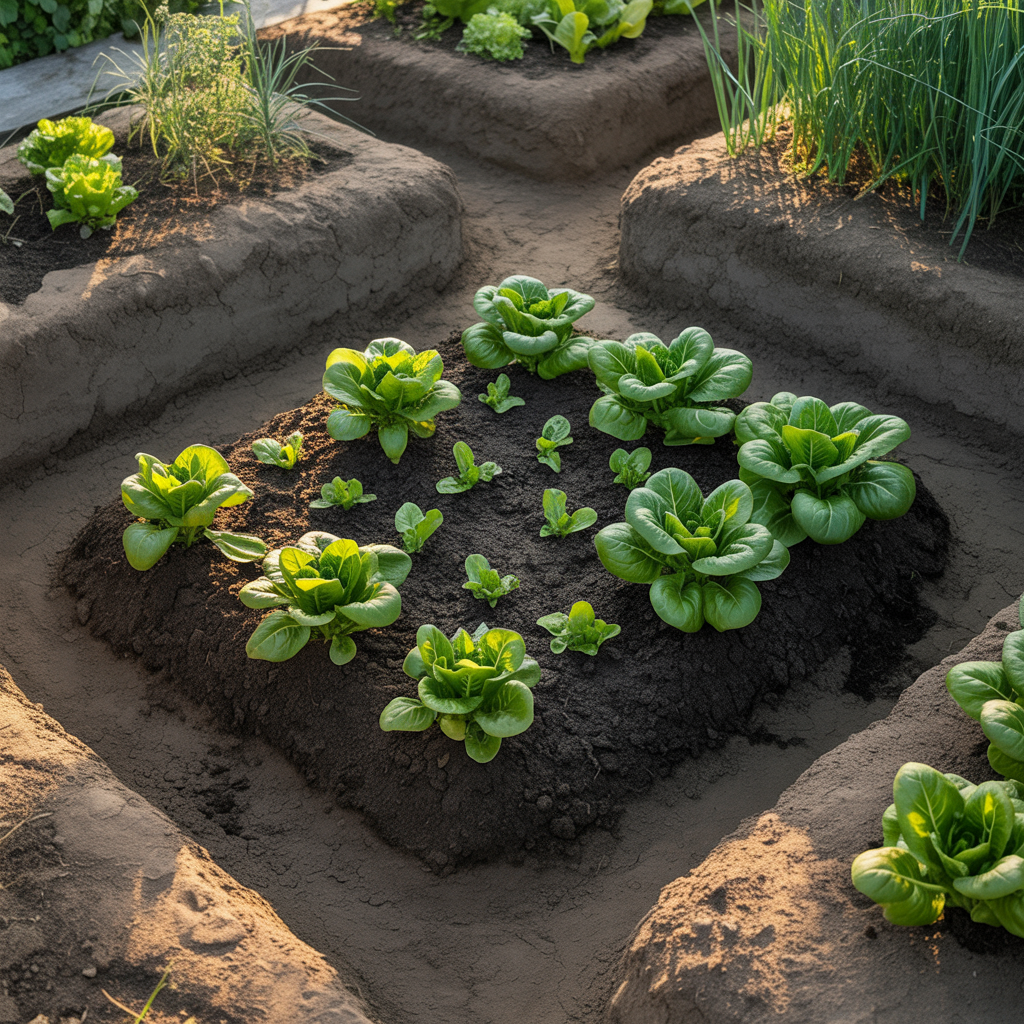
Unlike raised beds, sunken beds are slightly lower than the surrounding ground. They are designed to collect and hold water in a controlled way.
This layout is especially useful in dry climates or gardens where water drains too quickly. Instead of losing moisture, the garden retains it where plants need it most.
To create a sunken bed, dig a shallow planting area and improve the soil with organic material. Ensure the base still drains slowly rather than becoming compacted.
This setup works well for vegetables such as lettuce, spinach, and other crops that benefit from consistent moisture.
However, it should be avoided in areas with heavy rainfall or poor natural drainage.
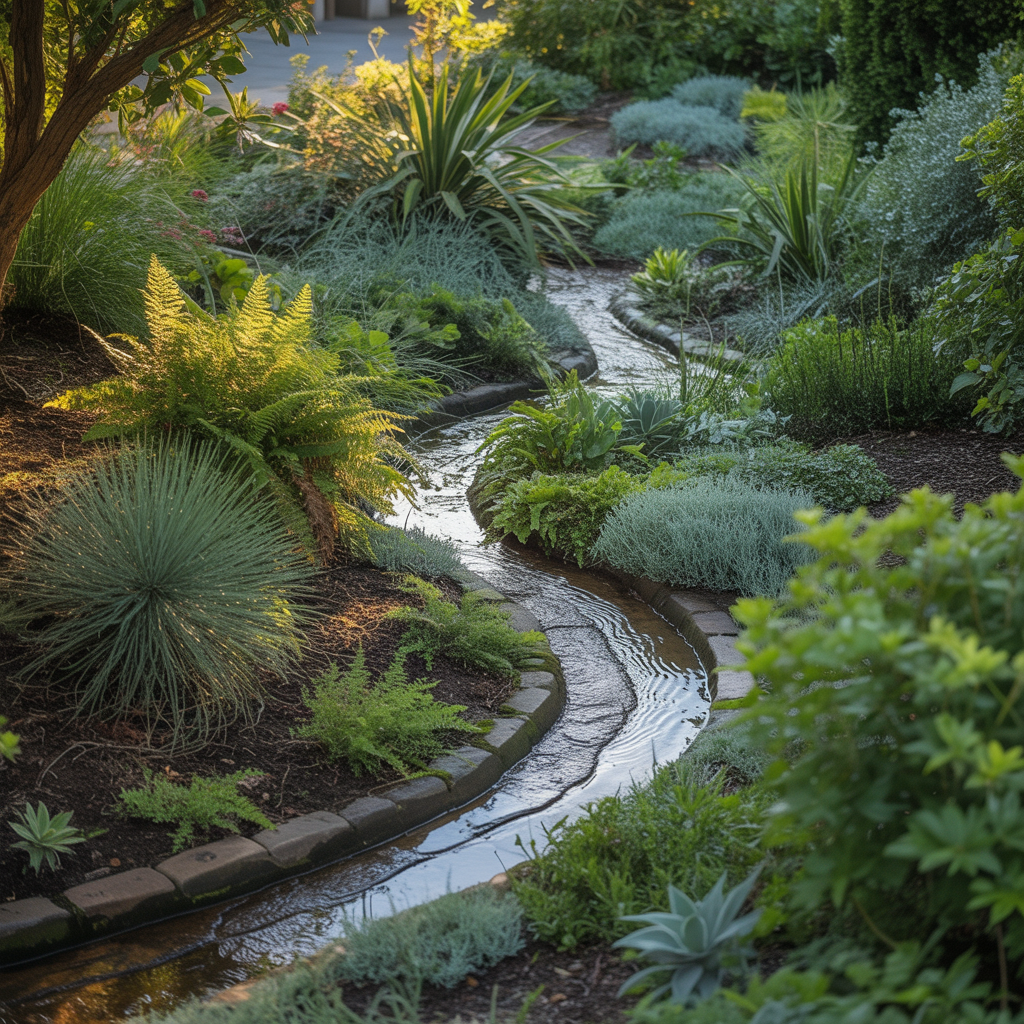
6. French Drain-Inspired Layout for Problem Areas
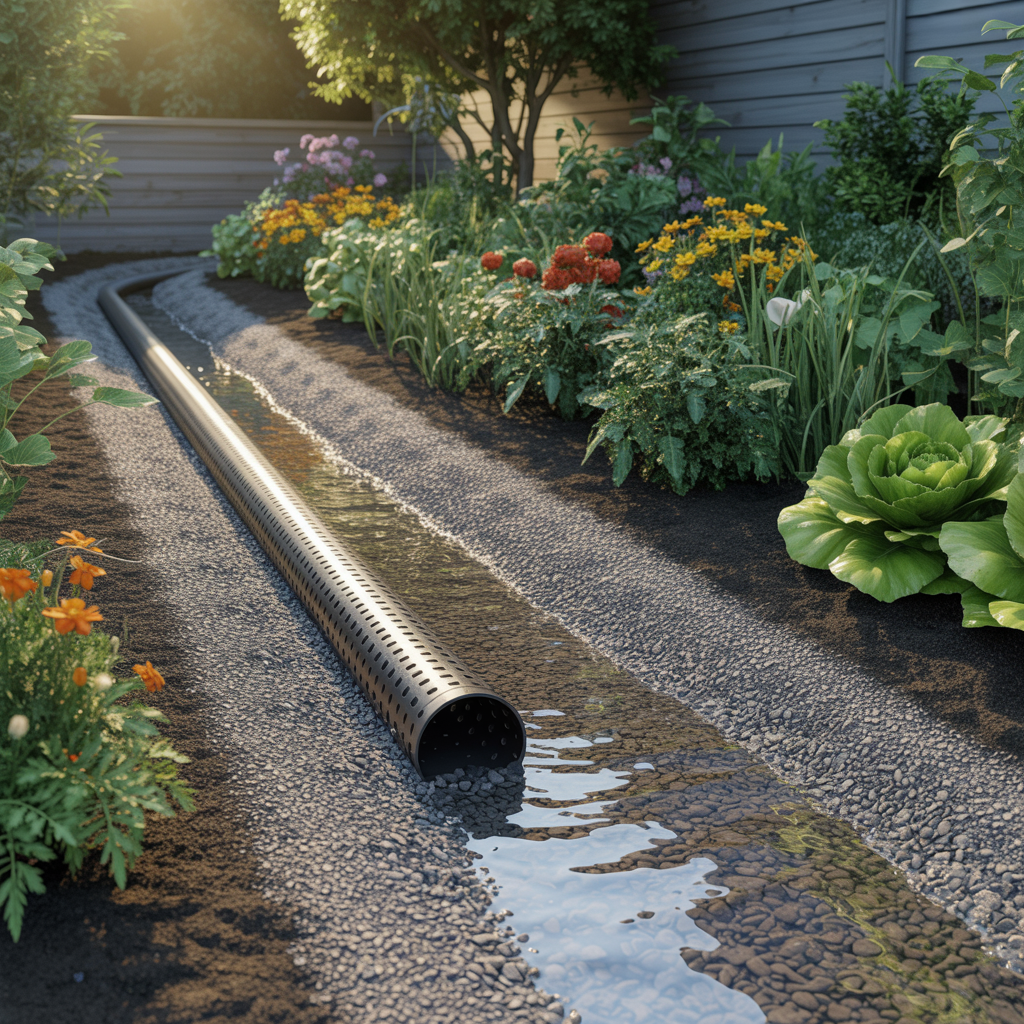
A French drain layout is designed to redirect excess water away from sensitive planting areas.
It uses a trench filled with gravel or stones to capture and guide water toward a safer drainage point. This prevents water from accumulating around roots.
To build this, dig a shallow trench in areas where water tends to collect. You can fill it with gravel and, if needed, add a perforated pipe to improve flow.
This layout is ideal for gardens with persistent drainage issues or uneven ground.
It allows you to protect plant roots without changing the entire garden structure.
7. Strategic Plant Zoning Based on Water Needs
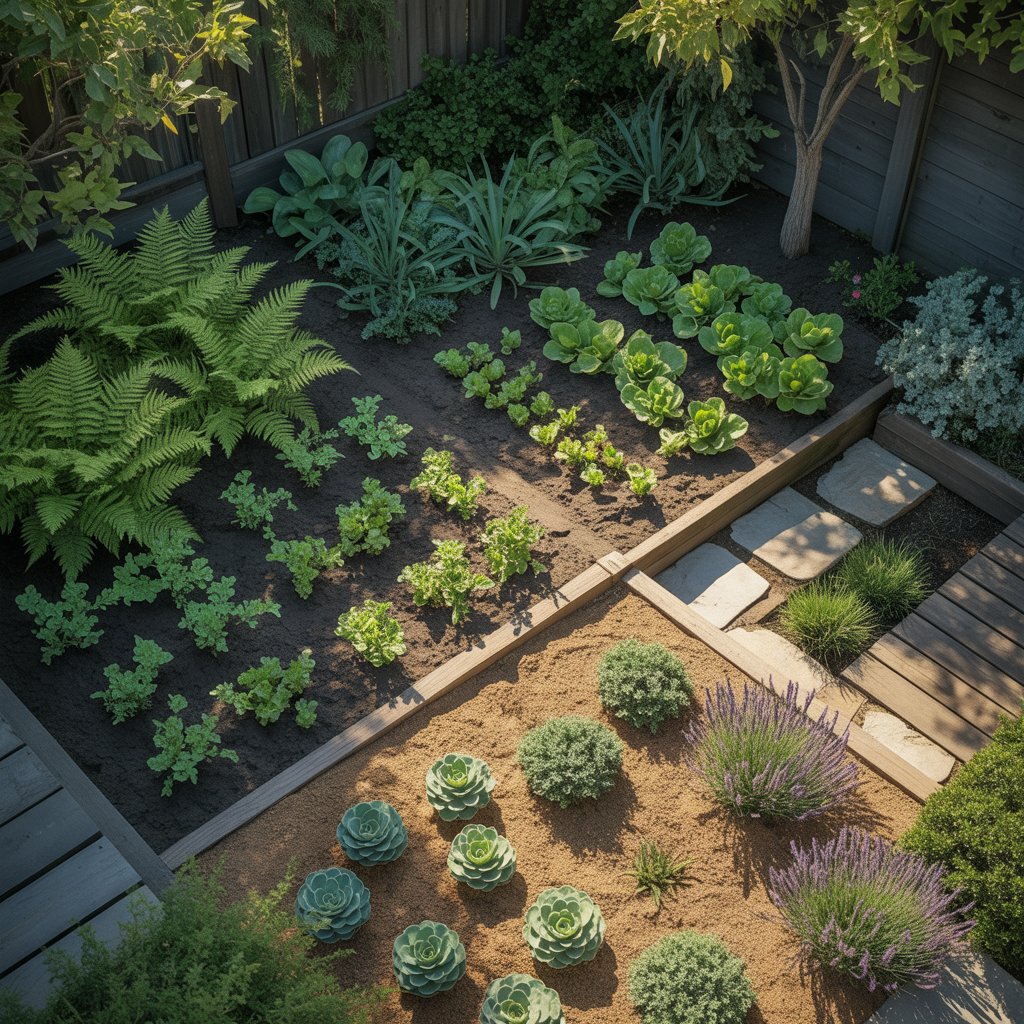
Instead of forcing all plants into the same conditions, this layout works with natural water distribution.
Plants are grouped based on how much moisture they require. Areas that retain water are used for moisture-tolerant plants, while drier areas are used for plants that prefer well-drained soil.
To apply this, observe how water behaves in your garden after rain. Identify wet and dry zones, then match plant types accordingly.
Moisture-tolerant plants include ferns, hostas, and certain vegetables, while drought-tolerant plants include lavender, succulents, and Mediterranean herbs.
This approach reduces stress on plants and minimizes the need for constant adjustments.
8. Mulch Zoning Layout for Moisture Regulation
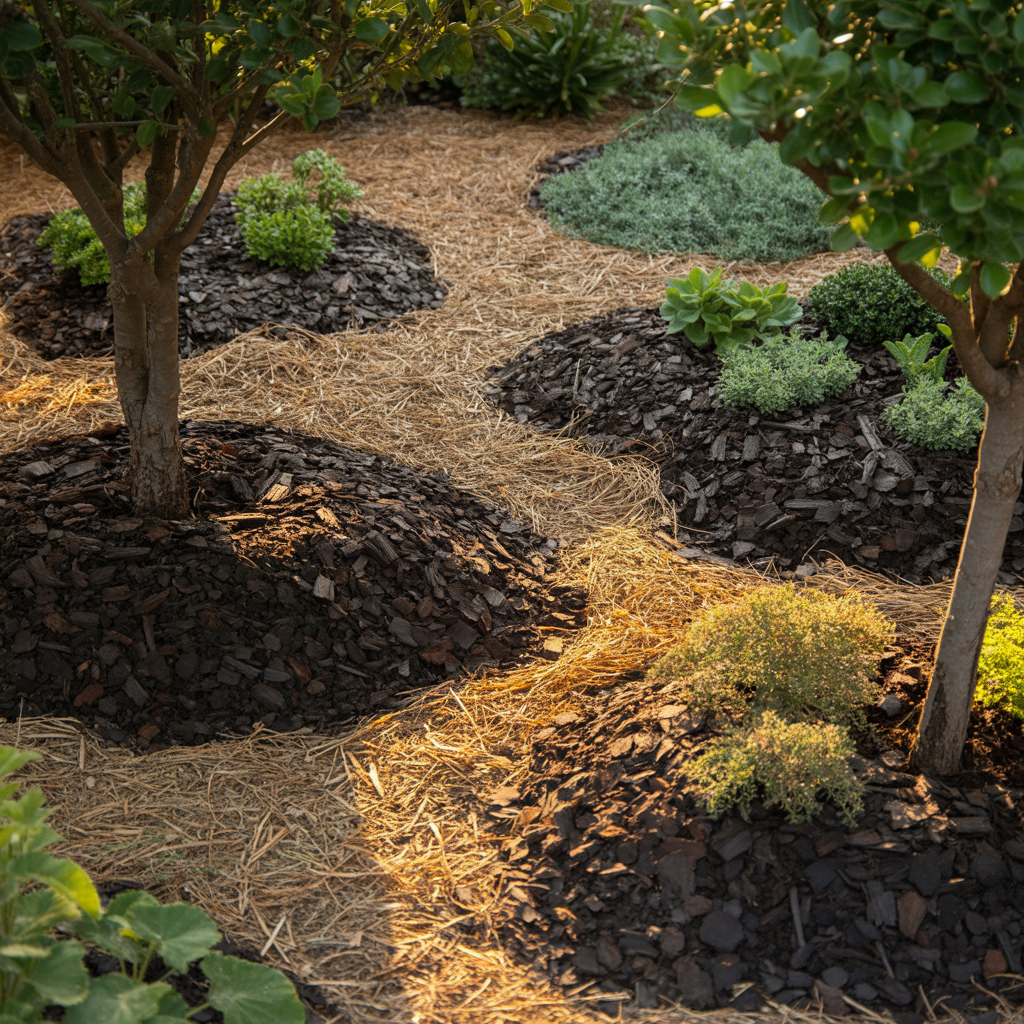
Mulch can be used strategically to control how water is retained across different areas.
Thicker mulch layers slow evaporation and help soil retain moisture, while thinner layers allow faster drying. Adjusting mulch depth creates micro-environments within the garden.
To implement this, apply thicker mulch in areas that dry out quickly and lighter mulch in areas that tend to stay wet.
This layout works well as a finishing layer for other drainage strategies, helping fine-tune moisture balance without major structural changes.
9. Contour Bed Layout (Follow the Land, Not Fight It)
Instead of leveling your garden, this layout follows the natural shape of the land.
Beds are built along contour lines, which are horizontal lines across a slope. This slows down water movement and allows it to soak into the soil gradually instead of rushing downhill.
To apply this, observe how water flows during rain and mark natural lines where water slows down. Build planting beds along those lines using soil mounds or edging materials.
This layout works best on sloped land and helps prevent erosion while improving water absorption.
Plants that benefit include fruit trees, shrubs, and deep-rooted perennials that need steady moisture without waterlogging.
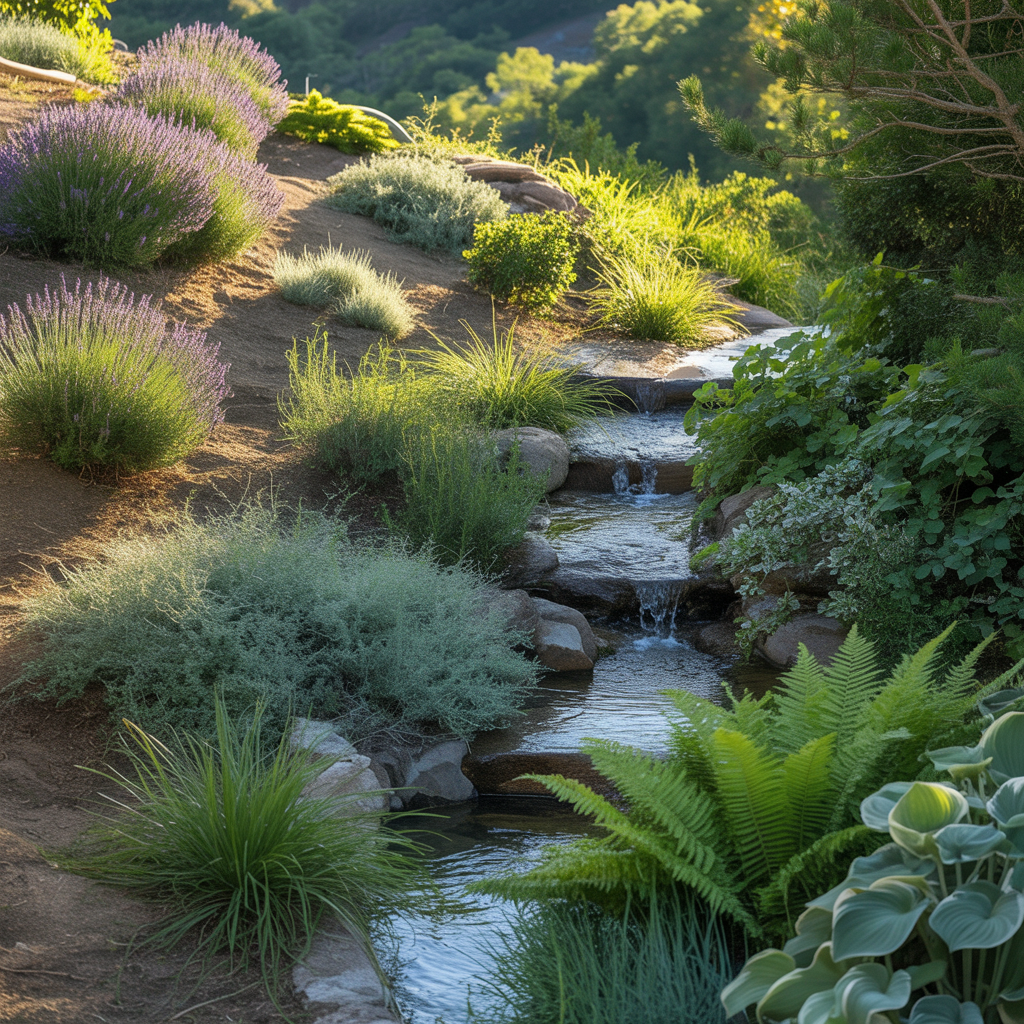
10. Swale Layout (Slow, Spread, Soak System)
A swale is a shallow trench designed to catch and spread water across the landscape.
Water flows into the swale, slows down, and gradually soaks into the soil instead of running off. This creates a balanced moisture system across the garden.
To build a swale, dig a shallow trench along the contour of the land and use the removed soil to create a small berm on the downhill side.
This layout is ideal for areas with heavy rain or fast runoff. Moisture-loving plants can be placed near the swale, while drought-tolerant plants can grow on the berm.
11. Island Bed Layout (Elevated Pockets in Wet Areas)
Island beds are raised planting areas surrounded by lower ground. Instead of trying to drain the entire garden, this layout creates dry “islands” where plants can grow safely above water-prone areas.
To create this, build raised mounds or circular beds using well-draining soil. Surrounding areas can remain lower to collect excess water.
This layout works well in gardens with poor drainage or uneven ground. Plants that prefer dry conditions, such as herbs and ornamental grasses, thrive in these raised islands.
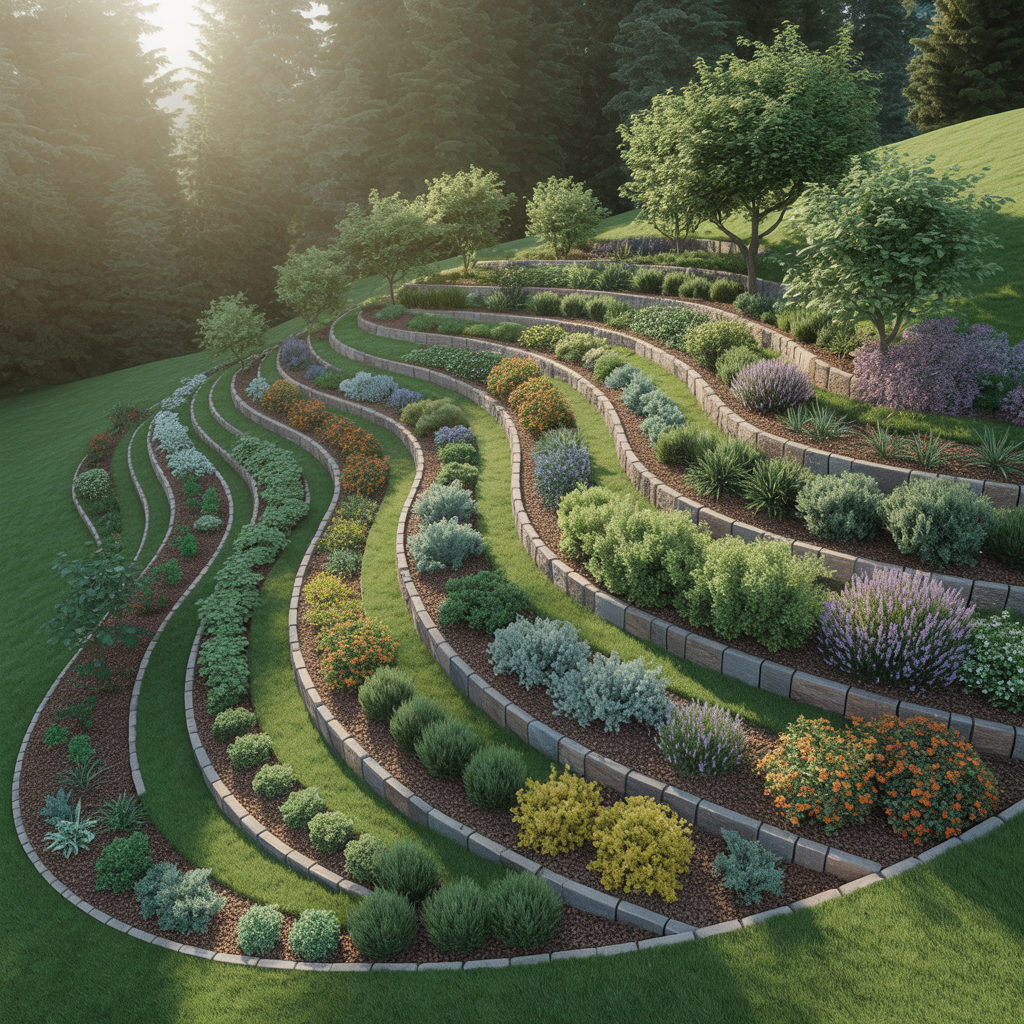
12. Split-Level Terrace Layout (Step-Based Drainage Control)
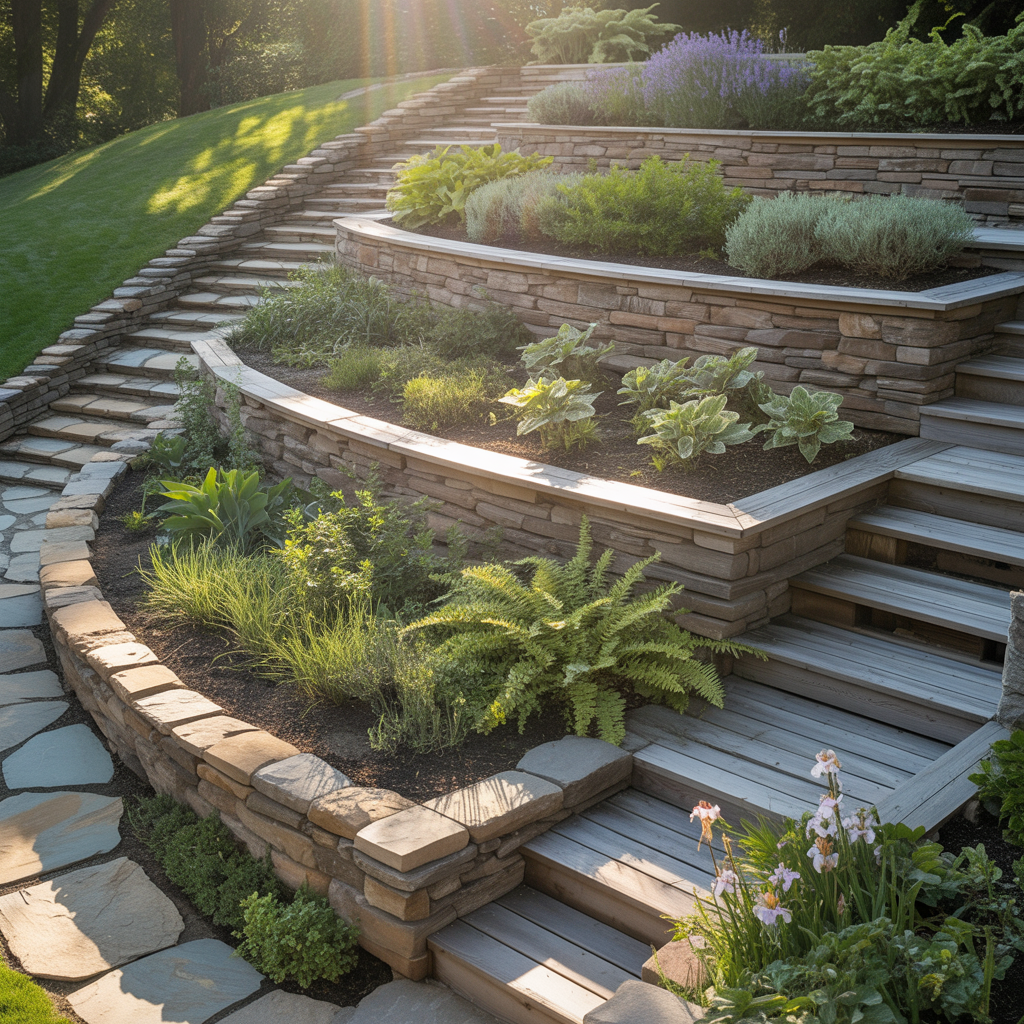
This layout divides the garden into multiple levels. Each level acts as a controlled drainage zone, slowing water as it moves downward. Retaining edges or small walls prevent soil from washing away.
To apply this, create step-like levels using stone, wood, or compacted soil. Each level should have slightly different soil conditions.
This layout is highly effective for sloped gardens and prevents water from accumulating at the bottom.
It also allows you to grow different types of plants at different levels based on moisture needs.
13. Permeable Border Layout (Soft Edges for Water Escape)

Instead of enclosing beds with solid borders, this layout uses permeable edges.
Materials like gravel, sand, or loosely stacked stones allow water to move in and out of planting areas. This prevents water from getting trapped.
To create this, replace hard edges with materials that allow water flow while still defining the space.
This layout works well in gardens where traditional borders cause water to pool. It supports plants that require balanced drainage without sudden moisture buildup.
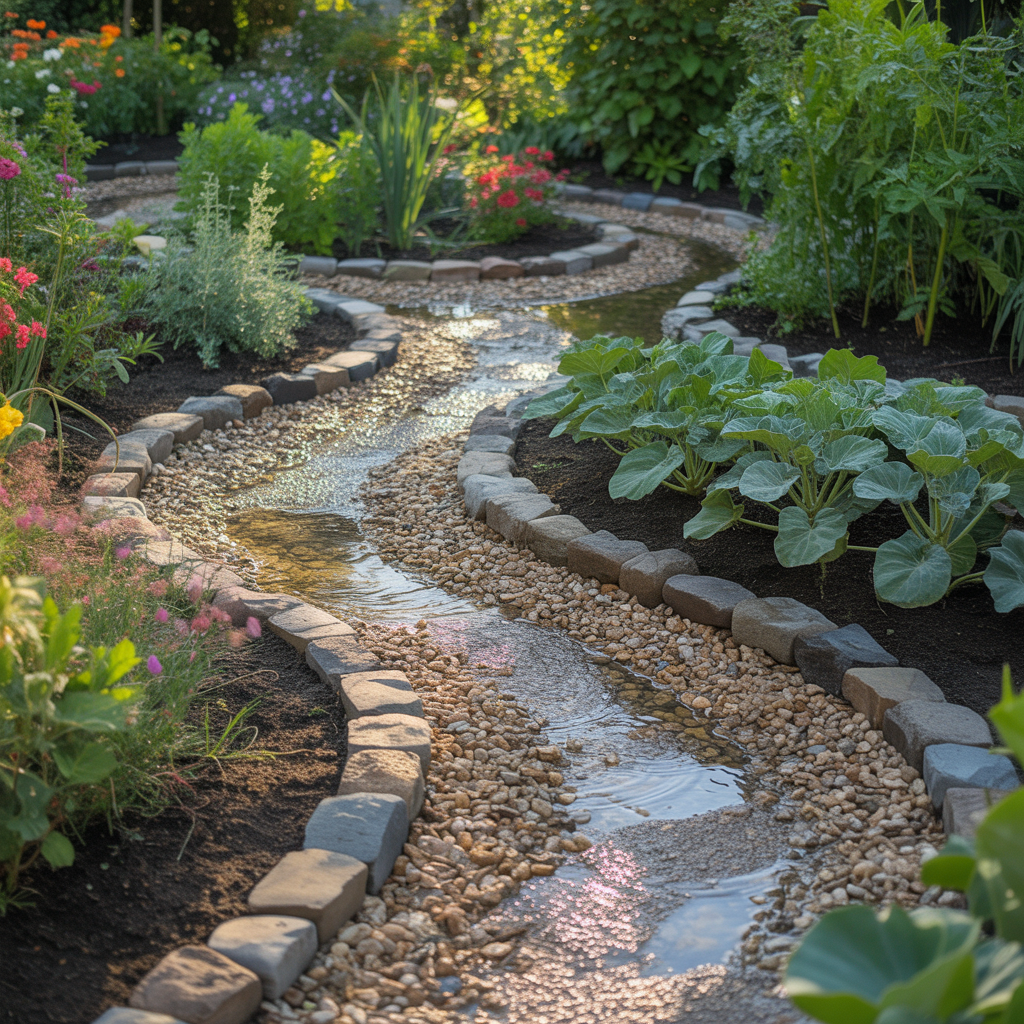
14. Drainage Corridor Layout (Hidden Water Pathways)
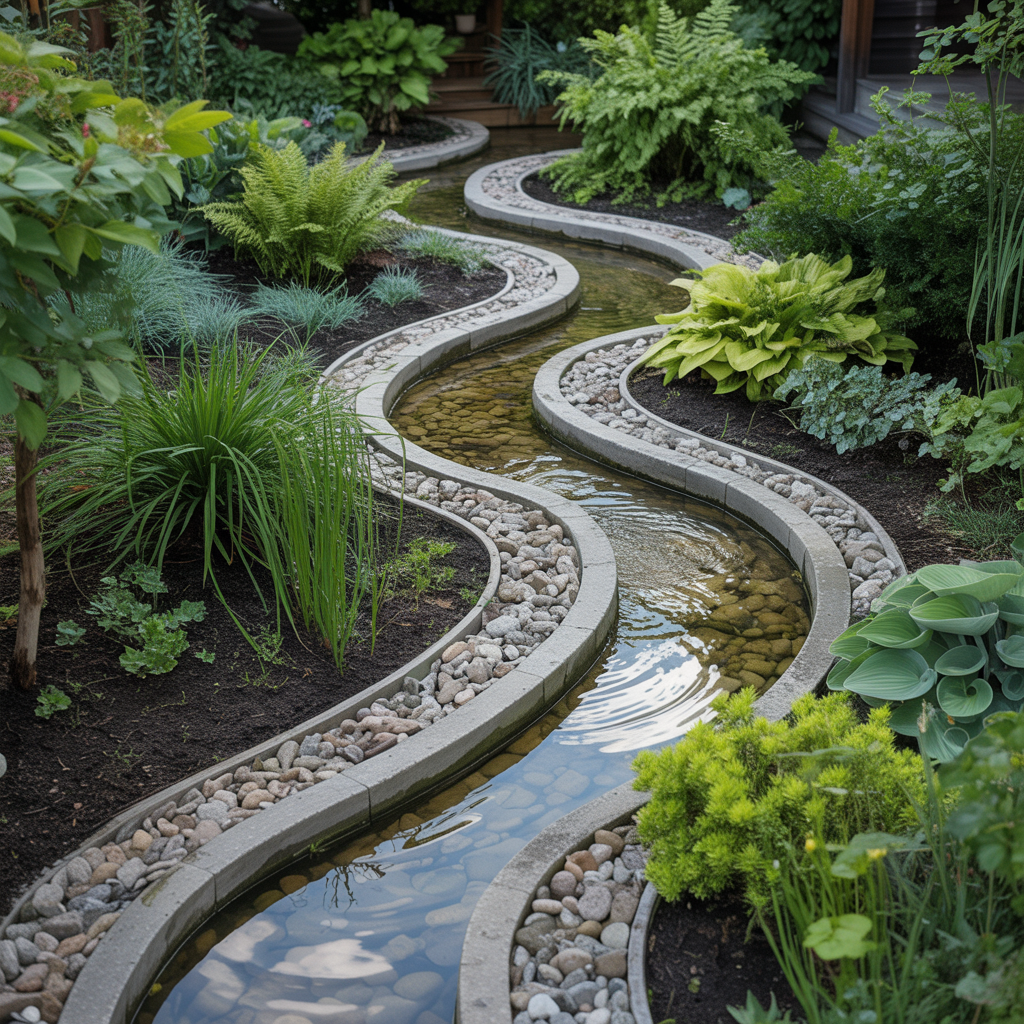
This layout creates invisible paths where water naturally flows through the garden.
Instead of draining water away completely, these corridors guide it through specific routes, allowing plants along the way to benefit.
To implement this, identify natural low points and connect them using slightly lower channels filled with gravel or looser soil.
This layout works well in medium to large gardens and reduces the need for artificial drainage systems.
Plants placed along these corridors often grow more consistently due to steady moisture availability.
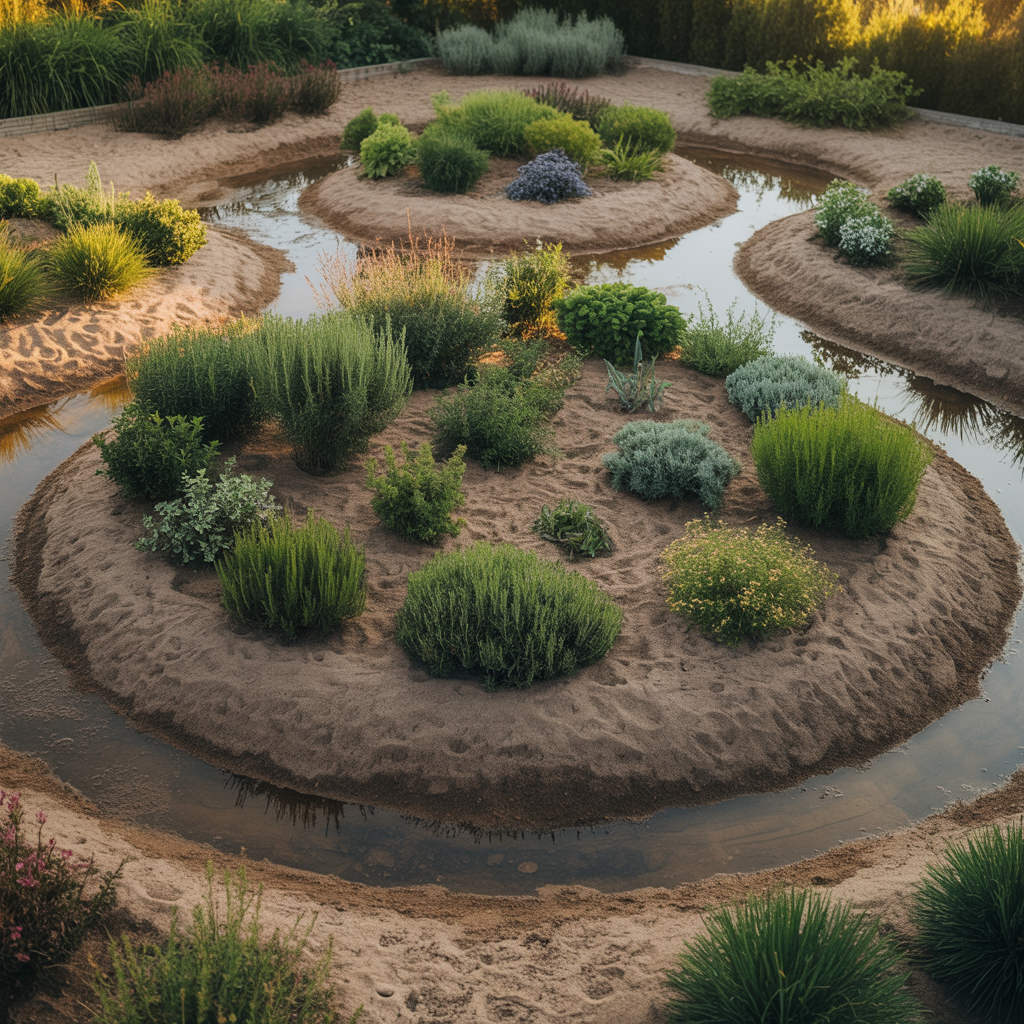
15. Mixed Elevation Cluster Layout (Micro-Drainage Zones)
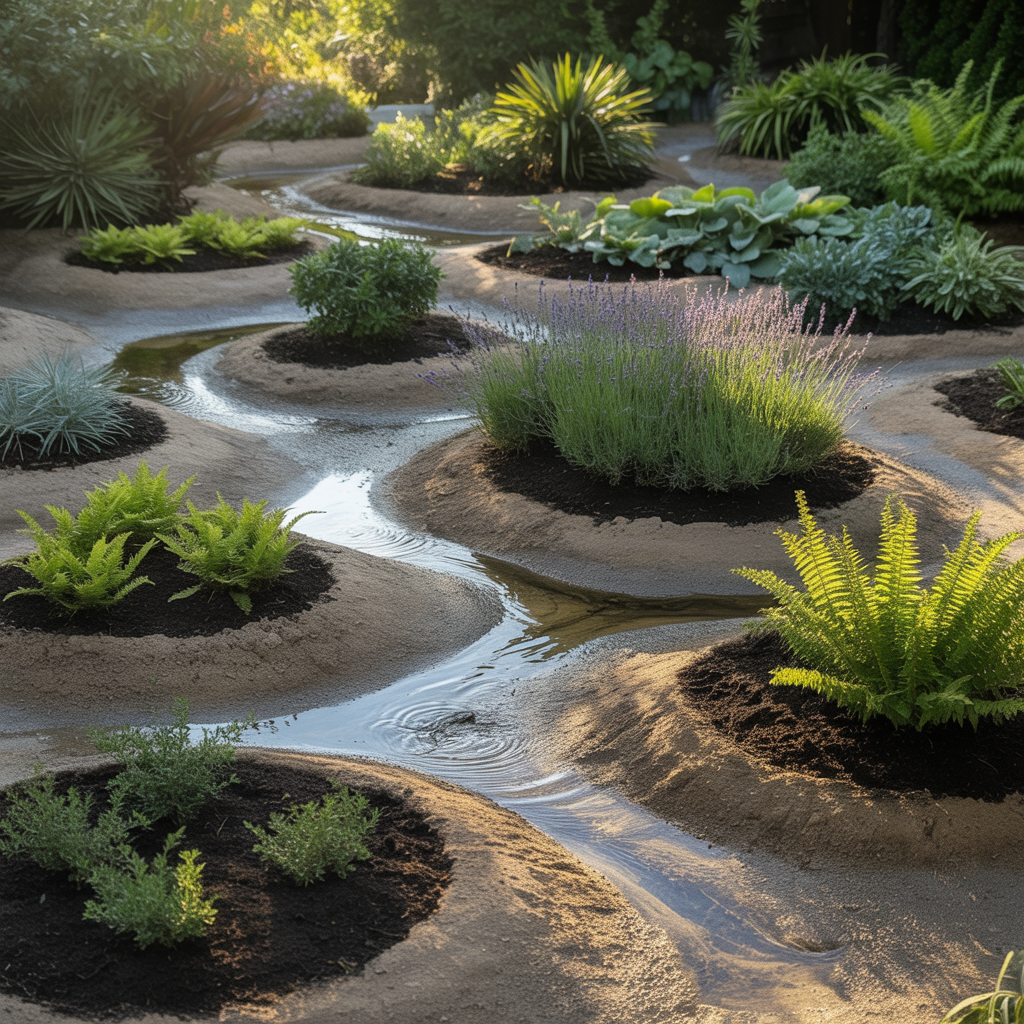
This layout creates small variations in height within a compact space.
Instead of one flat surface, the garden includes slightly raised and slightly lowered areas, forming micro-zones for water movement.
To apply this, shape the soil into gentle rises and dips while planting different species based on moisture preference.
This layout is ideal for small gardens where large structural changes are not possible. It allows you to manage drainage without major construction.
16. Edge Channel Layout (Protecting Core Planting Areas)

This layout focuses on protecting the central planting area by managing water at the edges.
Shallow channels are created around the perimeter to capture excess water and redirect it away from the main growing space.
To build this, dig narrow channels along the edges and fill them with gravel or leave them open depending on your design.
This approach works well in gardens where water enters from surrounding areas. It keeps the main planting zone stable and well-drained.
17. Container Cluster Drainage Layout (For Small or Urban Gardens)
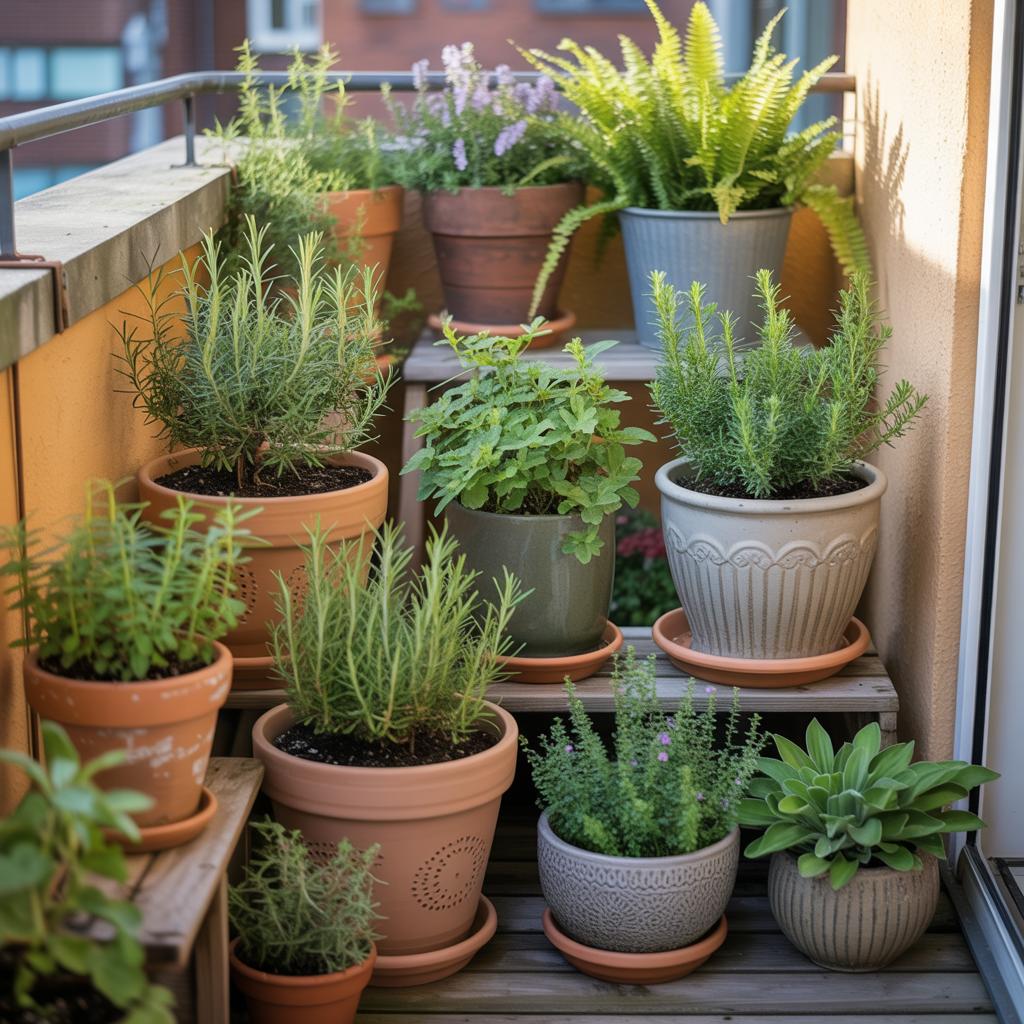
This layout uses grouped containers to control drainage precisely. Containers with different drainage rates are arranged strategically.
Faster-draining pots are placed in wetter areas, while moisture-retaining containers are placed in drier spots.
To apply this, select pots with varying drainage holes and soil mixes, then group them based on how water behaves in your space.
This layout is ideal for balconies or patios where ground modification is not possible.
It connects well with ideas from small balcony garden layout ideas that actually work, where space and control are limited.
How to Choose the Right Layout for Your Garden
The best layout depends on your specific conditions.
If your soil retains too much water, raised beds and sloped designs are often the most effective solutions. If your garden dries out too quickly, sunken beds and mulch zoning can help retain moisture.
Observing how water behaves after rain provides valuable information for making these decisions.
Common Drainage Mistakes in Garden Design
One common mistake is assuming that more watering will fix plant problems.
In many cases, poor drainage is the underlying issue. Adding more water can worsen the situation by increasing root stress.
Another mistake is ignoring soil structure. Even a well-designed layout cannot compensate for soil that does not support proper water movement.
Overcomplicating drainage systems can also create unnecessary maintenance. Simple, natural solutions often provide better long-term results.
Step-by-Step Plan to Improve Garden Drainage
Start by observing how water behaves in your garden after watering or rainfall.
Identify areas where water collects and areas that dry too quickly. These patterns will guide your layout decisions.
Introduce raised sections or slopes where needed. Adjust soil composition and add permeable materials to improve water flow.
Monitor changes over time and make gradual adjustments rather than large, immediate changes.
How Drainage Affects Overall Plant Health
Drainage influences more than just water levels.
It affects root oxygen availability, nutrient absorption, and overall plant stability. Poor drainage can lead to slow growth even when other factors appear correct.
This pattern is similar to issues discussed in why orchid roots look healthy but the plant still struggles, where root conditions affect the entire system.
Long-Term Maintenance for Balanced Drainage
A well-designed layout still requires occasional adjustments.
Soil can compact over time, and mulch may need to be refreshed. Observing how the garden changes with seasons helps maintain balance.
Regular maintenance ensures that the system continues to function effectively.
Frequently Asked Questions
What is the best way to improve garden drainage naturally?
Using raised beds, slopes, and proper soil structure can improve drainage effectively.
Can layout alone fix drainage problems?
Layout plays a major role, but soil condition must also be considered.
How do I know if my garden drains well?
Water should not pool for long periods, and soil should dry gradually.
Do all plants need the same drainage?
No, different plants require different moisture levels.
How long does it take to see improvement?
Changes in drainage often show results gradually over time.
Final Thoughts
A garden layout that improves drainage naturally creates a stable environment where plants can grow consistently.
Instead of reacting to problems after they appear, a well-designed layout prevents many issues from developing in the first place.
By guiding water through the garden rather than resisting it, you create a system that supports long-term growth with less effort.