10 Mistakes to Avoid If You Want More Beautiful Orchids
My first orchid arrived as a gift, tucked into a ceramic pot with blooms that looked too perfect to be real. I placed it on my kitchen windowsill and marveled at its grace for weeks. Then, without warning, the flowers dropped one by one, and all that remained was a stem and a few glossy leaves. I assumed it had died, tossed it aside, and moved on.
Months later, I noticed a tiny green tip peeking from the same stem. That moment reshaped how I see orchids—not as fragile decorations, but as living puzzles with quiet strength and a will to surprise you.
What I’ve learned since then comes from years of trial, errors, and gentle nudges from fellow gardeners. Orchids aren’t difficult; they’re just misunderstood. They won’t demand much, but they will whisper clues if something isn’t right. Listening to those signs—through leaves, roots, and even silence—makes all the difference.
If your orchids have struggled or you’ve been unsure whether you’re doing things right, don’t worry. I’ve collected the most common mistakes so you can skip the setbacks and move straight to the part where your orchids bloom beautifully, again and again.
1. Overwatering: The Fastest Way to Trouble
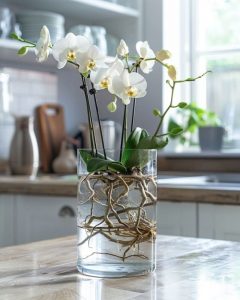
When I first started growing orchids, I treated them like any other houseplant and watered them regularly. They are epiphytes, meaning they naturally grow on trees and get their water from rain and humidity. Overwatering can lead to root rot.
Therefore, you need to let the potting medium dry out slightly between waterings. Orchids typically need water once a week, but adjust based on humidity levels in your home.
Also, use a pot with drainage holes to ensure excess water doesn’t collect at the bottom.
2. Using the Wrong Potting Medium
At first, I planted my orchids in regular potting soil, thinking they’d appreciate the rich nutrients.
Orchids need a special medium, like bark, sphagnum moss, or a mix of the two, to mimic their natural growing conditions.
3. Neglecting Light Requirements
Orchids are picky about light. I once placed mine in direct sunlight, thinking they’d thrive like other flowering plants. Instead, their leaves scorched.
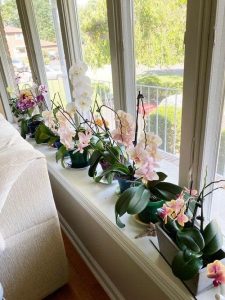
A spot near an east-facing window is ideal. If you only have south or west-facing windows, use a sheer curtain to diffuse the light. Watch their leaves, healthy leaves are light green.
4. Ignoring Humidity Levels
Orchids thrive in high-humidity environments. My dry indoor air left them looking dull and struggling to grow.
Keep humidity around 50–70%. You can achieve this by misting the leaves regularly, placing a humidifier nearby, or setting the orchid pot on a tray of water with pebbles.
5. Not Fertilizing Correctly
For a long time, I didn’t fertilize my orchids because I assumed they’d get all the nutrients they needed from water and light.

Use a balanced orchid fertilizer (20-20-20) diluted to half-strength. Feed your orchids every two weeks during the growing season (spring and summer) and once a month during fall and winter.
6. Overlooking Airflow
In the wild, orchids grow in breezy conditions on tree trunks. My early mistake was placing them in stagnant air, leading to fungal issues and unhappy plants.
You need to avoid placing them in closed, humid spaces like poorly ventilated bathrooms. A small fan set on low near the plants can work wonders.
7. Cutting Flower Spikes Too Soon
I’ve been guilty of trimming flower spikes too quickly after the blooms fell, assuming they were spent. Little did I know, orchids often rebloom from the same spike.
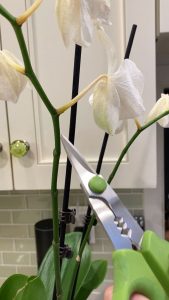
If it turns brown and dries out, it’s safe to remove it. If it remains green, leave it, there’s a good chance the orchid will produce another round of blooms from the same spike.
8. Ignoring Signs of Stress
When I first started growing orchids, I didn’t pay much attention to their leaves or roots. Over time, I learned that orchids communicate through these parts, signaling when something is wrong.
Wrinkled leaves can indicate underwatering, while yellow leaves might mean overwatering or excessive light.
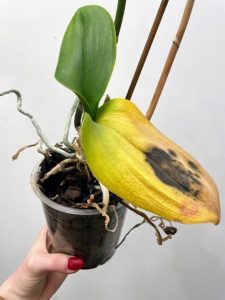
Besides, healthy roots should be green (if wet) or silvery-gray (when dry). Black or mushy roots signal root rot, requiring immediate action.
9. Repotting at the Wrong Time
Repotting sounds productive—but doing it while your orchid is blooming or stressed can backfire. Wait until the flowers are done and the plant has had a chance to rest.

I’ve had the best results repotting just as new roots begin to grow. That’s when the plant is ready to settle into a new pot and adapt. Choose a slightly larger container and fresh medium—it gives your orchid a boost without interrupting its rhythm.
10. Giving Up Too Soon
Orchids can be slow growers, and there were moments when I thought my efforts were in vain. But with patience, I learned that orchids need time to adapt and flourish.
If the leaves are healthy and the roots are firm, the plant is still alive. It may take months for new growth or blooms to appear, but the reward is well worth the wait.
Final Thoughts
Learning to grow orchids well isn’t about mastering strict rules—it’s about slowing down and paying attention. These plants won’t thrive under guesswork, but they’ll reward observation with blooms that feel like a quiet celebration. You’ll find that the more you care for them thoughtfully, the more connected you feel to your growing space.
If something feels off, don’t give up. Orchids are resilient in their own gentle way. And when that first bud reappears after a long pause, it feels like a quiet victory—one you absolutely deserve. Let your next orchid not just grow, but flourish, with the help of what you’ve learned here.