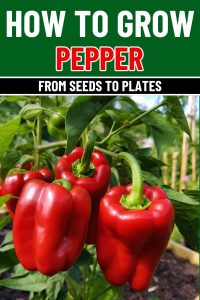
Grow Peppers From Seeds to Plates: Your Heartfelt Guide to a Homegrown Harvest
A basket of peppers once caught my eye at a tiny roadside stand, shimmering in a riot of colors I couldn’t look away from. Sunlight slid across their skins—some deep crimson, others golden like sunsets, a few in shades I didn’t even have names for. They looked too beautiful, too alive, to simply toss into a grocery cart.
Taking them home felt like bringing back little flames of summer itself. Each pepper had a different weight, a different scent—some earthy, some sweet, some sharp enough to make my mouth water before a single bite. Holding them, I could almost hear the quiet work of the earth behind every shape and color.
Something inside me knew then: I needed to grow my own. Not just for the harvest, but for the experience of seeing life awaken from the soil. For the connection. For the pride of tasting something that started, quietly and invisibly, right beneath my fingertips. Let’s walk through the beautiful, hopeful process together—from the first handful of seeds to the glorious day you pluck your very first pepper, still warm from the sun.
Why Grow Peppers From Seeds?
Starting peppers from seeds gives you a front-row seat to every miracle: the first stretch of a seedling toward the light, the first budding flower, the first blush of ripening fruit.
It’s a journey that store-bought seedlings just can’t replicate. Not to mention, you unlock a world of rare varieties—heirloom beauties, spicy legends, and colors that almost seem too beautiful to be real. Trust me, the patience it asks of you is returned a thousand times over when you taste that first homegrown bite.
Step 1: Choose the Right Pepper Variety
In the beginning, I didn’t realize how many personalities peppers could have. Some are sweet and mellow like old friends. Others are fiery, bold, and demand your attention. Picking the right one is like matchmaking for your garden.
-
Bell Peppers: Gentle giants that brighten your salads and stir-fries. Think reds, yellows, greens, and even lilac.
-
Hot Peppers: Jalapeños, Habaneros, Cayennes — the daring spirits that add spark to your meals.
-
Miniature Peppers: Perfect for patios and pots, these little bursts of flavor are made for gardeners with limited space but endless curiosity.
Tip: Ask yourself—do you crave color, heat, or sweetness? Your answer will lead you to your perfect pepper partner.
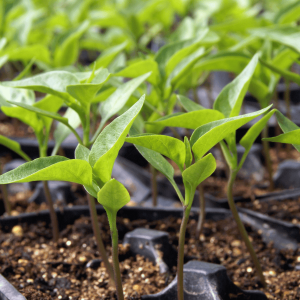
Step 2: Start Seeds Indoors
There’s something deeply tender about tucking a tiny seed into soil and believing in its future. Peppers need a head start indoors if you want them to thrive.
Here’s how I set the stage:
-
Planting Time: Start 8–10 weeks before your last expected frost. It sounds early, but peppers like to take their time waking up.
-
Seed Tray Setup: Fill small trays or pots with a fine, light seed-starting mix. I gently press 2–3 seeds per cell, barely 1/4 inch deep.
-
Warm Embrace: Pepper seeds are fussy about temperature. I set my trays atop a heating mat, aiming for a cozy 75°F. A sunny windowsill might do in a pinch, but consistent heat makes a world of difference.
-
Water Wisely: A light misting, never a heavy downpour. Keep the soil moist but breathable. I learned the hard way that too much water suffocates dreams before they sprout.
-
Lighting the Way: After sprouting, seedlings need 12–16 hours of bright light daily. Grow lights saved me from heartbreak when my windows weren’t sunny enough.
Watching those first green loops push through the soil—there’s no feeling like it. It’s hope, alive and reaching.
Step 3: Transplant Your Seedlings
When my seedlings grow their second or third set of leaves, I know they’re ready to meet the outside world. But not all at once—peppers, like people, need a gentle introduction.
How I Harden Off My Peppers:
-
For one week, I take them outside for a few hours each day, slowly extending their exposure.
-
I protect them from strong wind and harsh sun at first—just like you’d shield a child from a storm.
![]()
Planting Details:
-
Sun Seekers: Find a spot that gets 6–8 hours of sunlight daily.
-
Soil Prep: Loose, slightly acidic soil (pH 6.0–6.8) works best. I mix in compost until the earth feels crumbly and alive.
-
Spacing: I leave 12–18 inches between plants, giving them room to dance with the breeze.
-
Containers: If potting, use at least a 5-gallon container. I learned smaller pots stunt their dreams.
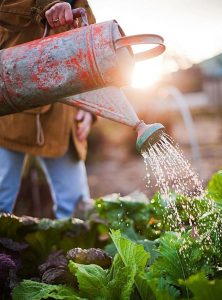
Step 4: Care for Your Pepper Plants
Every morning, I walk my garden with a cup of tea, checking the peppers like old friends. They ask for simple things but give so much in return.
-
Water Deeply, Not Constantly: I wait until the top inch of soil dries before watering. Deep drinks encourage roots to stretch and strengthen.
-
Feeding Time: A balanced fertilizer once a month keeps them strong. (I use one with equal parts nitrogen, phosphorus, and potassium.)
-
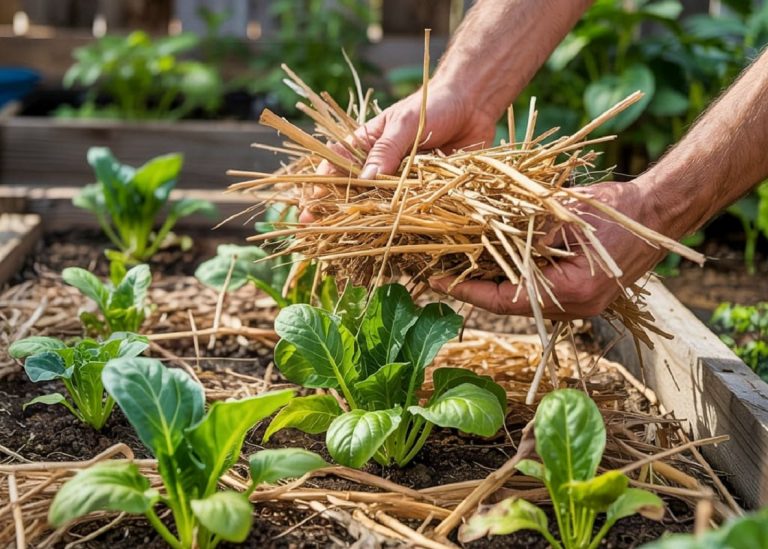
Mulching Magic: A layer of straw or shredded leaves holds precious moisture and fends off weeds.
-
Pruning Wisely: I snip away yellowing leaves and sometimes the first flowers. It feels brutal, but it builds a stronger, more fruitful plant.
And above all, I listen. A drooping leaf, a slow growth spurt—peppers whisper what they need if you’re paying attention.
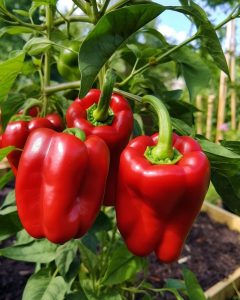
Step 5: Watch Your Peppers Grow
Every pepper journey teaches patience. Some varieties take 60 days, others up to 90. But trust me—every second is worth it.
The flowers appear first, like delicate stars against green foliage. Then tiny, waxy fruits emerge, swelling slowly into color and form. I always marvel at the moment a green pepper begins to blush red or orange—a shy hint that sweetness is rushing in.
Step 6: Harvesting Your Peppers
Harvest days feel like little festivals in my backyard. When a pepper reaches its full size and color, I clip it gently with clean shears, leaving a small stub of stem.

Tip: Picking peppers regularly encourages the plant to keep producing. It’s nature’s way of rewarding attentiveness with abundance.
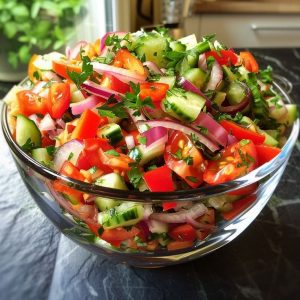
Step 7: Enjoy Fresh Peppers in Your Meals
The first bite of a homegrown pepper is unforgettable. Crisp, juicy, layered with flavors no store-bought version could hope to match.
I dice them into salads, roast them until their skins crackle and char, slice them into homemade pizzas, and sometimes dry them into little jewels for winter cooking. Every meal becomes a memory—a reminder that magic can grow from a single seed.
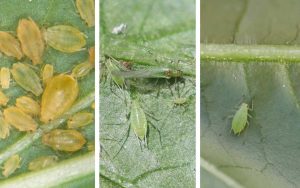
Common Problems and Troubleshooting
Even a careful gardener hits bumps along the way. Don’t worry. Every problem carries a solution—and often, a lesson too.
-
Pests: Aphids, mites, and whiteflies love peppers. I mist plants weekly with neem oil as a preventative.
-
Blossom End Rot: That sad black spot at the bottom? It’s a sign your soil needs steady moisture and maybe a sprinkle of calcium.
-
Yellow Leaves: Usually a cry for better drainage or balanced nutrients. A little compost tea or fish emulsion can perform miracles.
In every challenge, I find a chance to become a better gardener.
Final Thoughts: Your Pepper Story Awaits
Planting peppers isn’t just gardening. It’s participating in life’s grand, patient artistry. It’s believing in tiny, quiet beginnings and celebrating bold, colorful endings.
You’ll learn from the first shaky sprout. You’ll celebrate the first shining fruit. You’ll mourn a few failures and laugh at surprises. But above all, you’ll create a living tapestry in your garden—woven by your hands, your heart, and the simple courage to try.
So why not start today? A handful of seeds, a pocketful of hope, and a little patch of sun are all you need to begin your own pepper story. And when the first pepper blushes bright against green leaves, you’ll know—it was all worth it.