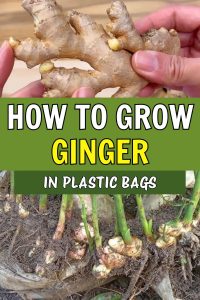
Step-by-Step Guide on Growing Ginger in Plastic Bags
One day, I was rummaging through the kitchen, looking for something to throw into a pot of soup, and found a forgotten piece of ginger tucked in the back of the produce drawer. Its skin was wrinkled, but tiny green buds were peeking out like little surprises. My youngest pointed at it and asked, “Is it growing?” That small question led us down the garden path—literally.
We didn’t have extra pots at the time, but I had a stash of black plastic bags under the sink—the thick kind used for yard clippings. With a bit of curiosity and a touch of improvisation, we punched some holes, filled the bag with potting mix, and gently tucked that sprouting ginger in. That was our very first plastic bag ginger patch—right by the back door.
I didn’t expect much, but a few weeks later, delicate green stalks poked through the soil like little flags of success. The whole experience was so simple, rewarding, and oddly cozy. Now every year, we grow ginger in plastic bags—sometimes several—tucked in corners of the porch, near the compost bin, even hanging from an old wire basket nailed to the fence.
Let me show you how you can do it too. This isn’t just a tutorial—it’s a quiet little adventure with a lot of heart.
Why Grow Ginger in Plastic Bags?
Besides being a clever use of space, growing ginger in bags gives you more control over moisture, soil, and warmth—all things ginger thrives on. Here’s what I (and a few fellow garden lovers) love most:
-
Portable warmth – You can move the bag to catch just the right amount of shade and heat.
-
Budget-friendly – No need for fancy pots. A sturdy plastic bag does the trick.
-
Compact convenience – Even a small apartment balcony can host a thriving ginger plant.
-
Better drainage control – You can punch holes where you want, preventing soggy roots.
One friend of mine grows hers hanging from her laundry railing. Another keeps hers by the kitchen door, right under the herb shelf.

What You’ll Need
Before you begin, gather the following materials:
- Ginger rhizomes – Look for fresh, plump pieces with visible buds (eyes). Organic ginger from the store works well, but if you can get seed ginger from a nursery, that’s even better.
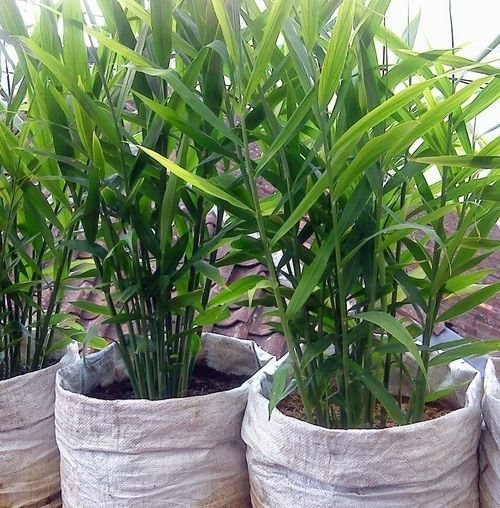
- A large plastic bag – Use a sturdy, breathable bag (such as a grow bag or a black plastic garbage bag with drainage holes).
- Quality potting mix – Choose loose, well-draining soil with organic compost. Ginger thrives in nutrient-rich, aerated soil.
- A spray bottle or watering can – Ginger prefers evenly moist soil, so misting is a great way to control moisture.
- A warm, shaded spot – Ginger needs warmth but doesn’t like direct sunlight.
Step-by-Step Guide to Growing Ginger in Plastic Bags
Step 1: Prepare the Ginger Rhizomes
Start by selecting healthy ginger rhizomes with multiple eyes (small buds). If the piece is large, you can cut it into smaller sections, ensuring each section has at least one or two buds. Let the cut pieces dry for a day before planting to prevent rot.
For faster sprouting, soak the ginger in water for 12 hours before planting. This helps rehydrate the rhizome and kick-starts the growing process.
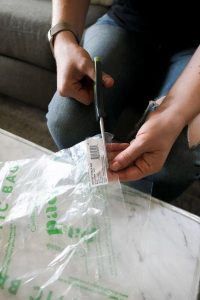
Step 2: Prepare the Plastic Bag and Soil
Take your plastic bag and punch a few small drainage holes at the bottom. This is essential to prevent water from accumulating and causing root rot. If you’re using a grow bag, it may already have proper drainage.
Next, fill the bag with about 8–10 inches of soil, mixing in compost or aged manure to provide nutrients. Ginger prefers a loose, slightly acidic to neutral soil (pH around 6.0–6.5).
Step 3: Plant the Ginger
Once your ginger pieces are ready, prepare the plastic bag by punching several small drainage holes at the bottom. Then fill it with about eight inches of your prepared soil, leaving enough space at the top to add more soil as the plant grows.
Gently press each ginger piece into the soil with the buds facing up. They don’t need to be buried deeply—just a couple of inches under the surface is enough. Cover them loosely with soil, water lightly to settle everything in, and place the bag in a warm, shaded spot. Ginger doesn’t like full sun, especially when it’s just starting out, but it loves warmth and humidity.
During cooler months, I sometimes wrap the bag with an old towel or place it near a sunny indoor window to keep things toasty.
Step 4: Create the Right Growing Conditions
Ginger thrives in warm, humid conditions with temperatures around 75–85°F (24–29°C). Therefore, place the bag in a partially shaded area, avoid direct sun, which can dry out the soil too quickly.
To maintain humidity, you can mist the soil occasionally. If you’re growing indoors, placing the bag near a sunny window but out of direct light works well.
Step 5: Watering and Care
Ginger plants don’t like soggy soil, so water only when the top inch of soil feels dry. During hot weather, you may need to water every couple of days, but during cooler months, reduce watering to prevent over-saturation.
After about 3–4 weeks, you should see green shoots emerging. As the plant grows taller, consider adding more soil around the base to support the developing rhizomes.
Step 6: Fertilizing for Healthy Growth
Once the ginger sprouts, feed it with a balanced liquid fertilizer every 3–4 weeks. A nitrogen-rich fertilizer (such as compost tea or fish emulsion) helps promote healthy leaf growth in the early stages. Later, switch to a phosphorus-rich fertilizer to encourage root development.
You can also sprinkle some wood ash or banana peel compost in the soil, as ginger benefits from potassium.
Step 7: Managing Pests and Diseases
Thankfully, ginger isn’t a magnet for too many pests, but I have had the occasional visit from aphids or spider mites. A light spray of neem oil or a homemade soap-and-water mix usually does the trick. I also like to plant a marigold or two nearby—their strong scent helps keep bugs away, and they add a cheerful splash of color.
The biggest issue to watch out for is overwatering. If the leaves start to yellow too soon or the soil smells funky, it’s usually a sign the roots are sitting in too much moisture. In that case, improve drainage right away and let the soil dry out a bit before watering again.
Step 8: Harvesting Your Ginger
You can start harvesting baby ginger after about four to five months—it’s tender, mildly sweet, and perfect for stir-fries and teas. But if you want full-sized, mature rhizomes, patience is key. Wait until the leaves start turning yellow and begin to dry out—this usually happens around 8-10 months.
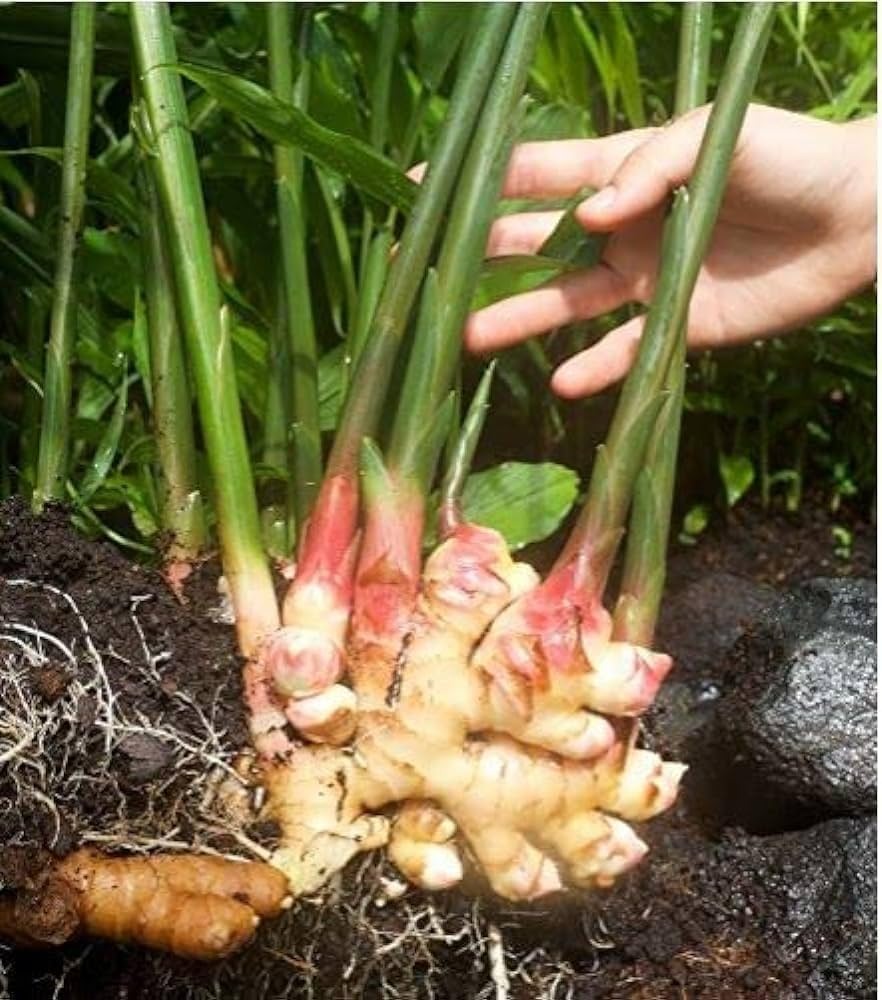
To harvest, gently tip the bag over, shake off the soil, and pull up the entire clump. I like to leave mine out for a few hours to cure in a shady, dry spot before storing or using. And don’t forget—save a few of the healthiest pieces to replant for the next season. That way, your ginger garden never really ends.
Common Problems and How to Fix Them
- Slow growth – If your ginger isn’t sprouting, check the temperature. If it’s below 70°F, move it to a warmer spot.
- Yellowing leaves – This could be a sign of overwatering or poor drainage. Reduce watering and check for root rot.
- Weak or small rhizomes – If your ginger looks small, it may need more nutrients. Try adding compost or an organic fertilizer.
A Few Lessons From the Soil
I’ve learned a lot from growing ginger this way. Like how important it is to let the soil breathe, or how a single sprouting root can grow into a bundle of golden rhizomes if you just give it time and attention. One season, I didn’t feed the plant much, thinking it would still do fine. The leaves looked healthy, but the harvest was tiny. It reminded me that quiet care—feeding, watering, watching—makes all the difference.
Now, every time I see a green shoot poking through the soil, I think of that first forgotten root and how it turned into something we now look forward to year after year. There’s something magical about that, don’t you think?
Grow With Me
So, if you’ve got a bit of ginger sprouting in your kitchen right now, don’t toss it. Give it a chance. Find a cozy spot, grab a plastic bag, and start your own quiet little garden. You might be surprised at how much joy—and how much ginger—you’ll grow.
And if you do try it, I’d love to hear your story. Drop me a comment, share your photos, or ask a question—I’m always happy to chat about plants and the little wonders they bring into our lives.