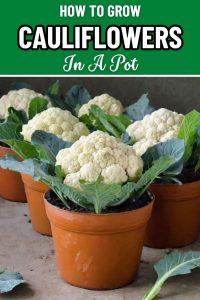
How to Grow Cauliflower in a Pot: My Tried-and-True Method
I didn’t set out to grow cauliflower in a pot. It happened because I had one empty container, a few leftover seedlings from the garden center, and a bit of guilt about letting them go to waste. I tucked one into the pot, gave it the best soil I could, and placed it by the shed, half expecting nothing to happen. Then one morning, I saw the start of a pale, tightly curled crown tucked among the leaves. I couldn’t believe my eyes.
That single cauliflower became the start of a new tradition. I’ve since grown several more—on the patio, along the fence line, even on a narrow balcony during a city visit. It’s not the easiest crop, I’ll admit. Cauliflower is a little fussy, a little dramatic. But give it the right setup, and it rewards you with something truly beautiful—and completely satisfying to harvest.
Growing cauliflower in containers has taught me more about patience and observation than any other veggie. It doesn’t rush. It doesn’t forgive carelessness. But when it works, it feels like a secret well kept from the rest of the gardening world.
So if you’re short on space, or simply curious like I was, let me walk you through the method that’s worked for me and a few other gardeners I’ve learned from along the way. You don’t need a farm or even a backyard—just a pot, a little care, and some garden heart.
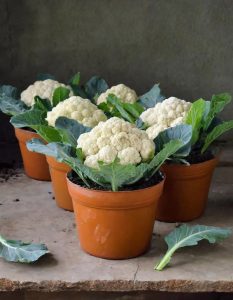
Choosing the Right Pot and Soil
Cauliflower looks manageable when it’s young, but don’t let that fool you—it grows into a leafy, wide-spreading plant that needs room to thrive. I learned this the hard way after starting mine in a container that barely held a basil plant. The leaves had nowhere to go, and the root system was cramped. Since then, I’ve stuck with pots that are at least 12–18 inches deep and just as wide. A five-gallon bucket with good drainage holes works wonders.
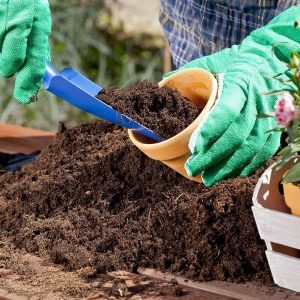
As for soil, forget plain backyard dirt. Cauliflower needs fluffy, nutrient-rich soil that drains well but holds moisture. I usually mix organic potting soil with a generous scoop of compost or aged manure. One of my gardening friends swears by adding a pinch of bone meal, and I’ve found that really helps with strong root growth and healthier heads.
If you want a tip that’ll save you a lot of trouble down the line: fill your container all the way up, water it in, and let it settle before planting. That way you’re not topping up with dry soil later and disturbing those tender roots.
Planting Cauliflower Seeds or Seedlings
I’ve grown cauliflower both ways—seeds and store-bought seedlings. Each has its perks. Seeds are satisfying if you like watching things from the very beginning, but seedlings save time and give you a bit of a head start, especially if your season is short.
If you start from seed, sow them about ¼ inch deep in moist potting mix, ideally indoors or in a sheltered spot. They germinate in a week or so, and once they have three strong true leaves, they’re ready to be moved into their forever pot.
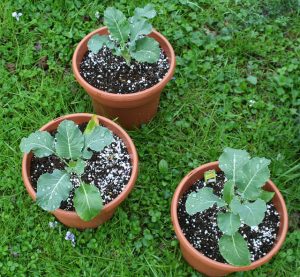
For seedlings, handle them gently—cauliflower roots don’t love being disturbed. I’ve found it best to plant just one per container to give them all the room they need. One year, I got ambitious and tried to squeeze two in a big container. The result? Two plants competing for light, space, and nutrients—neither of them happy.
The lesson: give them breathing room, and they’ll reward you later with a proper, compact head.
The Right Amount of Sunlight
Cauliflower needs sunlight—but not too much. I learned that lesson one summer when I placed my pot smack in the middle of our sunniest spot, thinking more light meant faster growth. By week three, the leaves were wilting midday, and the plant looked stressed. The heat had gotten to it.
Now, I give cauliflower at least six hours of sun, but in a spot with gentle afternoon shade, especially during warmer months. Morning sun and filtered light in the afternoon is the sweet spot. If temps climb above 80°F, I move the pot to a partially shaded area. Trust me, even a little protection from the afternoon heat makes a huge difference.
If you’re growing in early spring or fall, when temps stay between 60–75°F, that’s cauliflower’s happy place. It thrives in that cool stretch where other vegetables might slow down.
Watering and Feeding
If cauliflower had a love language, it’d be consistency. It likes steady moisture and a regular meal—not feast and famine. I used to water only when I remembered, and sure enough, the heads would form small and crumbly. Now, I check the soil every morning, especially in warm weather.
The rule I follow: if the top inch of soil feels dry, it’s time to water. I water deeply, letting the excess drain freely. Don’t let the soil get soggy, though. That’s a fast track to root rot.
As for feeding, cauliflower is a hungry plant. I give mine a balanced organic fertilizer every two weeks until the head starts forming. Early on, I focus on nitrogen to boost leafy growth. Once I see the beginnings of a head, I switch to a phosphorus-rich blend—bone meal or compost tea works great.
A neighbor of mine uses worm castings in her mix and swears her cauliflowers come out twice the size. I tried it last season and—well, she might be onto something.
Managing Pests and Diseases
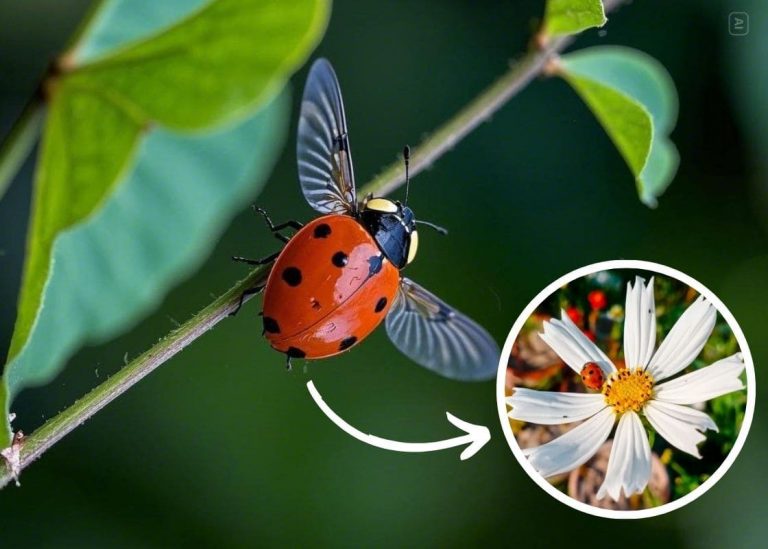
If there’s one thing cauliflower taught me, it’s vigilance. I’ve had more surprise guests on my plants than I can count—aphids, cabbage worms, whiteflies. They especially love the underside of leaves, where they gather like tiny armies.
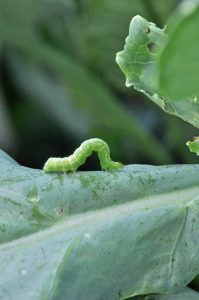
Now I make it a habit to inspect every couple of days, brushing off aphids with a strong spray of water or using neem oil if things get out of hand. Cabbage worms are trickier. They’re sneaky, and they munch fast. I’ve gotten used to handpicking them—and yes, it’s a little gross, but incredibly effective.
If the problem persists, I turn to Bt (Bacillus thuringiensis)—a naturally occurring bacteria that specifically targets caterpillars without harming beneficial insects. It’s been my saving grace more than once.
Humidity can bring its own troubles—powdery mildew in particular. I’ve had it creep in during rainy weeks. The trick is good airflow and watering only at the base, not overhead. A little breathing room around your plant goes a long way.
Blanching for the Perfect Head
The first time I grew a head of cauliflower that turned yellow, I was genuinely puzzled. It tasted fine, but it didn’t look like the creamy-white heads from the farmers’ market. I mentioned it to an older gardener at the community plot, and she smiled knowingly: “You forgot to blanch it.”
Blanching sounds fancy, but it’s just folding the outer leaves over the head to shield it from the sun. When the head reaches about two inches across, I gently gather the leaves over the top and tie them loosely with soft cloth or garden twine. This helps keep the head tender, crisp, and pale.
Some newer varieties do this on their own—called self-blanching types—but I still check every few days just to be sure. Sunlight turns the heads yellow or even purple, which isn’t harmful, but doesn’t look as classic. If you’re growing for that perfect creamy dome, don’t skip this step.
Harvesting at the Right Time
There’s a quiet thrill that comes with harvesting cauliflower. I usually start checking mine 60–80 days after transplanting, depending on the variety. A ready head is tight, firm, and about 6–8 inches across. Wait too long and it starts to separate and turn grainy—still edible, but not as satisfying.
When it’s time, I take a sharp knife and cut the head at the base, leaving a few leaves around it for protection. That first moment, lifting the whole head out of the pot—it never gets old.
Occasionally, if the season allows, the plant will send out small side shoots after the main harvest. They’re like little bonuses—mini cauliflowers that taste just as sweet.
Final Thoughts
I used to think cauliflower was too tricky for a small-space garden. Now I know it just asks for attention—the steady, patient kind. Growing it in a pot isn’t about perfection, it’s about rhythm. Sunlight, moisture, space, and timing—get those right, and it rewards you every time.
Some seasons go better than others. I’ve had plants that buttoned early or got hit with pests the day before harvest. But each mistake taught me something. Each small success—like that first tight white head—made me feel like a better gardener.
If you’re just starting out, don’t be discouraged. Cauliflower is a teacher. It slows you down, makes you observe, and rewards your effort in the most delicious way. So grab a pot, fill it with good soil, and give it a try. You might just fall in love with this humble, hearty vegetable the same way I did.