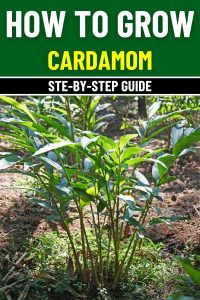
How To Grow Cardamom: A Comprehensive Guide for a Fragrant and Flavorful Harvest
Some plants just sneak into your heart without warning. I wasn’t planning on adding cardamom to my little backyard jungle until I stumbled across a tray of spindly seedlings at a tiny farmers’ market. Something about their glossy green leaves and faint, spicy fragrance that I couldn’t ignore.
The vendor, an old man with hands stained by soil and laughter lines around his eyes, leaned in and whispered, “Grow it, and you’ll never regret it.” There was a twinkle in his voice, like he was sharing a secret that most people missed rushing through life too fast.
I carried one home with a sense of ceremony, not really knowing how much patience — and wonder — it would take. Watching it unfurl tall, slender stalks and dreaming about one day plucking my own fragrant pods became an unexpected little ritual that stitched itself into my gardening life.
Why Grow Cardamom?
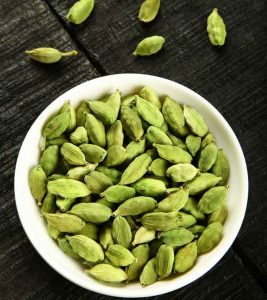
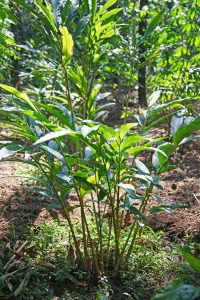
Cardamom (Elettaria cardamomum) belongs to the ginger family, blooming best in humid forests tucked away from scorching sun. Known across kitchens and ancient medicine chests alike as the “queen of spices,” cardamom whispers of rich traditions, healing brews, and dishes kissed with something special you can never quite explain.
Nurturing cardamom at home means more than harvesting fragrant pods. It fills your garden with a gentle, soothing presence. The plants sway like green dancers, casting dappled shade, releasing the faintest scent of spice into warm afternoons.
And when you finally gather your first pods — oh, the satisfaction! Fresh, potent cardamom makes store-bought varieties taste hollow by comparison. It’s not just a plant. It’s a keeper of slow, sweet magic.
Step-by-Step Guide to Growing Cardamom
1. Choose the Right Growing Environment
Think of cardamom like a shy guest at a summer party — it loves warmth and moisture but hates feeling scorched or exposed. To coax it into thriving, you’ll need to create the right little sanctuary.
Here’s how to set the perfect stage:
-
Temperature Goals: Keep the environment steadily between 65°F and 100°F (18°C–38°C). In cooler zones, cardamom can be raised in large pots and moved indoors when needed.
-
Light Preferences: Filtered light is best. Under the gentle shade of a taller tree or a bright, dappled patio corner works wonderfully. Full sun burns the leaves, leaving them dry and brittle.
-
Humidity Love: This plant adores humidity. If you’re planting indoors, a humidifier or daily misting helps recreate the steamy, lush forests it calls home.
I tucked my first cardamom pot near a young banana tree, and the pairing was a stroke of genius. The banana provided just enough shade, and watering one meant helping both thrive together like old friends.
2. Prepare the Soil
Good soil is like the soft bed a weary traveler sinks into after a long journey. Cardamom roots, delicate and slightly fussy, need a cozy place to settle.
Here’s the recipe for soil success:
-
Drainage Is Non-Negotiable: Use loose, fertile soil that drains well yet retains a gentle dampness — soggy roots lead to heartbreak.
-
Acidity Sweet Spot: Aim for a pH between 6.1 and 6.8. A slightly acidic soil teases out the best flavor and vitality in your plant.
-
Organic Buffet: Blend in generous amounts of compost, worm castings, or leaf mold. Think of it as laying out a feast for your cardamom’s first few years.
The first time I planted cardamom, I underestimated how heavy my garden’s natural clay soil could get after rain. Water pooled around the roots, and my poor plant struggled. Ever since, I build raised beds or add sand to lighten things up — it’s like giving your plants room to breathe deeply.
3. Planting Cardamom
Planting cardamom feels like tucking secrets into the earth. It’s quiet, almost sacred — a small promise between you and the soil.
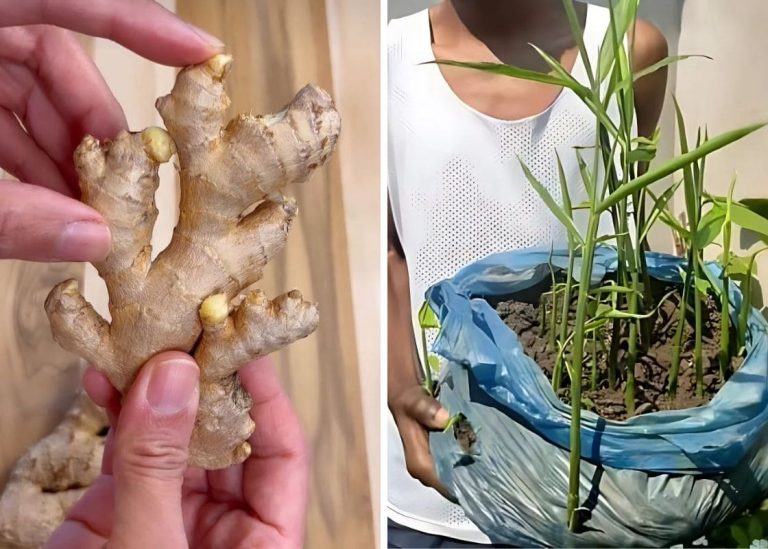
If you’re starting from seed, soak the seeds in water for 24 hours before planting to increase germination rates. You can also plant mature rhizomes (the underground stems) to speed up the process.
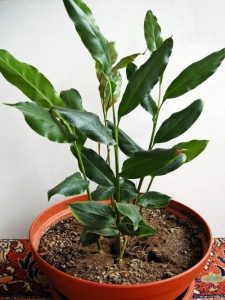
Plant the seeds or rhizomes about 2–3 inches deep and space them 6–8 inches apart. For container gardening, choose a pot that’s at least 12–14 inches in diameter to allow for proper root growth.
A gardening neighbor once told me, “Cardamom doesn’t like to feel smothered.” Heavy soil compacted over the rhizomes will stunt their growth. I always keep the soil light, fluffy, and welcoming — like a handmade quilt instead of a weighted blanket.
4. Watering and Moisture
Cardamom plants need a lot of water, especially during the growing season. However, overwatering can lead to root rot, so it’s crucial to strike the right balance.
Water your cardamom plant whenever the top inch of soil feels dry, ensuring the water drains properly.
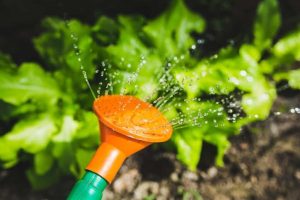
To maintain humidity, especially if you are growing cardamom indoors, consider using a humidifier or misting the plant regularly.
One dry, dusty summer, I tucked my cardamom under a canopy of taller plants and misted it every morning at sunrise. Walking through the cool, damp air felt like stepping into a little pocket of tropical forest. It wasn’t just good for the plant — it was a moment of peace for me too.
5. Fertilizing Cardamom
Feeding cardamom feels like setting a beautiful table for a guest who never complains but shines brighter with a little pampering.
Here’s the menu:
-
Liquid Fertilizer: Use a balanced organic liquid fertilizer (such as 10-10-10) every 4–6 weeks during the growing season.
-
Slow and Steady: Don’t overfeed. A slow, steady rhythm of nourishment helps the plant produce stronger, more flavorful pods.
Simple Truth: The richest flavor always comes from plants that grow a little slowly, a little stubbornly. Don’t rush your cardamom — every pod will be a treasure worth waiting for.
6. Pruning and Maintenance
Cardamom plants don’t demand much shaping, but a little attention keeps them looking vibrant.
Easy maintenance tips:
-
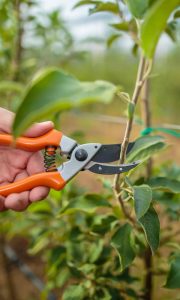
Trim Dead or Yellow Leaves: Snip off anything that looks sad or weary. It frees up energy for new growth.
-
Check Airflow: If your plant becomes too crowded, thin it gently to prevent fungal issues.
One wet season, I ignored my cardamom patch, thinking it could handle the humidity alone. A sneaky patch of mildew taught me otherwise. Now I keep a closer watch, trimming when needed to let the breezes dance between the leaves.
7. Protecting From Pests and Diseases
Common pests include aphids, spider mites, and scale insects, which can be controlled with organic insecticidal soap or by rinsing the plant with water.
Cardamom is also susceptible to fungal diseases, particularly when grown in overly wet conditions.
To avoid issues like leaf blight or mold, ensure the plant has proper drainage and avoid watering directly onto the leaves.
Hard-Earned Advice: When trouble pops up, act early. A light touch often saves the day before chemical interventions are needed.
Harvesting Cardamom
Harvesting cardamom is a patient gardener’s celebration. The plants flower in late summer or fall, and the pods slowly swell and ripen from green to soft yellow or brown.
Harvesting Steps:
-
Timing Is Everything: Pods are ready when they lose their bright green sheen and feel firm.
-
Snip, Don’t Yank: Use sharp scissors to cut the stalks. Be gentle — rough handling bruises the precious seeds inside.
-
Drying and Storing: Spread the pods in a cool, shaded area to dry for several days. Store the dried pods or extracted seeds in airtight containers for lasting flavor.
The first time I cracked open a sun-dried pod and inhaled that rich, spicy scent, it felt like holding a little piece of magic — a whole season’s worth of patience and love in one tiny package.
Final Thoughts: Growing Cardamom, Growing Gratitude
Growing cardamom is like growing a relationship — slow, nurturing, rewarding beyond words. It doesn’t rush, and it doesn’t demand loud applause. It simply offers its gifts to those who wait with open hands and hopeful hearts.
Each green stalk, each whispered fragrance on a humid morning, reminds me that nature’s gifts are never hurried. They arrive right on time, in their own gentle way.
If you’re ready to invite a little wonder into your garden, cardamom is waiting. Dig the soil, whisper your hopes, and watch what beauty unfolds.