Turn an Old Bottle Into a Bean Sprout Garden – Here’s How to Do It!
A few springs ago, I looked at an empty kitchen windowsill, wishing I could fill it with something green, alive, and delicious. Outside, the garden was still too chilly for anything tender, but inside… well, that small ledge seemed full of potential.
I dug around the recycling bin, unearthed a few old soda bottles, and wondered, half-laughing, Could I grow something edible right here? A little reading, a little experimenting — and a few soaked mung beans later — my tiny windowsill sprout farm was born.
Every morning after that, it became a ritual. A gentle rinse, a peek under the cloth lid, and that magical feeling when tiny, pale green shoots stretched out a little further overnight. It wasn’t just growing food — it was growing hope, right there in a plastic bottle. If your heart’s longing for a touch of green you can nurture with your own hands, I promise: this is the easiest, most joyful way to start.
Let’s dive into this simple, charming method together — and by the end of the week, you’ll be snipping crisp bean sprouts straight into your salad or sandwich.
Why Grow Bean Sprouts in Plastic Bottles?
Growing bean sprouts in a plastic bottle might sound like a backyard science experiment, but it’s one of the purest joys you can invite into your kitchen. With almost no space, no fancy tools, and just a little daily care, you can harvest handfuls of crunchy, fresh sprouts.

Plastic bottles are easy to find and reuse — a wonderful little nod to sustainability that feels as good as the sprouts taste. The small, contained environment also makes sprout growing almost foolproof. Less mess, faster growth, happier harvests.
I love how this method brings gardening into places you wouldn’t expect: high-rise apartments, tiny homes, dorm rooms, even RVs parked under wide open skies. As long as you have a warm spot and a little water, you’re all set.
Materials You Will Need
Before you start, gather the following materials:
- 1 plastic bottle (preferably a 2-liter soda bottle)
- Scissors or a knife
- Small piece of cloth or cheesecloth
- Rubber band or string
- Bean seeds (mung beans or any sprouting variety)
- Water
- A bowl for soaking the beans
Step-by-Step Guide to Growing Bean Sprouts in Plastic Bottles
Let’s walk through it together — I’ll share little tips and details I’ve picked up along the way.
Step 1: Prepare the Plastic Bottle
Grab your bottle and give it a good wash with soap and hot water. Let it dry fully.
Use your scissors or knife to carefully slice the bottle in half. You’ll mainly use the bottom half, but hang onto the top part too — it can serve as a moisture trap later if needed.
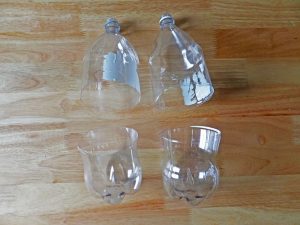
Poke several small holes in the bottom for drainage. I usually heat the tip of a skewer over a flame and melt the holes — quick and easy.
Step 2: Add a Cloth Lid
Cut a small piece of cheesecloth just large enough to drape over the top of your bottle’s open end. Secure it snugly with a rubber band or a piece of string.
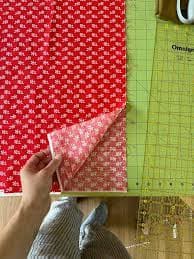
This breathable cover keeps dust out and lets air flow in — two keys to healthy sprouts.
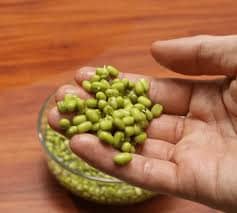
Step 3: Soak the Beans
Place your beans in a bowl and cover them with plenty of water. They’ll swell up overnight, drinking in all that moisture.
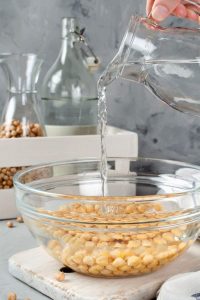
I usually soak them for about 6–8 hours. A good rule of thumb? When the beans double in size and feel a little plumper between your fingers, they’re ready.
Step 4: Fill the Bottle with Beans
Once the beans are soaked and drained, place them in the bottom half of the plastic bottle. Spread them evenly around the bottom, but don’t overcrowd them.
The cloth lid will prevent the beans from falling out while still allowing air to circulate.
Step 5: Water the Beans
Now comes the most important part: daily care. Twice a day — morning and evening — gently pour clean water through the cloth lid onto the beans, swish it around, then drain it out through the holes. This keeps the sprouts moist but never soggy.
I love this little ritual — it takes less than a minute, but you can almost feel the life stirring inside that bottle.
Step 6: Wait for the Sprouts
Keep your bottle in a warm, dim spot — under the counter, on a shaded windowsill, wherever temperatures stay between 65–75°F.
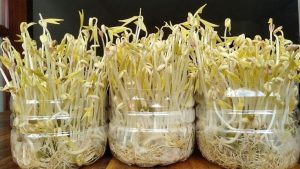
After about 3–4 days, you’ll notice tiny white roots and curling shoots pushing out. It’s like watching a miracle unfold.
At this stage, you can move the bottle to a place with soft, indirect light to help the sprouts green up a little — but avoid direct sun, which can make them tough.
Step 7: Harvest the Sprouts
By day 5–7, your sprouts should be lush, tender, and about 2–3 inches long. To harvest, tip the sprouts into a clean bowl and snip off the roots if you prefer (some people like them, some don’t). Give them a final rinse and pat them dry.
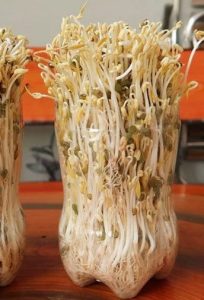
Toss them into salads, tuck them into sandwiches, or simply snack on them by the handful. The flavor? Fresh, nutty, impossibly good.
Helpful Tips for Growing Perfect Bean Sprouts
Over time, I’ve picked up a few tricks that make a world of difference:
-
Choose fresh seeds: Always use seeds labeled for sprouting to avoid chemical treatments meant for planting.
-
Cleanliness counts: I wash my hands and tools carefully — sprouts are sensitive to bacteria.
-
Less is more: Resist the urge to overfill your bottle. Fewer beans mean better air circulation and stronger sprouts.
-
Rinse gently but thoroughly: Splash the water in and let it swirl — think of it like a soft, cleansing rain.
One of my garden friends even adds a single drop of lemon juice to her final rinse for extra freshness. It’s small touches like these that make it a craft, not just a task.
Final Thoughts: Your Tiny Indoor Garden Awaits
There’s a deep and beautiful satisfaction in growing something so simple, so nourishing, with just your hands, a few beans, and a bit of water. It reminds me that nature doesn’t need grandeur to work its magic — it only needs a little invitation.
You don’t need a big garden, expensive tools, or perfect weather. You only need the willingness to nurture something tiny into something wonderful. Every sprout you grow will carry a bit of that tender care into your meals — and your spirit.
I hope you give it a try. Fill a bottle, rinse with care, and in just a few days, you’ll taste the sweetness of growing your own food right there in your kitchen. Happy sprouting, my friend!