20 Clever and Creative DIY Garden Projects with Rocks to Elevate Your Outdoor Space
A few years ago, I helped my neighbor Paul—retired schoolteacher and proud owner of the neatest rose beds on our street—rebuild the crumbling stone path in his backyard. It wasn’t part of any grand plan. He just waved me over one breezy afternoon, holding a rusty wheelbarrow and a grin, and said, “Let’s give these rocks a new life.”
We spent hours digging, leveling, stacking. Between shovelfuls of soil, Paul told stories about hiking in Colorado, collecting pebbles from creek beds with his kids. Each rock we laid became part of that story—some smooth, some jagged, all weathered with age and memory.
I didn’t know it then, but that little project lit a spark in me. Ever since, I’ve seen rocks not as decoration, but as something far more soulful. They don’t bloom or sway like flowers, but they ground the garden with quiet strength. They carry history in their texture, and when placed with care, they become art—humble, enduring, and breathtaking.
Rocks are incredibly versatile. You can shape paths, build raised beds, outline your flower borders, or create pieces that surprise and delight—like a painted pebble pun path or a mossy stone bench tucked under a tree.
If you’ve ever looked at a pile of stones and felt a pull—a whisper that says “I could make something beautiful with this”—then this is for you. I’ve gathered 20 of my favorite DIY rock garden ideas here, ones I’ve tried myself or helped friends create. They’re more than just projects—they’re ways to make your garden feel personal, meaningful, and uniquely yours.
Let’s walk through them, one stone at a time.
#1. Elegant Gabion Planter Pedestal for Gardens
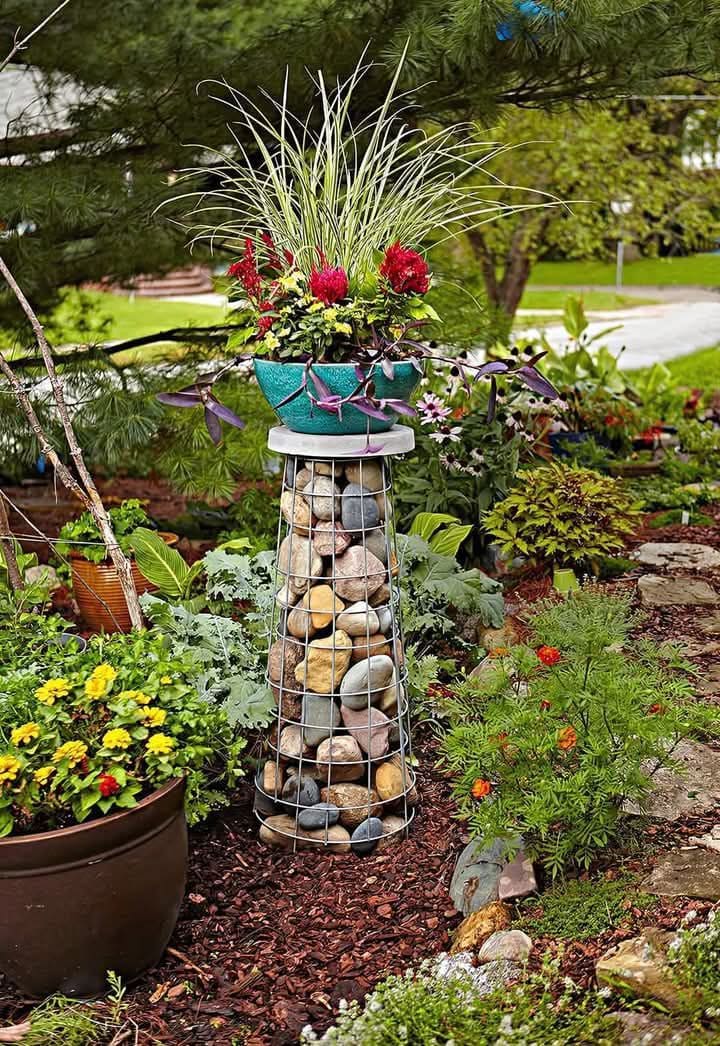
The first time I built a gabion planter, I felt like I was crafting a sculpture. I used a wire mesh frame filled with rounded creek stones I gathered one afternoon, my hands dusty and spirit light.
This project is all about contrast: the rugged texture of stone beneath a burst of bright blooms. It gives height to your garden design—perfect for placing near a bench, entryway, or even in the center of a flower bed for extra flair.
Tips:
-
Choose a heavy-gauge wire for durability.
-
Fill with similar-sized stones for a balanced look, or mix shapes for a wilder effect.
-
Add a plastic planter insert at the top to make watering easy.
Don’t forget: Anchor it well, especially in windy areas—it’s not as heavy as it looks when dry!
#2. Whimsical Fairy Tree Garden with Stone Path
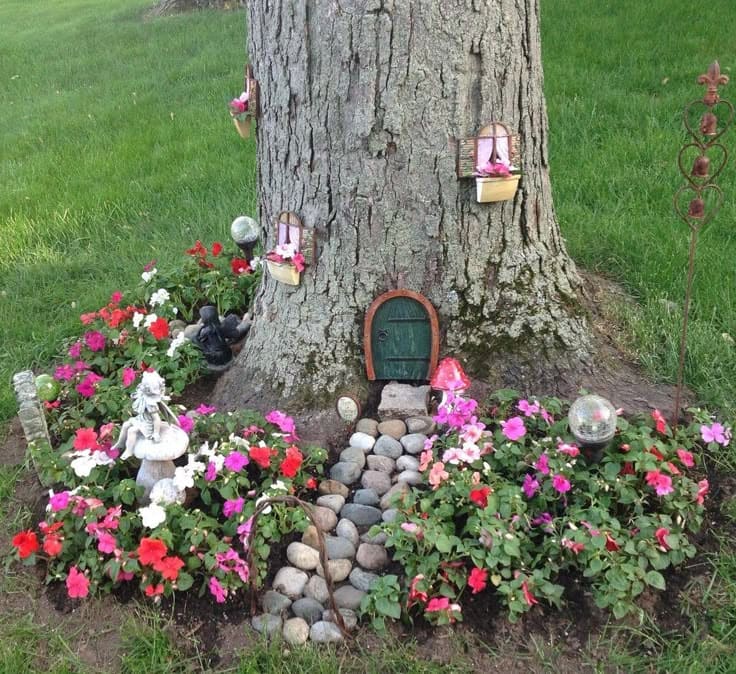
When my niece visited last spring, we spent an afternoon creating a fairy garden at the base of our old maple. A tiny stone path wound around the trunk like a secret trail, ending at a painted wooden door.
We tucked miniature mushrooms, moss, and even a little “mailbox” into the scene. It was as if the tree had grown its own personality overnight.
To create your own:
- Start with smooth, flat stones for the path—ones you can comfortably walk on.
- Use natural materials—bark, moss, tiny flowers—for detailing.
- Add fairy accents sparingly; let the tree and stones shine.
Note: Kids love helping with this. Give them a paintbrush and let their imaginations run wild.
#3. Playful Painted Rock Pathway with Garden Puns
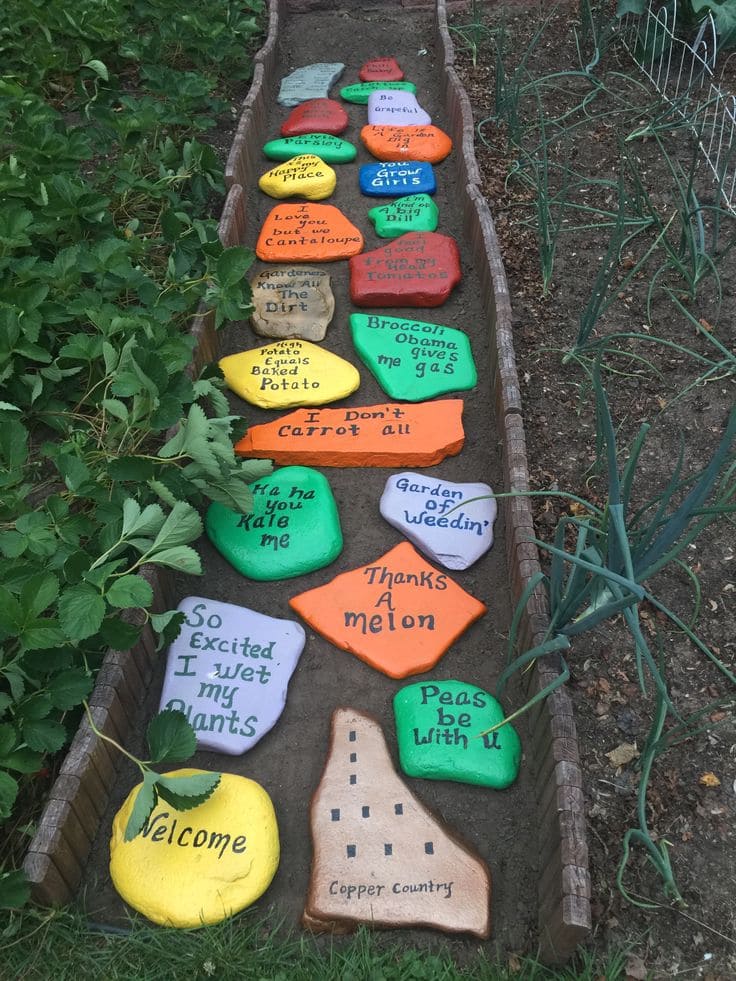
Your kids and guests will love this cheerful rock pathway filled with colorful, pun-inspired messages!
Each painted stone adds a fun, quirky touch, turning an ordinary garden path into a delightful conversation starter.
Materials You’ll Need:
-
Acrylic paint pens or weatherproof outdoor paints
-
River rocks, about palm-sized
-
Clear outdoor sealant spray
Instruction:
-
Clean and dry your rocks thoroughly.
-
Paint your puns—short, bold, and playful works best.
-
Let dry and spray-seal to protect from rain.
Tip: Mix in a few plain stones to avoid visual overload.
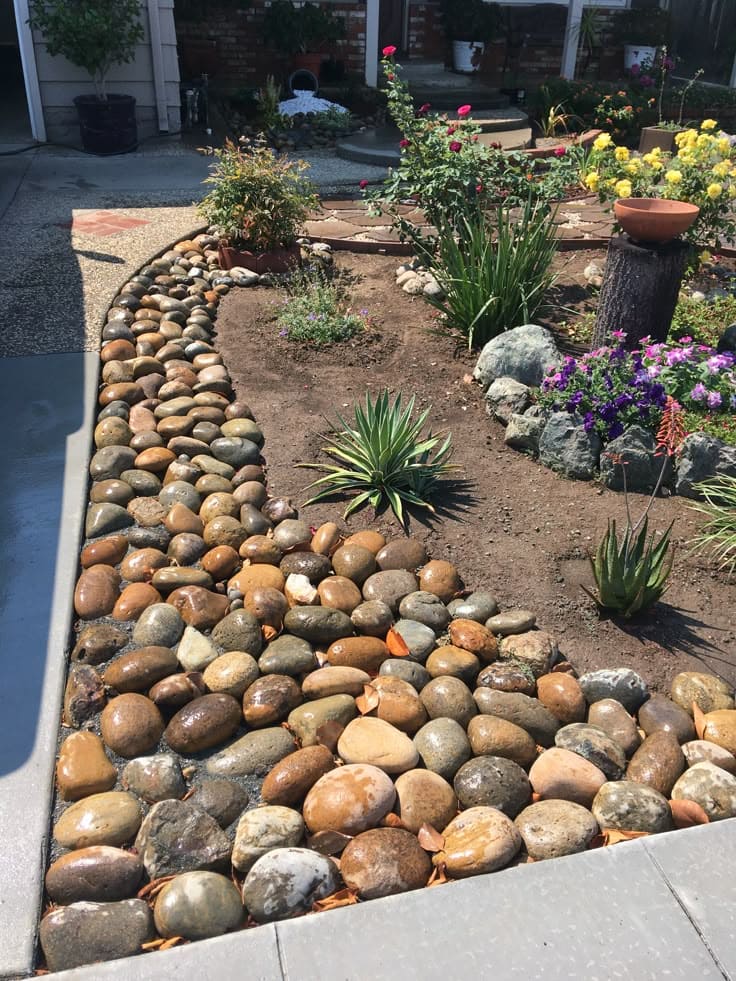
#4. Delightful Flower-Shaped Rock Garden Path
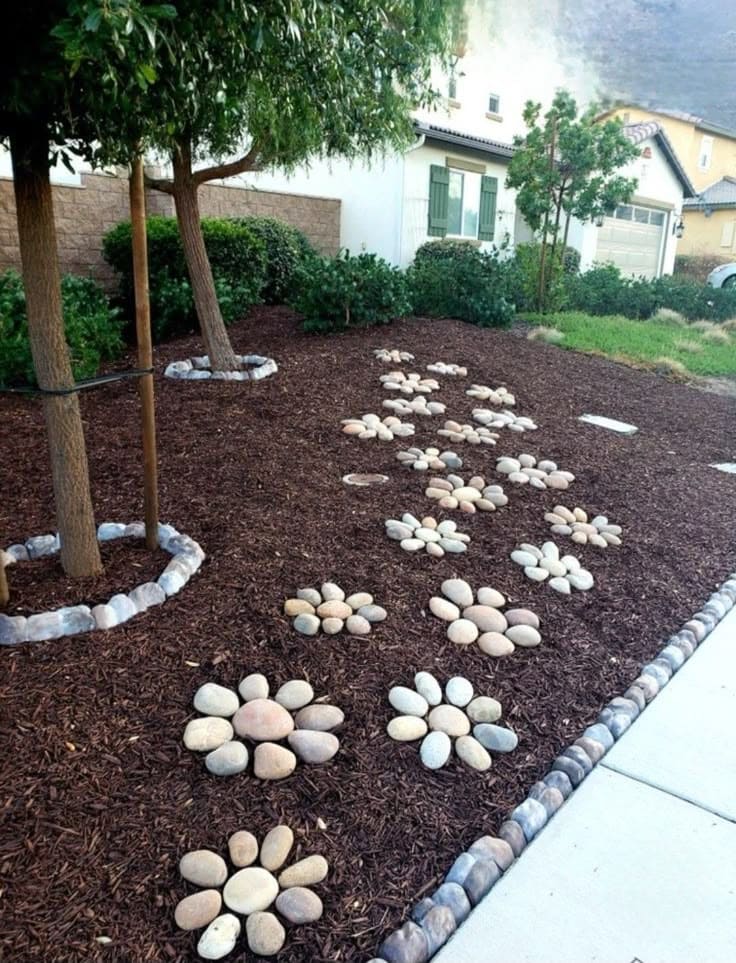
I believe this charming rock flower path brings a playful and artistic touch to any garden. Smooth stones are carefully arranged into delicate floral patterns, creating a natural yet whimsical design.
Perfect for low-maintenance landscaping, this DIY project adds elegance and personality while blending seamlessly with mulch or grass, making your yard truly unique.
How to Make It:
-
Lay out your flower design in chalk or string first.
-
Use flatter stones for the petal areas to avoid tripping hazards.
-
Fill gaps with gravel or sand to hold everything in place.
Real Talk: It takes patience, but once you finish, it looks like something out of a garden magazine. The trick is to use different tones—greys for petals, browns for stems, and a warm amber for the flower centers.
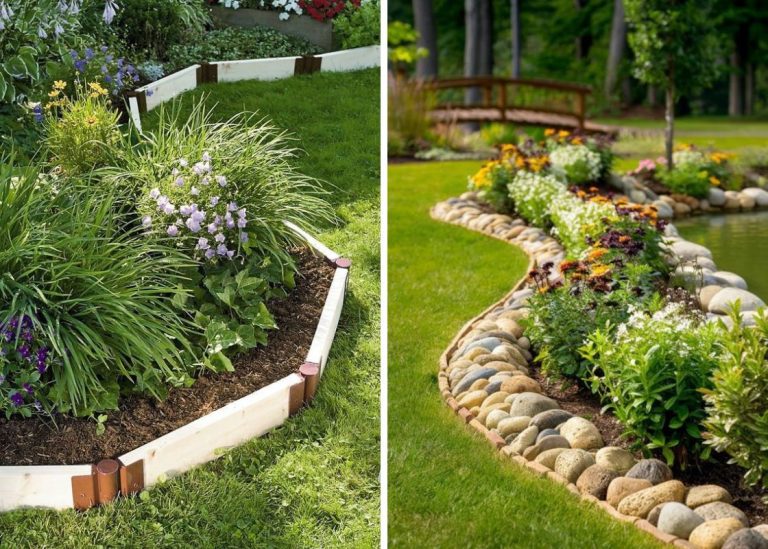
#5. Rustic Handcrafted Pebble Garden Border Wall
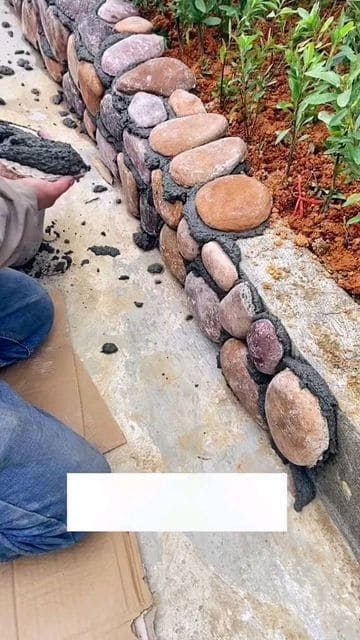
My back garden has always had a problem: messy edges that made everything feel unfinished. One summer, I decided to build a low border wall with pebbles and mortar. It turned out better than I expected—and it hasn’t moved a bit since.
What You’ll Need:
-
Smooth, similar-sized pebbles (about 2–3 inches across)
-
Quick-setting mortar
-
Trowel, gloves, and a level
Instruction:
-
Mark your edge line with string or chalk.
-
Mix your mortar and lay the base row carefully.
-
Stack pebbles, pressing into the mortar and filling gaps as needed.
-
Wipe off excess mortar and allow to cure fully (about 24–48 hours).
Helpful Tip: Work in small sections so the mortar doesn’t dry before you finish shaping it.
#6. Enchanting Handcrafted Stone Tower with Planters
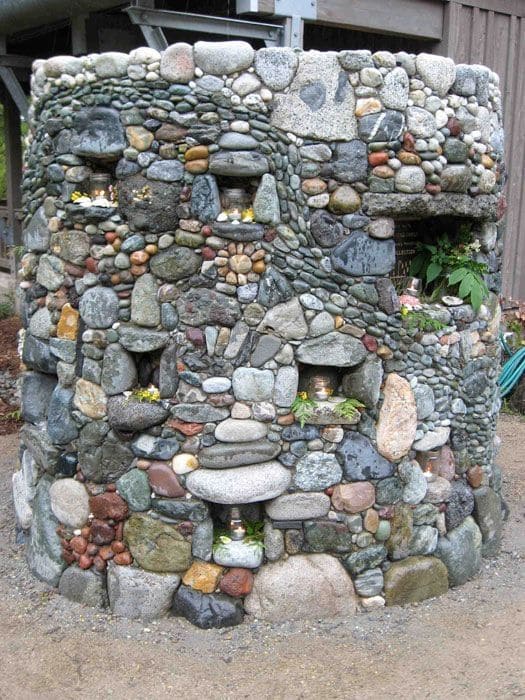
Who wouldn’t love a garden masterpiece like this? This stunning stone tower is an artistic blend of texture, color, and functionality.
Intricately arranged pebbles and rocks create a mesmerizing structure with built-in pockets for plants and candles.
What You’ll Need:
-
Medium to large stones (around fist-size)
-
Strong mortar or landscape adhesive
-
Shallow planting cups or coconut coir
-
Succulents or small ferns
Step-by-Step:
-
Start with a wide, sturdy base.
-
Build up slowly, letting each layer dry before adding the next.
-
Leave gaps between rocks where you can fit mini planters.
-
Fill with soil and nestle in hardy plants.
Note: If you light candles in the pockets, place them in glass holders to protect the plants above.
#7. Rustic Wheelbarrow Rock Waterfall Feature
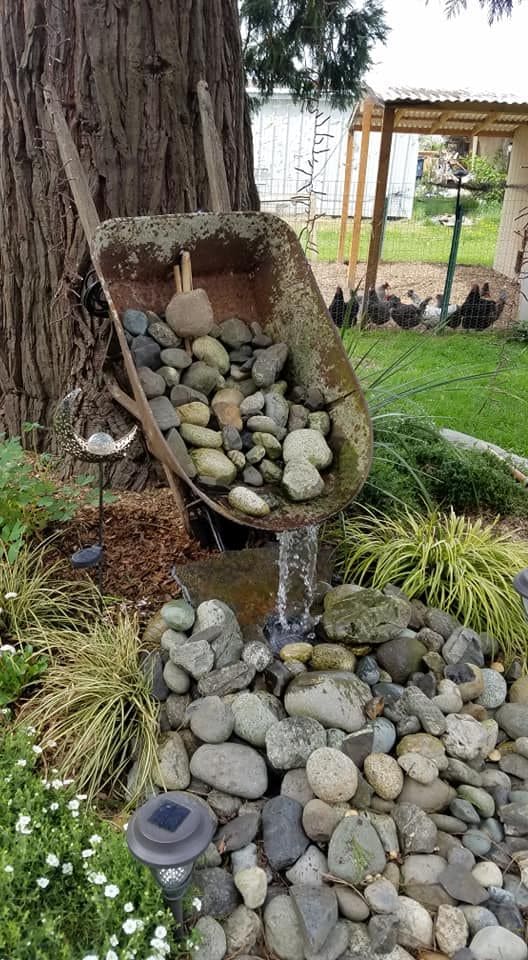
The old wheelbarrow behind our shed was rusting into oblivion. But one morning, while sipping tea under the maple, an idea struck me. What if I turned it into a waterfall?
With a pump, some tubing, a few river stones, and a little digging—I did exactly that. Now it’s my favorite sound in the garden: gentle water trickling over smooth stones.
To Recreate This Waterfall:
-
Position the wheelbarrow on a slope or build a slight mound.
-
Insert a small pond pump and hide it beneath larger rocks.
-
Use a container underneath to catch and recirculate water.
-
Arrange stones to flow naturally like a mini cascade.
Tips: Line the inside with waterproof sheeting if it leaks. Choose smooth stones for quieter water flow.
Don’t: Let debris fall in—it’ll clog the pump. Clean it once a week for longevity.
#8. Striking Gabion Planter Tower for Garden Charm
To add a bold yet natural focal point to your garden, this stunning gabion planter tower is a perfect choice.
A wireframe filled with smooth, multicolored stones supports a vibrant flower arrangement, creating a striking blend of texture and height.
Materials You’ll Need:
-
Sturdy galvanized wire mesh (at least 3 feet tall)
-
Zip ties or metal clips
-
River rocks or mixed garden stones
-
Potting soil and plants for the top
How To:
-
Form your mesh into a cylinder and secure the ends.
-
Place it upright on flat ground.
-
Fill gradually with stones—tamping gently to stabilize.
-
At the top, add a liner and soil.
-
Plant cascading flowers, herbs, or even strawberries.
Tip: Want to make it glow at night? Add solar fairy lights inside!
#9. Elegant Balancing Rock Towers for Gardens
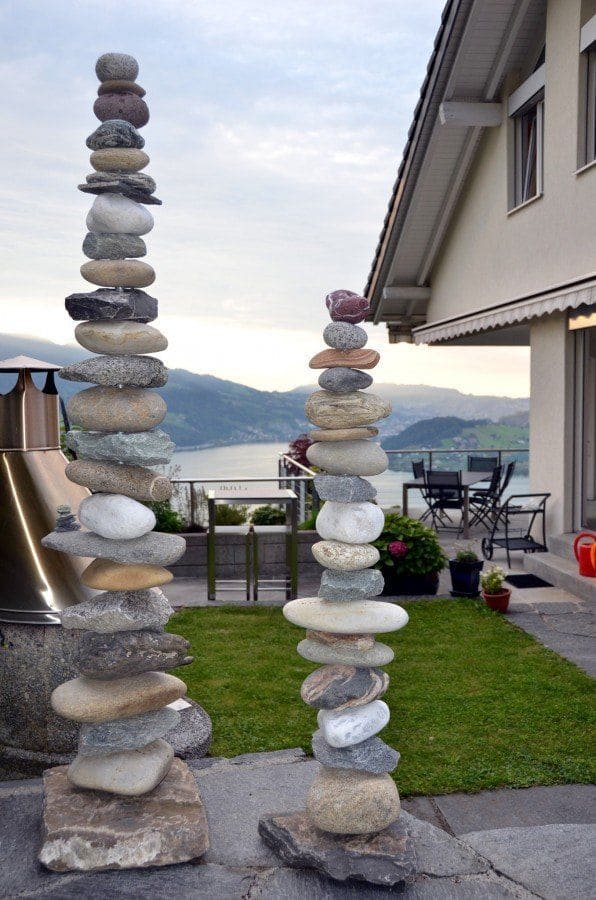
Sometimes, gardening isn’t about planting. It’s about slowing down. Last autumn, I started experimenting with stacking rocks—no mortar, no glue—just pure balance.
I spent an entire afternoon near my hostas, stacking smooth stones one by one. It felt like therapy. The finished tower wasn’t tall, but it was peaceful. It still stands today.
What You Need:
-
A selection of flat and round stones in various sizes
-
A flat, sturdy base (a paver or wide rock works best)
-
Patience
How To Create Your Stack:
-
Begin with the widest stone.
-
Slowly layer up, rotating each stone until it naturally settles.
-
Adjust gently—there’s a moment when it just “clicks” into place.
Important: Don’t build these near play areas—they’re delicate and can fall easily.
#10. Whimsical Stone Mushroom Garden

If you love adding a magical touch to your garden, these adorable stone mushrooms are the perfect DIY project! Using smooth, rounded rocks, you can create a playful woodland scene that looks like a fairy’s paradise.
Scatter them throughout flower beds or along pathways to bring a natural, enchanting aesthetic to your outdoor space.
Materials:
-
Round river stones (for caps)
-
Thicker, squat rocks (for stems)
-
Outdoor adhesive or construction-grade epoxy
How-To:
-
Choose stones that visually resemble mushroom tops and stalks.
-
Use strong adhesive to secure the cap to the base.
-
Let it cure completely (usually 24 hours).
-
Place in clusters for a more natural effect.
Extra Touches:
-
Add moss around the base for a wild, untouched look.
-
Hide one among flowers for a surprise discovery.
#11. Charming Gabion Birdhouse Pedestals for Porch Decor
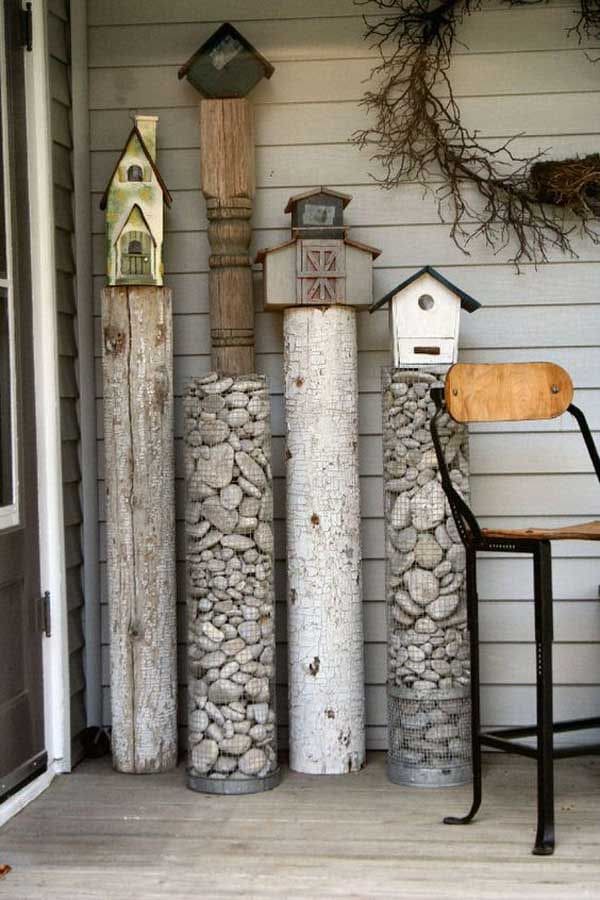
One of my closest friends, Sarah, has this wild back porch that spills into her flower field. A few years ago, she crafted gabion birdhouse pedestals using scrap wire mesh and pebbles collected from a nearby stream. I helped her carry the stones—my arms ached, but my heart didn’t.
We topped each one with a hand-painted birdhouse, and now she’s got sparrows nesting in them every spring.
What You’ll Need:
-
Galvanized mesh (12–18 inches tall for the pedestal)
-
Decorative stones
-
A wooden birdhouse
-
Screws or weatherproof glue
Steps:
-
Form the mesh into a short cylinder and fill with stones.
-
Level the top surface carefully.
-
Mount the birdhouse securely.
-
Place near shrubs or trees for shelter.
Garden Wisdom: Keep the height manageable so you can clean or peek inside the birdhouses when needed. Birds love height, but not in the middle of strong winds!
#12. Whimsical Painted Rock River for Gardens
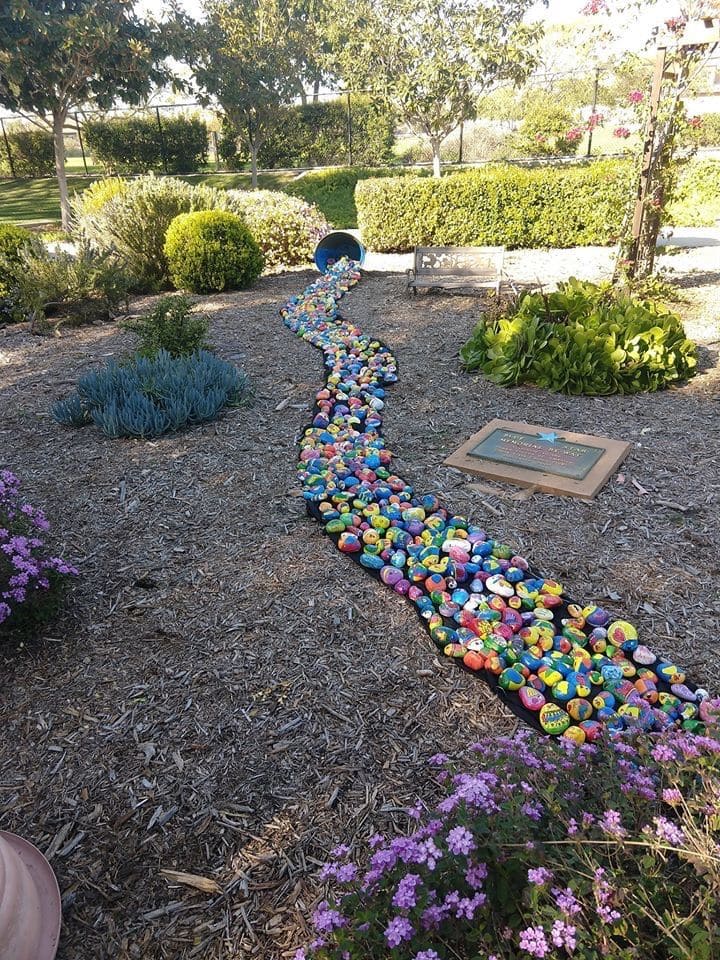
Flowing like a magical stream, this colorful painted rock river adds a playful charm to any garden.
With bright, hand-painted stones spilling from a tipped-over pot, it creates an eye-catching illusion of movement.
Supplies You’ll Need:
-
Flat river rocks
-
Outdoor acrylic paints
-
A broken or tilted clay pot
-
Clear waterproof sealant
Steps:
-
Paint each rock in similar hues for a gradient look.
-
Let dry and seal.
-
Arrange in a flowing pattern starting from the mouth of the pot.
Tip: If you love butterflies, paint a few rocks with wings—they’ll look like they’re flying out of the stream.
#13. Serene Japanese Zen Garden Water Feature
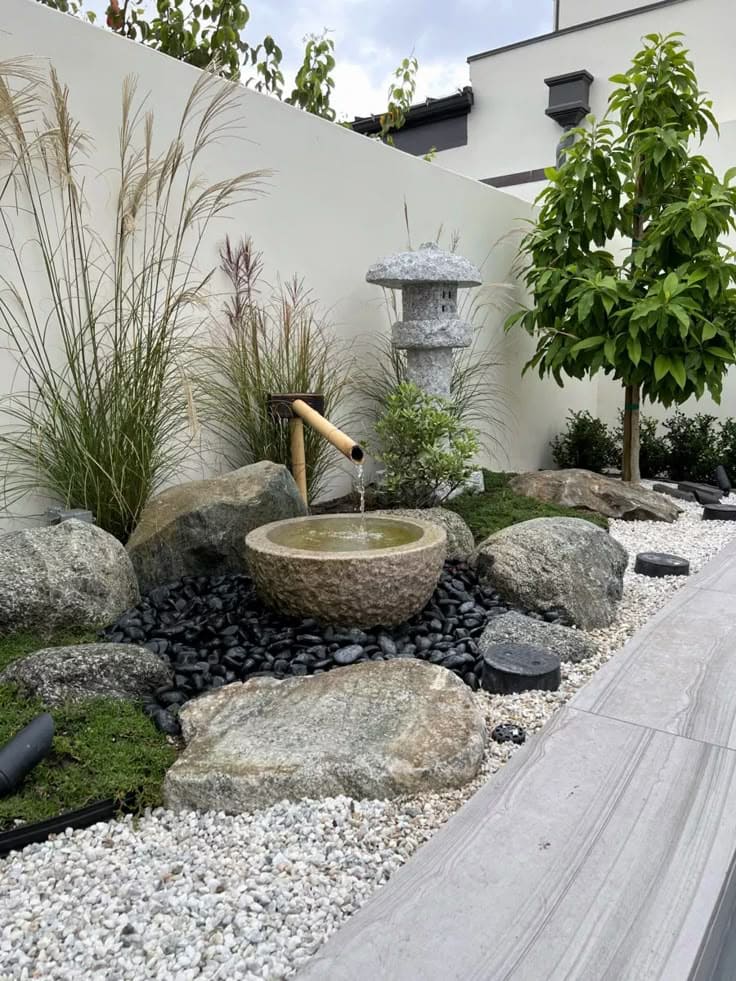
I am sure this peaceful Japanese-inspired garden will bring a sense of harmony to any outdoor space. A bamboo spout gently pours water into a stone basin, surrounded by smooth pebbles, moss, and ornamental grasses.
The balanced blend of natural textures creates a meditative retreat, perfect for relaxation, reflection, and connecting with nature.
To Create One:
-
A bamboo water spout kit or cut bamboo stalk
-
Stone basin or shallow ceramic bowl
-
Smooth pebbles and moss
-
Recirculating water pump
How To Set It Up:
-
Position the bowl and pump at the base.
-
Install the spout above, with tubing feeding into the pump.
-
Add pebbles around the base and tuck moss nearby.
-
Plug in and adjust water flow for gentle sound.
Note: Place it where you can sit nearby with a cup of tea. It’s not just decoration—it’s an experience.
#14. Rustic Stone Sphere Table for Elegance
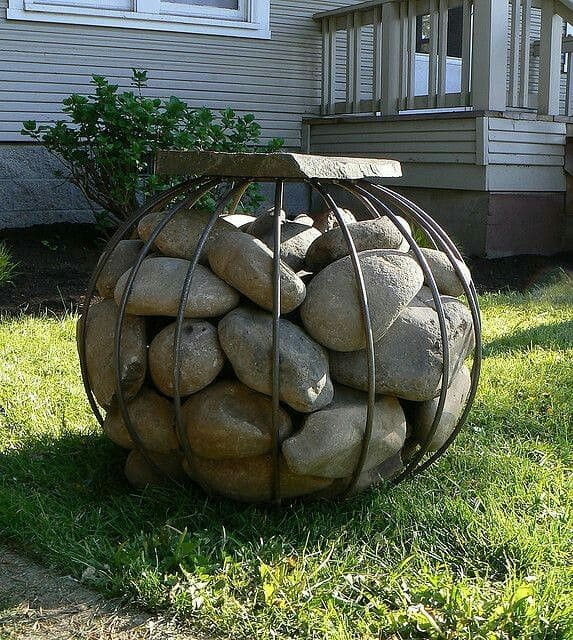
This idea came from a neighbor who’s a retired architect. He built a round table from a metal wire globe frame, filled it with river stones, and topped it with reclaimed wood. It was both sculpture and function.
When I made mine, I used an old tomato cage and covered it with chicken wire, then packed in stones before adding a round stone slab on top.
Here’s What You’ll Need:
-
Metal sphere frame or DIY one from wire
-
Medium-size round rocks
-
Weatherproof tabletop (wood, slate, or concrete)
-
Zip ties, gloves, and a bit of patience
Steps:
-
Build or purchase a spherical frame.
-
Wrap in mesh if needed to hold the rocks.
-
Fill evenly and securely.
-
Place a round tabletop securely over it.
Why I Love It: It’s the best seat in the garden for coffee and long chats. It grounds the space—literally and emotionally.
#15. Charming Turtle-Shaped Stone Patio Design
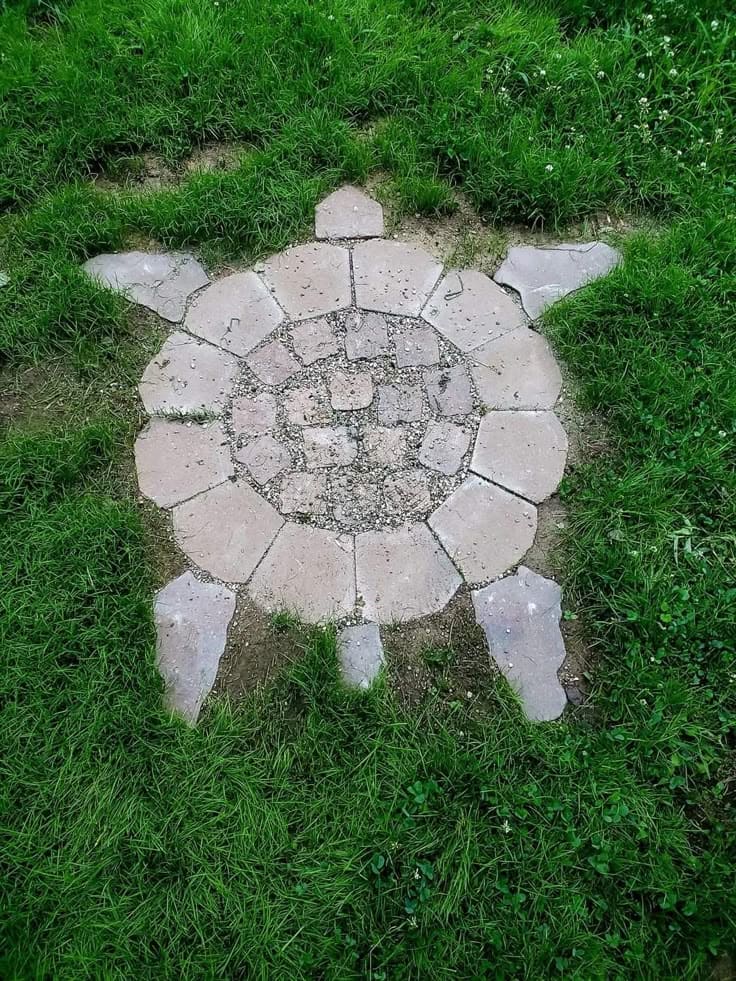
This adorable turtle-shaped stone patio is a creative way to add personality to your garden. Carefully arranged paving stones form a playful yet functional design that blends seamlessly into the surrounding greenery.
Perfect for a small seating area or decorative pathway, this DIY project brings a whimsical touch to any outdoor space.
How to Make Your Turtle Patio:
-
Mark your space (about 3×4 feet works great)
-
Use round or hexagonal pavers for the shell
-
Flat slate or bricks for legs, head, and tail
-
Level the ground and set stones into sand for stability
Steps:
-
Draw your turtle outline on the ground.
-
Dig a shallow base (2–3 inches deep).
-
Place landscape fabric, then add sand.
-
Set your stones, adjusting shape as needed.
-
Fill gaps with pea gravel or polymeric sand.
Best Part: It’s not just a patio—it’s a memory, a project, and a conversation starter rolled into one stone turtle shell.
#16. Elegant Stone Bowl Planter for Gardens
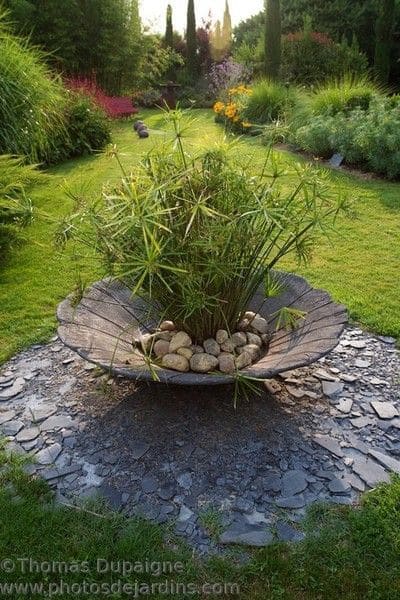
Bringing natural beauty and sculptural elegance, this stone bowl planter transforms any outdoor space into a serene retreat.
The smooth arrangement of pebbles surrounding lush greenery creates a harmonious balance between rugged and refined elements.
Materials Needed:
-
A wide, shallow stone or concrete bowl (at least 18 inches across)
-
Cactus or succulent potting soil
-
Mixed succulents or low-growing herbs
-
Small decorative gravel
Steps to Create:
-
Ensure the bowl has drainage holes (or add a layer of coarse gravel).
-
Fill halfway with soil, then arrange plants.
-
Top with gravel for moisture retention and contrast.
-
Water lightly and place in partial sun.
Tip: This is perfect for patios or sunny corners where you want subtle texture and quiet beauty.
#17. Enchanting Mossy Stone Bench with Pond
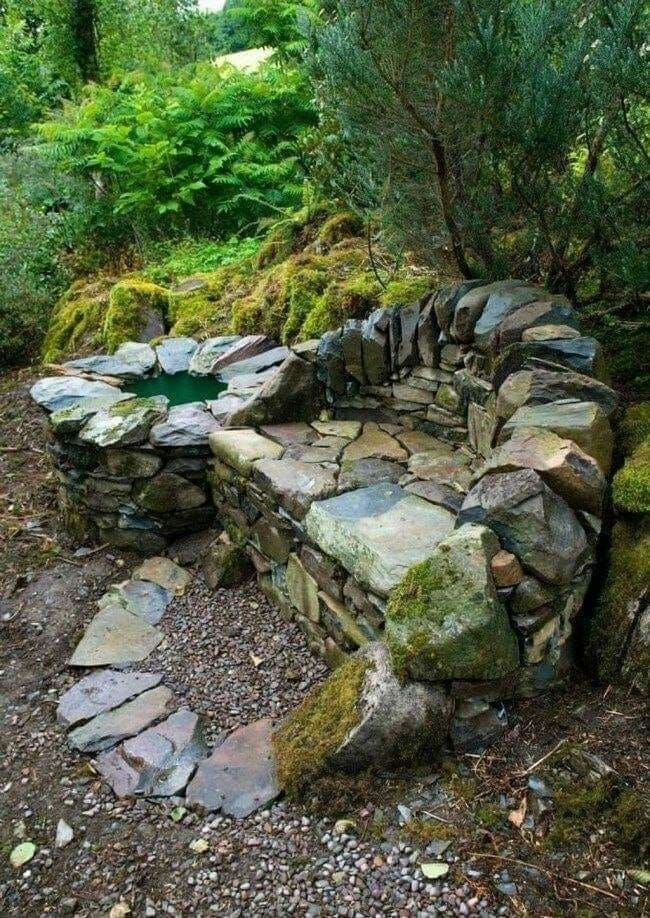
Haha, this hidden stone retreat looks like something straight out of a fantasy novel! Built entirely from rugged, moss-covered rocks, this rustic bench blends seamlessly into nature.
Complete with a charming mini pond, it offers a peaceful escape, making it the perfect spot to sit, reflect, and soak in the beauty of the outdoors.
What You’ll Need:
-
Flat-topped boulders or stone slabs for the seat
-
Large support rocks or stumps
-
Optional: Pre-formed plastic pond liner, water plants, stones
How To Build It:
-
Choose a shady, peaceful corner.
-
Level the ground and set support rocks firmly.
-
Lay the bench slab across the top.
-
For the pond, dig to fit your liner and surround with stones.
You don’t need a big backyard for this. You just need a corner that feels like yours.
#18. Rustic Milk Can Bird Bath Fountain
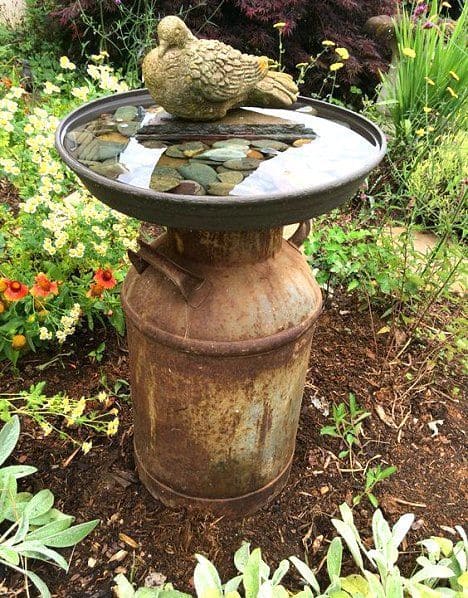
I found an old milk can at a flea market—dented and discolored. I couldn’t resist. Back home, I turned it into a bird bath fountain by topping it with a shallow metal dish and adding a solar fountain kit.
Now, the birds visit daily, and the gentle bubbling sound adds a calm rhythm to my mornings.
Materials Needed:
-
Vintage milk can (about 2 feet tall)
-
Shallow galvanized tray or plant saucer
-
Solar-powered water fountain pump
-
Decorative stones
Steps:
-
Place the can on level ground.
-
Center the tray on top and weigh it down with stones.
-
Insert your solar pump and adjust flow.
-
Refill as needed and clean weekly.
Tip: Keep it in a sunny spot, so the fountain activates easily. The birds will love you for it.
#19. Whimsical Stone Dragonfly Garden Decor
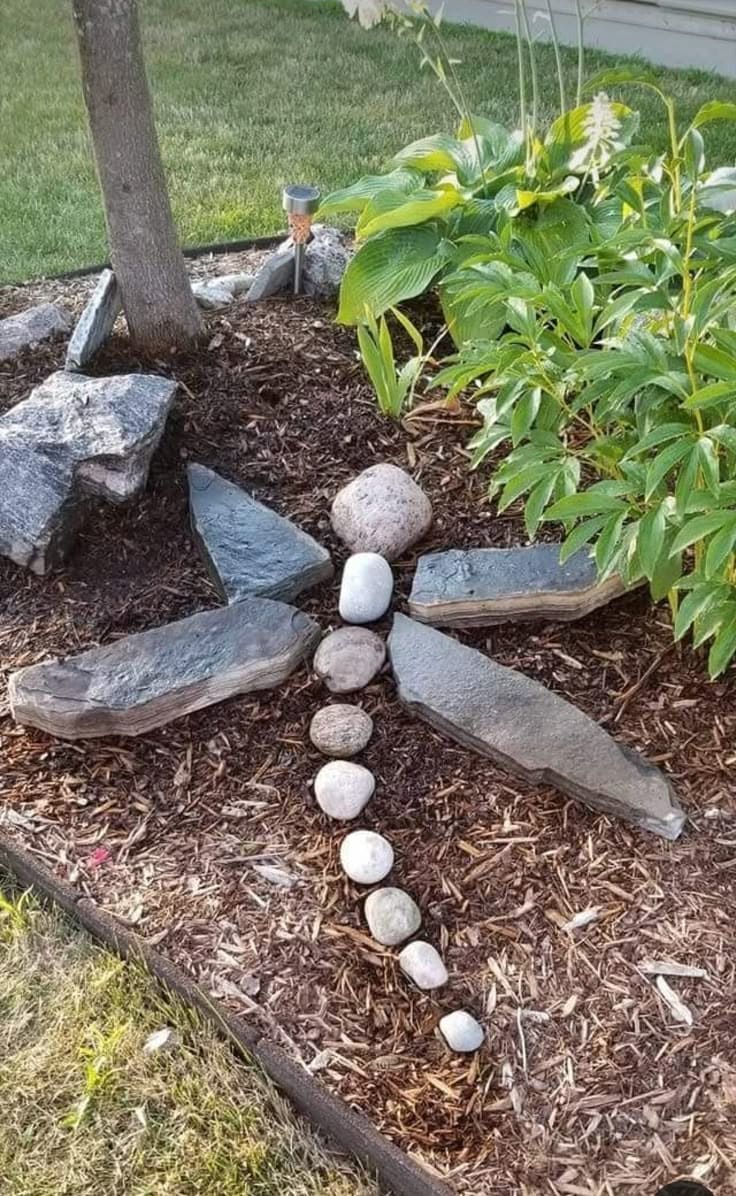
Like a delicate creature frozen in time, this stunning rock dragonfly adds a touch of charm to any garden. Smooth river stones form its slender body, while flat, textured rocks create elegant wings.
This DIY project blends creativity with nature, offering a simple yet eye-catching way to enhance flower beds or outdoor spaces.
What You’ll Need:
-
1 long oval stone (body)
-
4 flat, oval stones (wings)
-
Landscape adhesive or epoxy
-
Optional: Wire for antennae or legs
How To Craft It:
-
Clean and dry all stones thoroughly.
-
Arrange wings and body on a flat surface.
-
Use strong adhesive and let cure 24 hours.
-
Add wire details if desired.
Creative Note: Tuck it near a pond or among flowers. It’s a quiet surprise for anyone who looks closely.
#20. Rock Crevice Succulent Planter
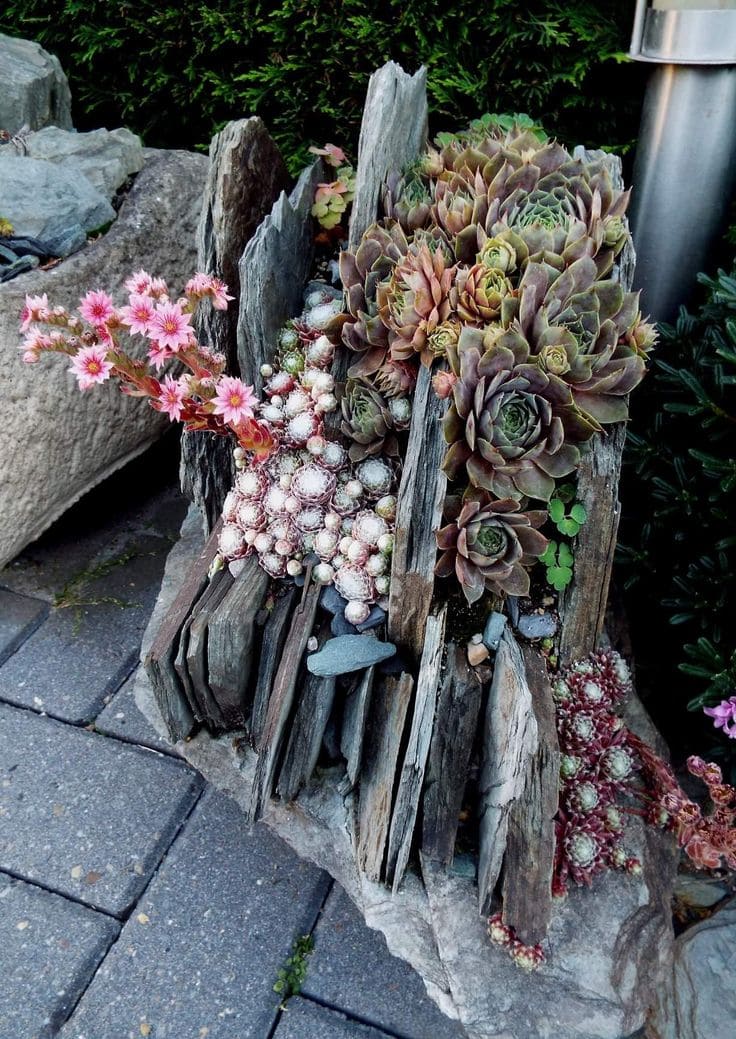
Do you love the rugged beauty of nature? This stunning DIY garden project transforms stacked slate and rock crevices into a mesmerizing succulent display. Hardy hens-and-chicks nestle between the jagged stones, creating a miniature alpine retreat.
The contrast of delicate flowers against the rough texture of rock makes this planter an eye-catching garden masterpiece.
Real-life Tip: These look amazing on a raised bed edge or beside gravel pathways. Let nature guide the placement.
Final Thoughts
A rock doesn’t ask for much. It just sits, quietly holding its shape, its story, and sometimes—your whole garden together. That’s the magic, isn’t it? You don’t need fancy tools or a perfect plan. Just your hands, a bit of time, and a few stones willing to become something more.
Some may stack into towers. Others will bloom into paths. A few might hide under flowers, doing their job without praise. And somehow, in the process, you’ll feel a little more grounded too.
So gather what you have. Let the rocks do the talking. Your garden is waiting.