20 Brilliant and Budget-Friendly DIY Edging Ideas to Transform Your Garden
It was an early spring morning, and I had just finished weeding along the curved border of my flower beds. The hyacinths were starting to pop, the daffodils had declared their sunshine—and yet something felt unfinished. The soil was neat, the blooms were bright, but the edge between the grass and garden looked blurred, like a sentence missing its punctuation.
That’s when I remembered a tip from an older gardener I once met at a plant swap. “The secret to a beautiful garden isn’t always the flowers. It’s the edges.” She wasn’t wrong. That afternoon, I started collecting stones from around the property, arranging them like a jigsaw puzzle to line the beds. And just like that, everything felt more intentional—polished, yet still personal.
Since then, I’ve experimented with all kinds of DIY garden edging, from rustic logs to vintage plates, and even old tires a neighbor was throwing out. What I’ve learned? You don’t need to spend a lot to create something beautiful—you just need a bit of imagination and a willingness to get your hands in the dirt.
Here are 20 of the most charming, budget-friendly DIY edging ideas I’ve seen, tried, or admired from other gardeners who love adding personality to every corner of their garden space.
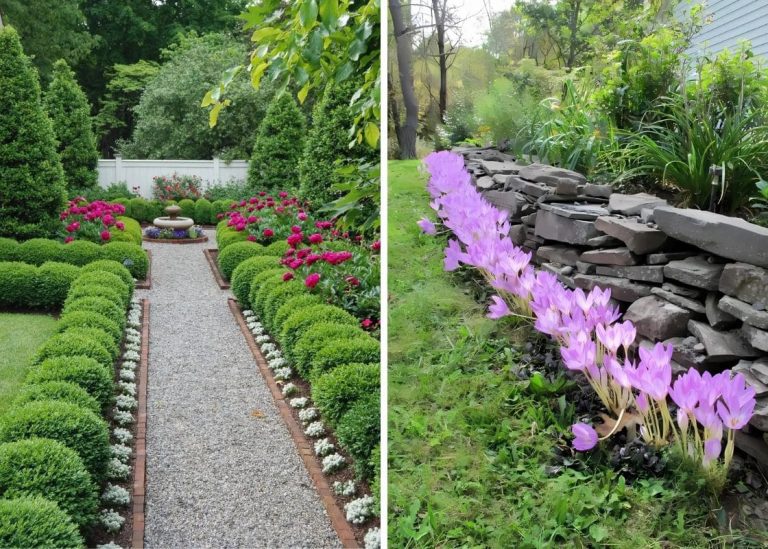
#1. Elegant Garden Stone Edging
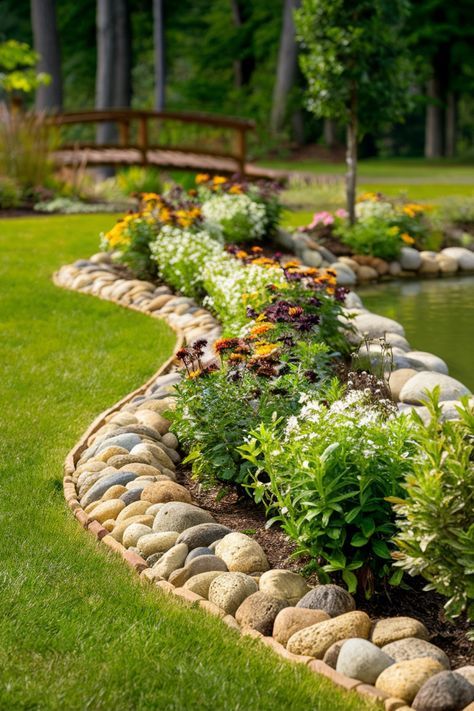
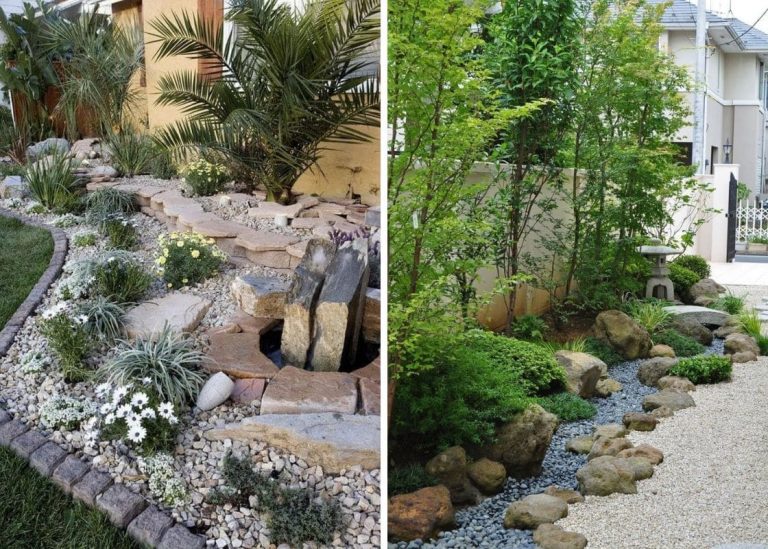
There’s something deeply satisfying about smooth river stones framing a garden bed. This idea uses rounded stones—some the size of your palm, others a bit larger—arranged in gentle curves along flowerbeds or paths. The natural colors and soft textures blend seamlessly with soil, mulch, or gravel, giving your space a calm, earthy elegance.
I used a variation of this around my herb garden last year, and guests kept asking where I bought the edging. The answer? The creek behind our property.
Tip: If you’re foraging for stones, rinse them first to remove mud. You’ll be amazed at how the colors pop once they’re clean and placed.
#2. Rustic Wooden Log Edging
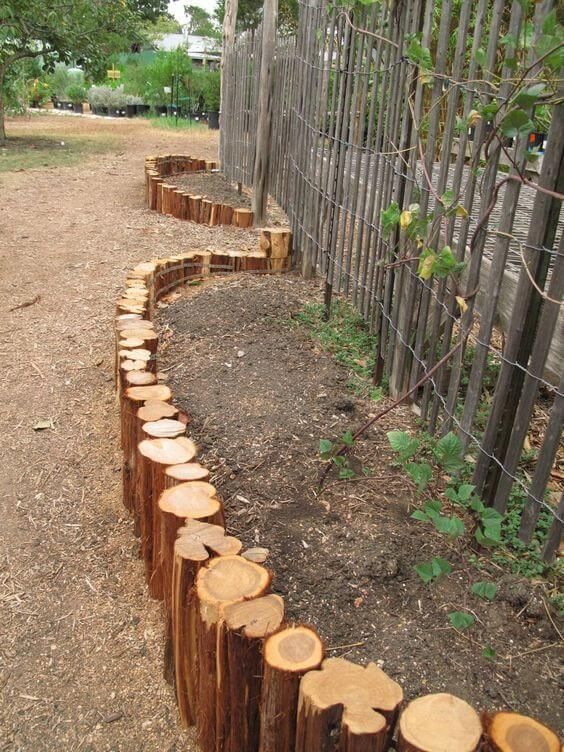
This one feels like bringing a slice of forest right into your backyard. Short log rounds, placed vertically side by side, create a sturdy and rustic edge that works especially well in woodland-themed or cottage gardens. If you have access to firewood or fallen branches, this is a project just waiting to happen.
One of my neighbors built her log edging using trimmings from a tree that came down during a storm. It was her way of keeping part of the tree alive in the garden.
Note: Use hardwood for longevity, and treat the base with linseed oil if you want to slow decay.
#3. Creative Recycled Tire Edging
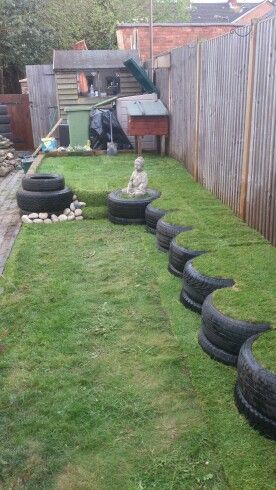
This one surprised me the first time I saw it. Cut into thick, flexible strips, old tires make a bold, curved border around flower beds or play areas. When painted or left natural, the dark rubber offers an industrial edge that contrasts beautifully with vibrant foliage.
A friend of mine used this around her children’s sunflower patch. Not only did it hold shape well, but it also gave the kids something tactile and sturdy to sit on while digging and watering.
Use a strong utility knife and gloves when cutting tires, and always secure the base into the soil to prevent shifting.
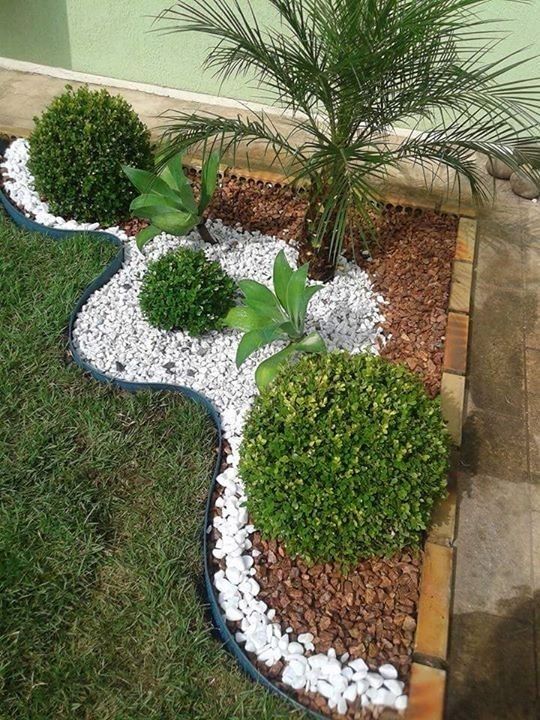
#4. Chic Stone Border Edging
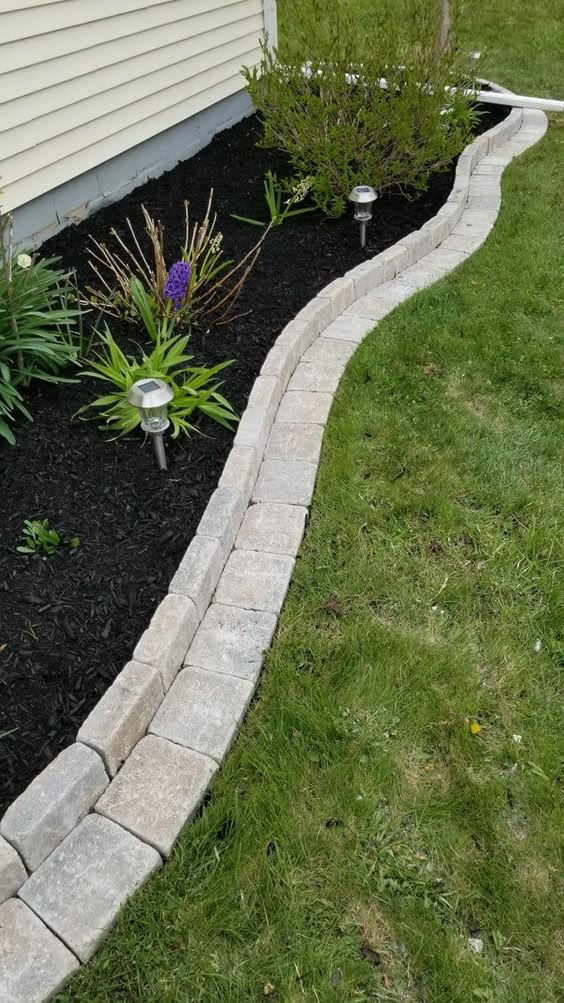
This look is all about precision. Sleek flat stones—laid end-to-end in a clean arc or straight line—make the garden beds look orderly and defined. I love this edging for modern gardens or minimalist outdoor spaces where the shape of the bed really gets to shine.
My cousin used dark slate stones to outline her all-white garden bed filled with hydrangeas and dusty miller. The contrast? Stunning.
Advice: Level your soil before placing each stone for a smooth, professional finish.
#5. Vintage Brick Path Edging
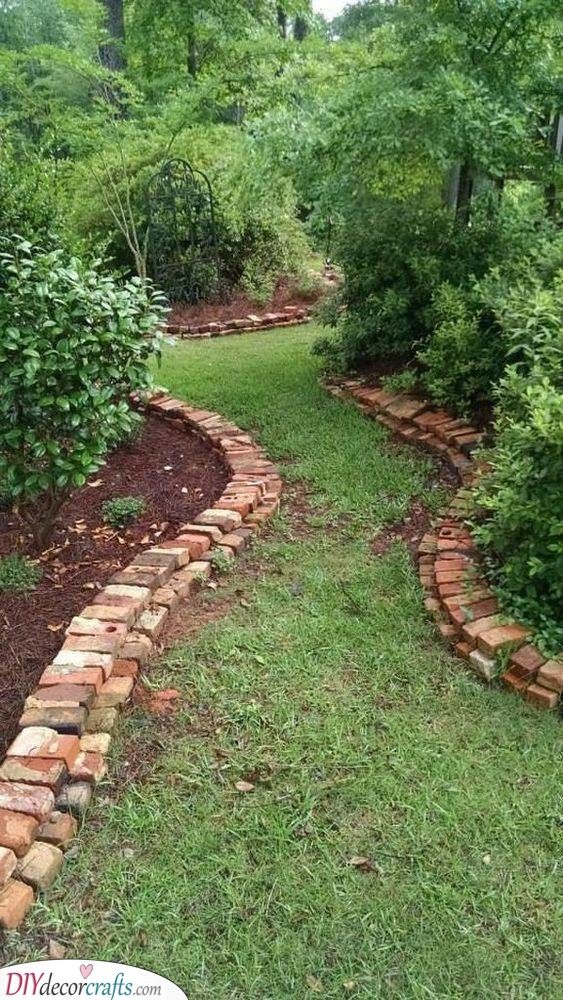
Nothing brings that storybook charm quite like aged red brick. Arranged on their sides, slightly angled or stacked flat, bricks create a sturdy, timeless edge that suits cottage gardens, vegetable plots, or winding pathways.
I laid a few salvaged bricks along the edge of my rose bed, and every time I walk past, it feels like I’m stepping into a childhood memory—of garden tours, of grandma’s backyard, of simpler things.
Tip: Use sand as a base layer to help stabilize the bricks and prevent weeds from creeping through.
#6. Wavy Plastic Garden Edging
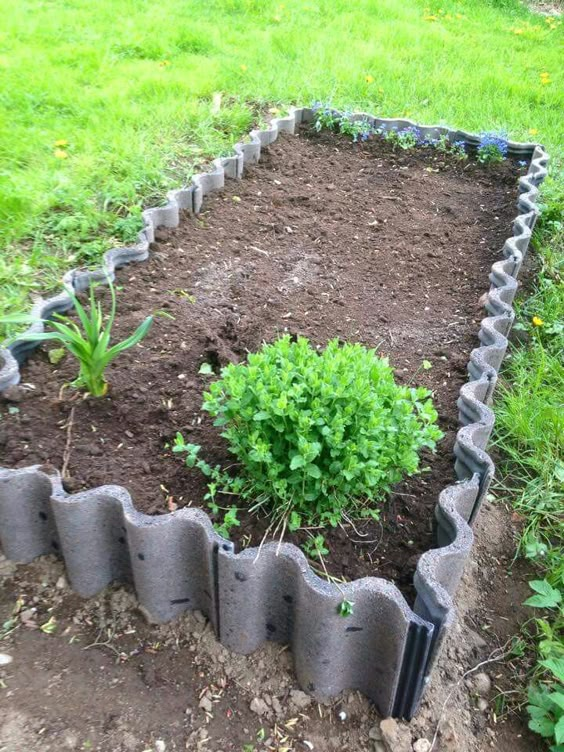
This one’s for practical gardeners who want clean lines with a twist. Wavy plastic edging may not sound glamorous, but when installed thoughtfully, it adds a sleek, modern vibe to garden beds. The curves help soften straight edges while still holding mulch and soil firmly in place.
I installed this along our front walkway during a particularly hectic spring when I needed a quick fix—and honestly, it held up beautifully through the rain, foot traffic, and our dog’s chaotic zoomies.
Tip: Warm the plastic in the sun before installation to make shaping easier, and secure the curves deeply into the ground to prevent movement.
#7. Whimsical Bottle Border Path
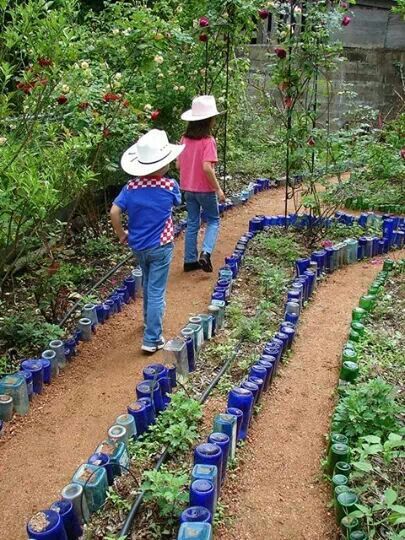
One of the most charming garden borders I’ve ever seen was made entirely of upside-down glass bottles. Lined like colorful soldiers, the bottles caught the sunlight during the day and glowed like hidden treasure.
I tried this after a garden party where we’d collected a bunch of wine bottles—clear, green, cobalt blue. We rinsed them, dug shallow trenches, and pressed them in neck-first. It turned our stepping stone path into a conversation piece.
Friendly warning: Use thicker glass to avoid breakage, and stagger bottle heights slightly for a more playful look.
#8. Sleek Metal Border Edging
For those who crave structure and style, thin metal edging is your go-to. It hugs curves tightly and delivers a crisp line that instantly makes the garden feel intentional and clean.
A friend of mine edged her gravel paths with corten steel, and after a season of weathering, the metal developed a warm rust tone that looked like art next to her ornamental grasses.
Note: Be sure to anchor metal strips securely and wear gloves—it can be sharp until it settles in.
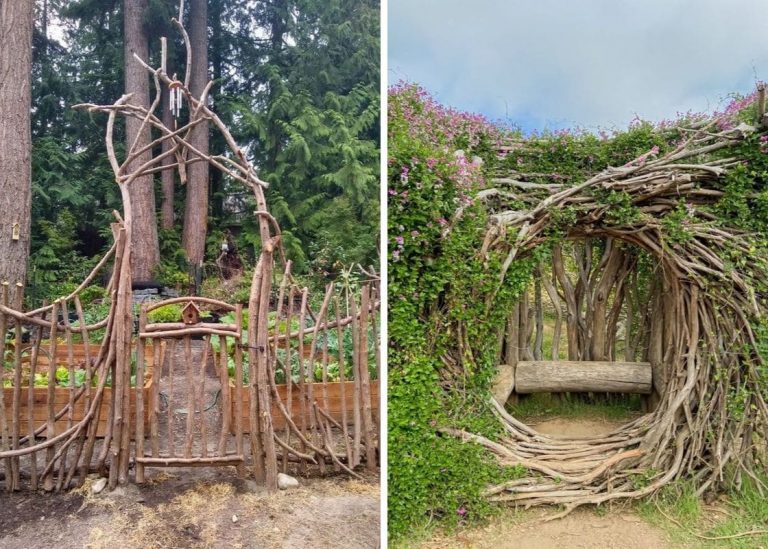
#9. Charming Woven Willow Edging
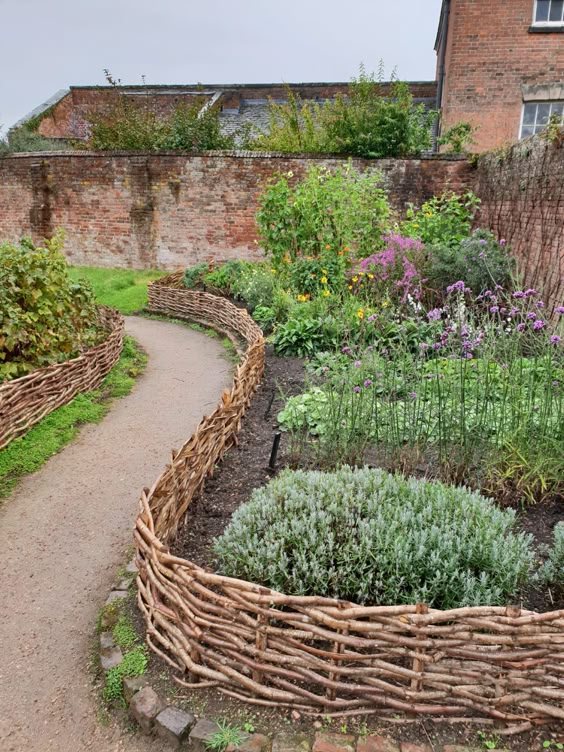
This edging is soft, cozy, and nostalgic all at once. Made from pliable willow branches woven between vertical stakes, it reminds me of old European kitchen gardens or countryside footpaths.
I tried this one around a circular herb bed just outside the kitchen. There’s something grounding about working with natural materials—watching them flex and settle into shape.
Tip: Soak willow rods overnight in water before weaving. It keeps them supple and less likely to snap.
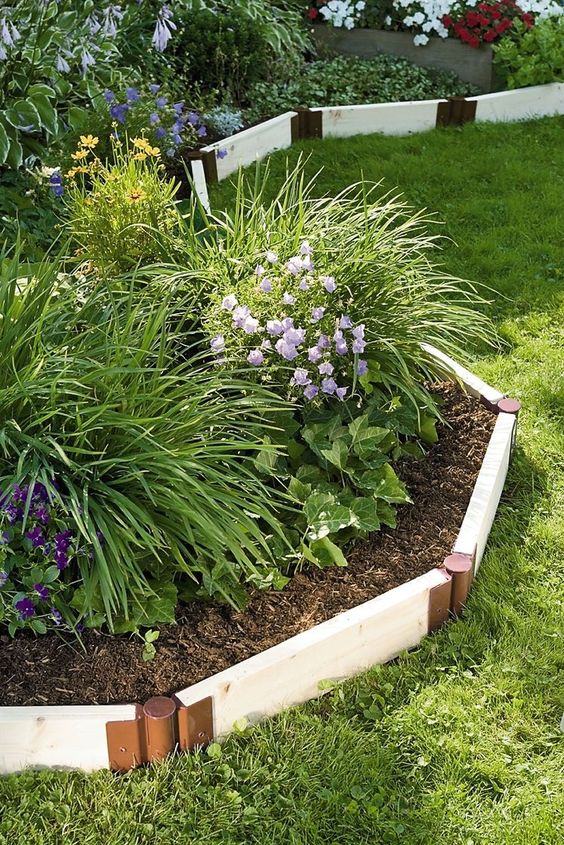
#10. Minimalist Wooden Planter Edging

When I needed a cleaner look around the vegetable beds last season, I built simple wooden borders with untreated pine planks. Nothing fancy—just straight lines, smooth corners, and rich soil inside.
The minimal look let the plants take center stage, and the structure helped me stay organized while sowing and weeding. It’s a neat solution if you’re balancing beauty with function.
DIY tip: Use weather-resistant screws and consider a natural wood preservative if you want it to last multiple seasons.
#11. Wooden Box Edging
If you’re dreaming of a raised garden bed without committing to full construction, this is your sweet spot. Wooden box edging lifts the soil just enough to create form and order while adding warmth and simplicity.
I built mine around my lavender bed using old fence panels. The scent of lavender mixed with the scent of pine on warm days? Absolutely unforgettable.
#12. Charming Terracotta Pot Edging
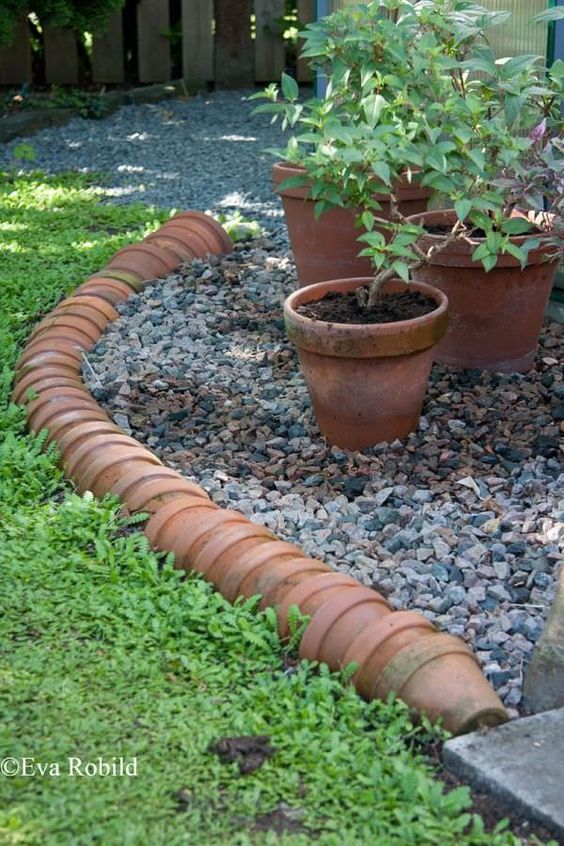
This edging is part rustic, part storybook magic. Terracotta pots, flipped upside down and lined up like garden sentinels, create a whimsical border that’s as delightful as it is practical.
My aunt used this along her strawberry patch, and every time I visited, I’d trace the line of little upturned pots with my fingers. It felt like a fairy trail.
Tip: Mix different sizes or even cracked pots for a more organic, imperfect beauty.
#13. Vintage Plate Garden Edging

This is where creativity meets nostalgia. If you’ve got a collection of chipped teacups or mismatched dinnerware hiding in your cabinet (or found a few at a thrift shop), why not turn them into edging?
I saw this done at a community garden where volunteers had pressed floral plates edge-first into the soil around raised beds. It looked like lace peeking out from beneath a tablecloth.
Personal tip: Choose sturdier plates and alternate patterns for a playful rhythm. And yes—don’t worry about cracks. They add charm.
#14. Rustic Wire and Stone Edging
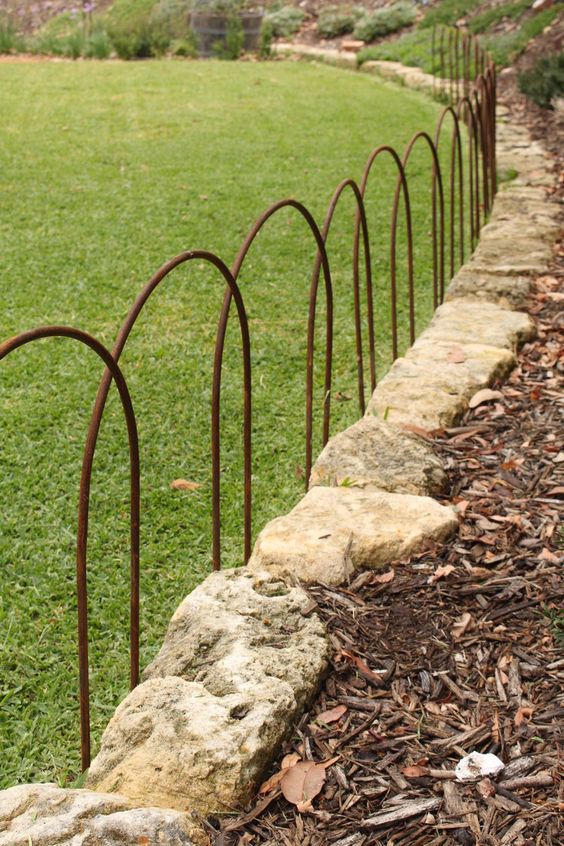
Some ideas just feel handmade—in the best way. Curved pieces of wire, arched into loops or low fences, paired with natural stones create an edging that’s gentle yet grounded.
I watched a neighbor build hers over a weekend, using salvaged wire from an old tomato cage and stones from her driveway border. The end result was earthy, soft, and perfectly imperfect.
DIY idea: You don’t need matching materials—just repeat the pattern for visual cohesion.
#15. Terracotta Roof Tile Edging
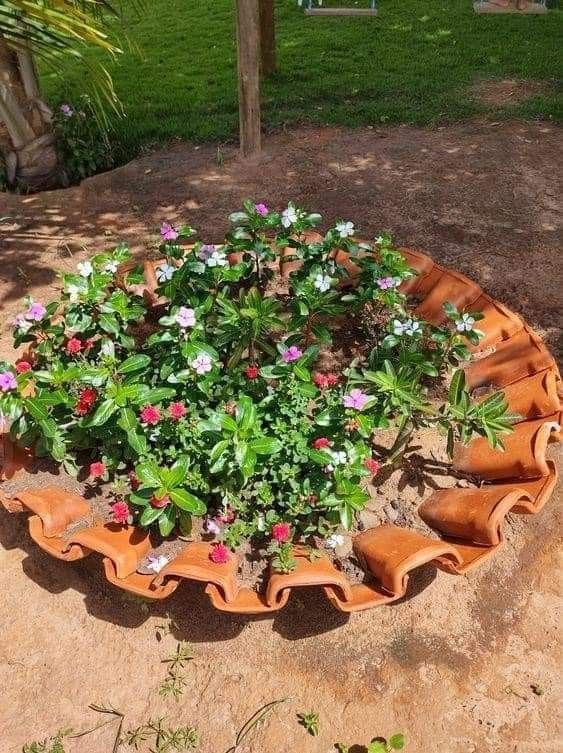
When my uncle renovated his old farmhouse, he nearly tossed a pile of broken roof tiles. I asked if I could take them—and that weekend, they became one of the most beautiful borders I’ve ever built. The rich terracotta curves hugged the edge of my flower bed, warm and weathered like they’d always belonged there.
These tiles make perfect semicircular barriers. Their rustic hue pairs especially well with yellows, oranges, and greens.
Tip: Set them upright at a slight tilt for a scalloped look, or lay them flat to form a tidy wave along the path.
#16. Elegant Bamboo Edging
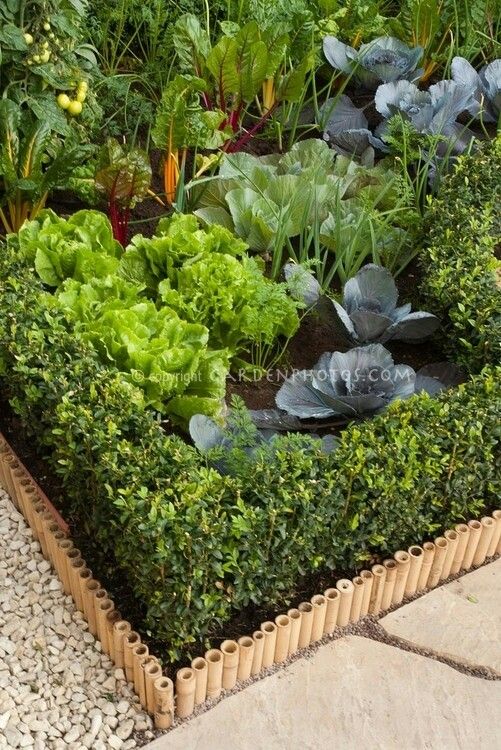
Bamboo edging has a quiet order to it. Maybe it’s the repetition, or the way the natural stalks patina over time. I used bamboo stakes once to define the edge of a shady vegetable patch, and it gave the whole garden a peaceful, balanced rhythm.
You can either hammer short vertical sections side-by-side or thread flexible stalks through upright stakes for a woven look.
Note: Make sure your bamboo is treated or naturally dried, especially in rainy areas, to avoid quick decay.
#17. Classic Scalloped Concrete Edging
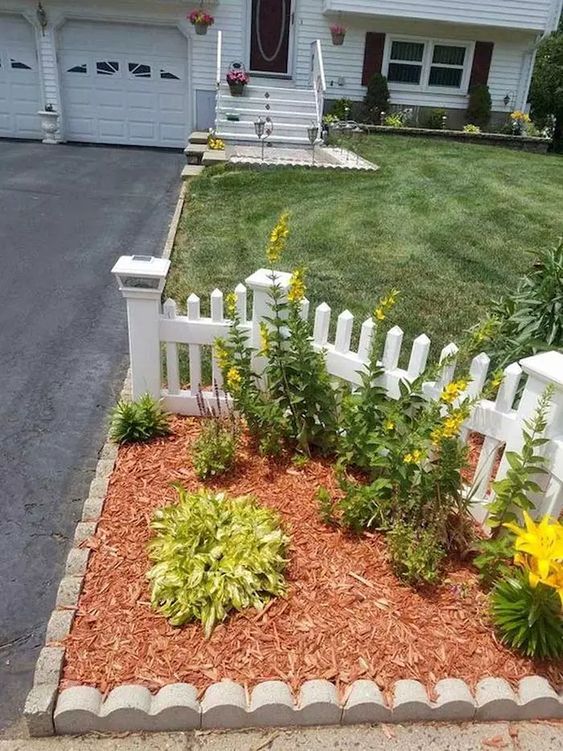
There’s something undeniably nostalgic about scalloped concrete garden edging. My grandparents had it all around their front rose beds, and as a child, I used to trace the curves with my hands while walking beside it.
These durable pieces create a bold, consistent edge that works well with both classic and modern landscapes. They’re heavy, reliable, and low-maintenance.
Advice: For a soft twist, paint them a pale sage or soft gray—it helps them blend into the garden while still offering structure.
#18. Creative Hubcap Garden Edging
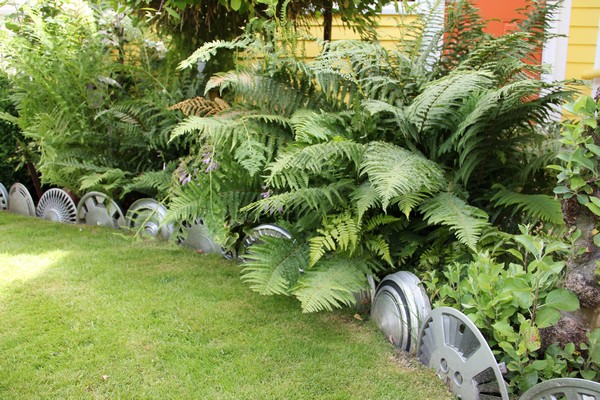
One of the quirkiest borders I’ve ever seen lined a community garden in town—made entirely of hubcaps. Some were vintage chrome, others rusted and aged. Each one had character, and the curved line they formed gave the whole space an urban, artful personality.
This idea is ideal for eclectic gardeners or those with a playful edge. It’s especially fun near vegetable beds or garden spaces meant for kids.
Personal tip: Dig them in deep enough so they won’t tip, and arrange them in alternating heights for visual rhythm.
#19. Natural Tree Log Edging
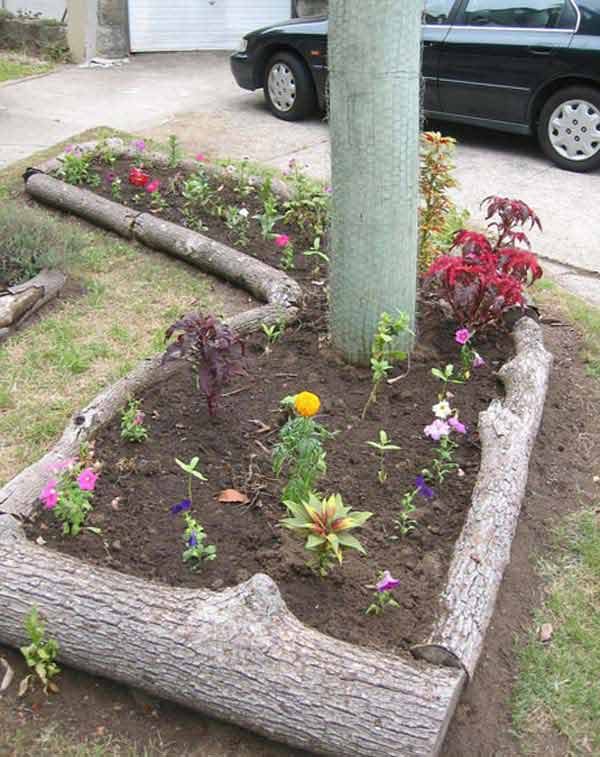
After a windstorm brought down a large limb in our yard, I spent a day slicing sections into thick log pieces. I lined them around our shade bed, and it quickly became one of my favorite borders—so earthy, so grounded, so… honest.
Natural log edging works best in informal gardens, and when the wood starts to moss over, it looks even better.
Tip: Use rot-resistant woods like cedar or black locust if possible, or expect to replace them every few years as they decompose naturally.
#20. Raised Concrete Block Edging

This one’s for those who want structure and a bit of extra height. Raised concrete blocks, especially when stacked or set slightly above ground level, offer a clean, defined space that’s great for vegetable plots or formal beds.
My neighbor uses hers to grow compact marigolds, herbs, and lettuce in tidy rectangles—and they always look so neat.
DIY twist: Paint the outer sides in muted tones or stencil garden quotes to personalize them.
Final Thoughts
Edging might seem like a finishing touch, but to me, it’s often where the magic begins. It brings order to chaos, rhythm to wildness, and a sense of thoughtfulness to every step you take through the garden. More than that—it reflects the personality of the gardener. Playful, structured, whimsical, nostalgic—each border tells a story.
If there’s one thing I’ve learned, it’s that beauty doesn’t have to be expensive. With a little time, a bit of scavenging, and a lot of heart, you can create borders that don’t just hold soil—they hold meaning.
So take a walk through your yard, peek into your shed, maybe ask your neighbor what they’re tossing out. You might already have everything you need to start your next great garden project. And when you do, send a photo—I’d love to see what edges your imagination has drawn.