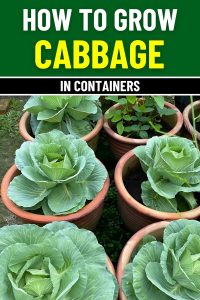
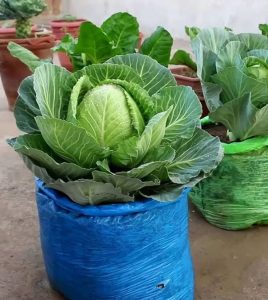
Full Guide to Growing Crisp and Fresh Cabbage in Containers
I’ll be honest with you—I never expected cabbage to charm me. My earliest memory of it was boiled, mushy, and far from inspiring, served with dinner during a rainy school night. But fast-forward a few decades, and here I am, writing this with a proud little cabbage plant thriving just outside my kitchen window. And it all started with a container.
It was early spring when I bought a few leftover seedlings from the garden center. They looked a little tired, honestly—fringed leaves and long stems that told of missed watering days. But I took them home anyway, tucked one into a deep terracotta pot near my sunniest wall, and gave it a little compost and kindness.
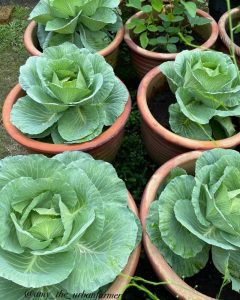
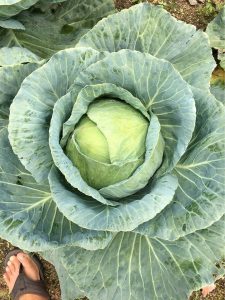
Three months later, I was admiring one of the crispest, roundest cabbage heads I’d ever seen—frilled in that silvery green hue only homegrown plants seem to have. It tasted sweet, earthy, and more satisfying than anything I’d pulled from a grocery shelf.
If you’ve ever wondered whether cabbage can grow in a pot—yes, it absolutely can. And it doesn’t just survive—it thrives. Let me walk you through how I did it, what I’ve learned along the way, and what I’d do again in a heartbeat.
Why Grow Cabbage in Containers?
Container-grown cabbage might sound fussy, but it’s actually one of the best ways to grow this leafy gem, especially if space or soil is a challenge. I love that I can control everything—the soil, the sunlight, even the bugs (to a degree!). It also adds such an elegant touch to the garden. Those big, lush leaves fan out like botanical sculptures.
-
Perfect for patios, balconies, and small gardens
-
Easier to protect from pests and diseases
-
Lets you move the plant with the sun or out of storms
-
Surprisingly beautiful as an ornamental edible
And the flavor? Crisp, clean, and far superior to store-bought heads. It’s one of those vegetables that makes you appreciate slow growing.
How to Grow Cabbage in Containers
Step 1: Choosing the Right Container
Here’s something I didn’t realize at first: cabbages aren’t just leafy—they’re deep-rooted and wide-shouldered. To grow a healthy, full head, they need room—and they’ll show it if they don’t get it.
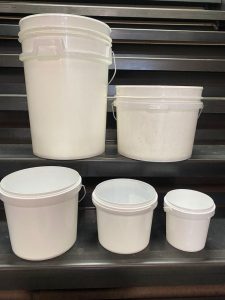
Look for containers that are:
-
At least 12–16 inches deep
-
Just as wide—they like room to stretch
-
Equipped with good drainage holes to prevent soggy roots
I’ve had great luck with large terracotta pots and deep wooden planter boxes. Plastic works too, especially if you’re growing multiple heads and need to move them around.
Pro tip: Add a layer of small stones or broken pottery at the bottom for better drainage. Nothing sours cabbage roots faster than sitting in water.
Step 2: Picking the Best Cabbage Variety
This is where the fun begins. When I started, I didn’t realize just how many types of cabbage existed. But I’ve since fallen in love with compact varieties that fit perfectly into containers—and mature faster too.
Favorites I’d recommend:
-
Golden Acre – Small and tidy with a classic green head
-
Red Express – Early, vibrant, and stunning in ornamental beds
-
Early Jersey Wakefield – Pointed heads with tender leaves
-
Savoy – Crinkled and gorgeous, perfect for cool-weather planting
If you’ve got kids or guests to impress, mix colors—green, red, and curly. Cabbage doesn’t have to be boring.
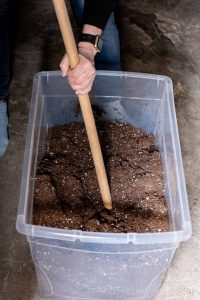
Step 3: Preparing the Perfect Soil
Your soil is everything. I learned this the hard way after using leftover dirt from another pot—and watching my poor cabbage stall for weeks. What it really wants is rich, well-drained soil with a bit of bite.
Here’s what works best for me:
-
A blend of high-quality potting mix + compost
-
A few handfuls of well-rotted manure or worm castings
-
Slow-release organic fertilizer mixed in before planting
The pH should be slightly acidic to neutral (6.0–6.8). If you’re unsure, a cheap soil tester can help. I check mine once a season, just to be sure I’m not giving the cabbage something it doesn’t like.
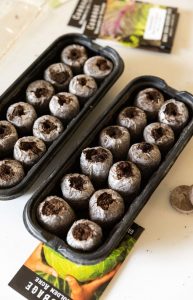
Step 4: Planting Your Cabbage
There’s something deeply satisfying about watching a cabbage unfold leaf by leaf. If you’re starting from seeds, sow them indoors about 1/4 inch deep in trays. Keep the soil moist and warm—they’ll sprout in about 5–10 days.
I’ve done both—grown from seed and started with nursery seedlings. Either works, but if it’s your first time, nursery starts are easier.
When transplanting:
-
Wait until seedlings are 4–6 inches tall with at least 2–3 true leaves
-
Transplant into your prepared container, burying slightly deeper than in the tray
-
Gently pat the soil around the roots and water thoroughly
Keep in mind—only one cabbage per container. Don’t crowd them. They’re solitary growers and need space to shine.
How to Care For Cabbage In Container
Providing the Right Light
Cabbage isn’t shy about its light preferences—it wants sun, and lots of it. I once tried growing a pot on the east side of my house where it only got morning light. The leaves grew thin and floppy, and the head never formed. Lesson learned.
Aim for at least 6–8 hours of direct sunlight a day. More is better, especially if you’re growing in cooler weather. If your space is a bit shady, you can supplement with a full-spectrum grow light. I’ve used one during shorter winter days, and it made a noticeable difference in leaf growth.
Try to rotate your pot every few days so the cabbage doesn’t lean in one direction. A well-lit, evenly grown head is a thing of beauty.
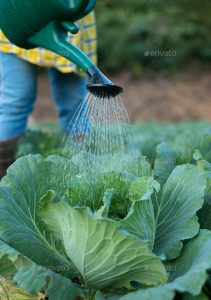
Watering and Feeding Your Cabbage
Watering cabbage in containers is a bit like baking bread—it takes attention, but once you learn the rhythm, it’s second nature. Overwater it, and the roots suffer. Let it dry out too much, and the leaves will go limp and papery. I’ve done both.
What’s worked best for me:
-
Water deeply until it drains from the bottom
-
Stick your finger into the soil—if the top 1–2 inches are dry, it’s time
-
In hot weather, daily watering may be needed (especially for terracotta pots)
As for feeding? That’s where things get fun. I like to start with a high-nitrogen fertilizer every 2–3 weeks in the beginning. It helps the leaves grow thick and glossy. But once the head starts forming, I switch to a balanced or lower-nitrogen feed to support tighter, firmer growth.
Compost tea also works wonders—smells a bit, but the plants love it.
Pest and Disease Management
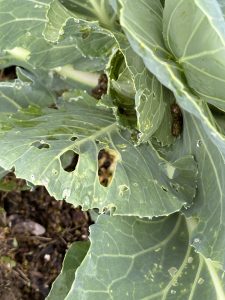
Let me say this now: cabbage will bring out the freeloaders. Aphids, cabbage worms, slugs… they all seem to know when a tender cabbage is nearby. I once lost an entire plant to cabbage loopers before I even knew what those little green things were.
So now I stay ahead of it.
Here’s my go-to pest routine:
-
Check the undersides of leaves every few days (especially in spring)
-
Spray with neem oil or insecticidal soap at the first sign of trouble
-
Use fine mesh netting to block moths from laying eggs
-
Surround the base with crushed eggshells to deter slugs
If a leaf looks too far gone—yellowing, chewed through—I snip it off. Better to lose one than let it attract more problems.
Also, don’t reuse soil from old cabbage containers unless you rotate with another crop. Diseases like black rot or clubroot can linger, and your new cabbage won’t stand a chance.
Tips for Encouraging Full, Firm Heads
Growing a solid cabbage head is part science, part patience, and part luck. Some years I get tight, perfect heads. Other times? Loosely folded leaves pretending to be a cabbage.
Here’s what’s helped me most:
-
Remove lower yellowing leaves to redirect energy upward
-
Don’t crowd the container with herbs or other plants
-
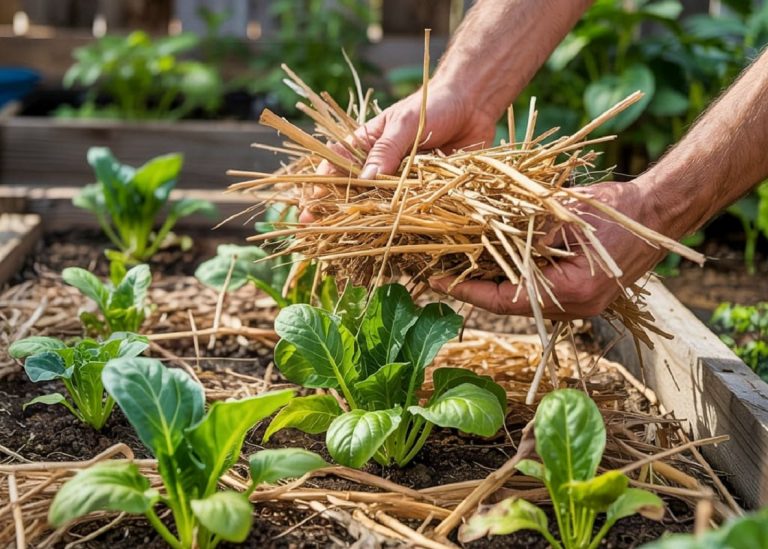
Mulch the surface with straw or bark to hold moisture and regulate temperature
-
Keep watering even, especially once the head starts to form
-
Be patient—most varieties take 70–100 days, and rushing it only leads to disappointment
And remember, some varieties naturally form looser heads (like Savoy). Knowing your type helps you set expectations.
Harvesting Your Homegrown Cabbage
I still remember the first cabbage I ever grew—it was my pride and joy. I’d check on it every morning like it was a pet, gently cupping the head to see if it felt “firm enough.” One sunny afternoon, I decided I couldn’t wait any longer. I grabbed my garden knife, cut it clean at the base, and carried it inside like a garden trophy.
The problem? It wasn’t quite ready. It looked full, but the layers inside were loose and watery. It still tasted fine, but I knew I’d jumped the gun. I was excited, sure—but also impatient. That cabbage taught me something: let the plant decide when it’s ready, not your dinner plans.
Now, I trust my instincts more—and the cabbage, too.
Here’s how I know it’s time to harvest:
-
The head feels solid, dense, and firm when gently squeezed
-
The outer leaves still look strong and healthy—not wilted or splitting
-
The size matches what the seed packet promised (more or less)
When it’s ready, I use a sharp knife and cut at the base, leaving about an inch of the stalk and the lower leaves. I don’t yank or twist—I treat it like something I’ve waited months to enjoy.
Extra tip: Leave the root and lower stem in the pot, water it well, and with a little luck, you might get a second, smaller head or two. It’s like the cabbage’s way of saying, “Thanks for waiting.”
Final Thoughts: A Leafy Lesson in Slowness
Cabbage has taught me patience. It doesn’t rush. It builds itself slowly—layer by layer, leaf by leaf—until one day it’s quietly magnificent. Growing it in a container might not seem traditional, but I’ve found it’s one of the most rewarding little experiments in my garden.
Even if you only grow one, I say go for it. Choose a beautiful pot, give it good soil, and watch it do its thing. You’ll be amazed at how much joy a single cabbage can bring.
Have you tried growing cabbage in containers? Thinking about it? Let me know in the comments—I’d love to hear what’s worked for you, or what you’re planning for this season. And if you do grow one, send a photo—I’ll be cheering you on from my little corner of the garden.